Lentil Sloppy Joes {Recipe}

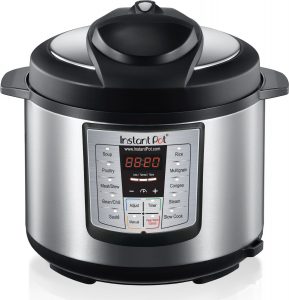
Last night was a “Whoops!” night. Supper was not planned or started. Time was running out and my brain was blank. I knew my Instant Pot would need to be called on if I wanted supper on the table by the time the ball practices were over.

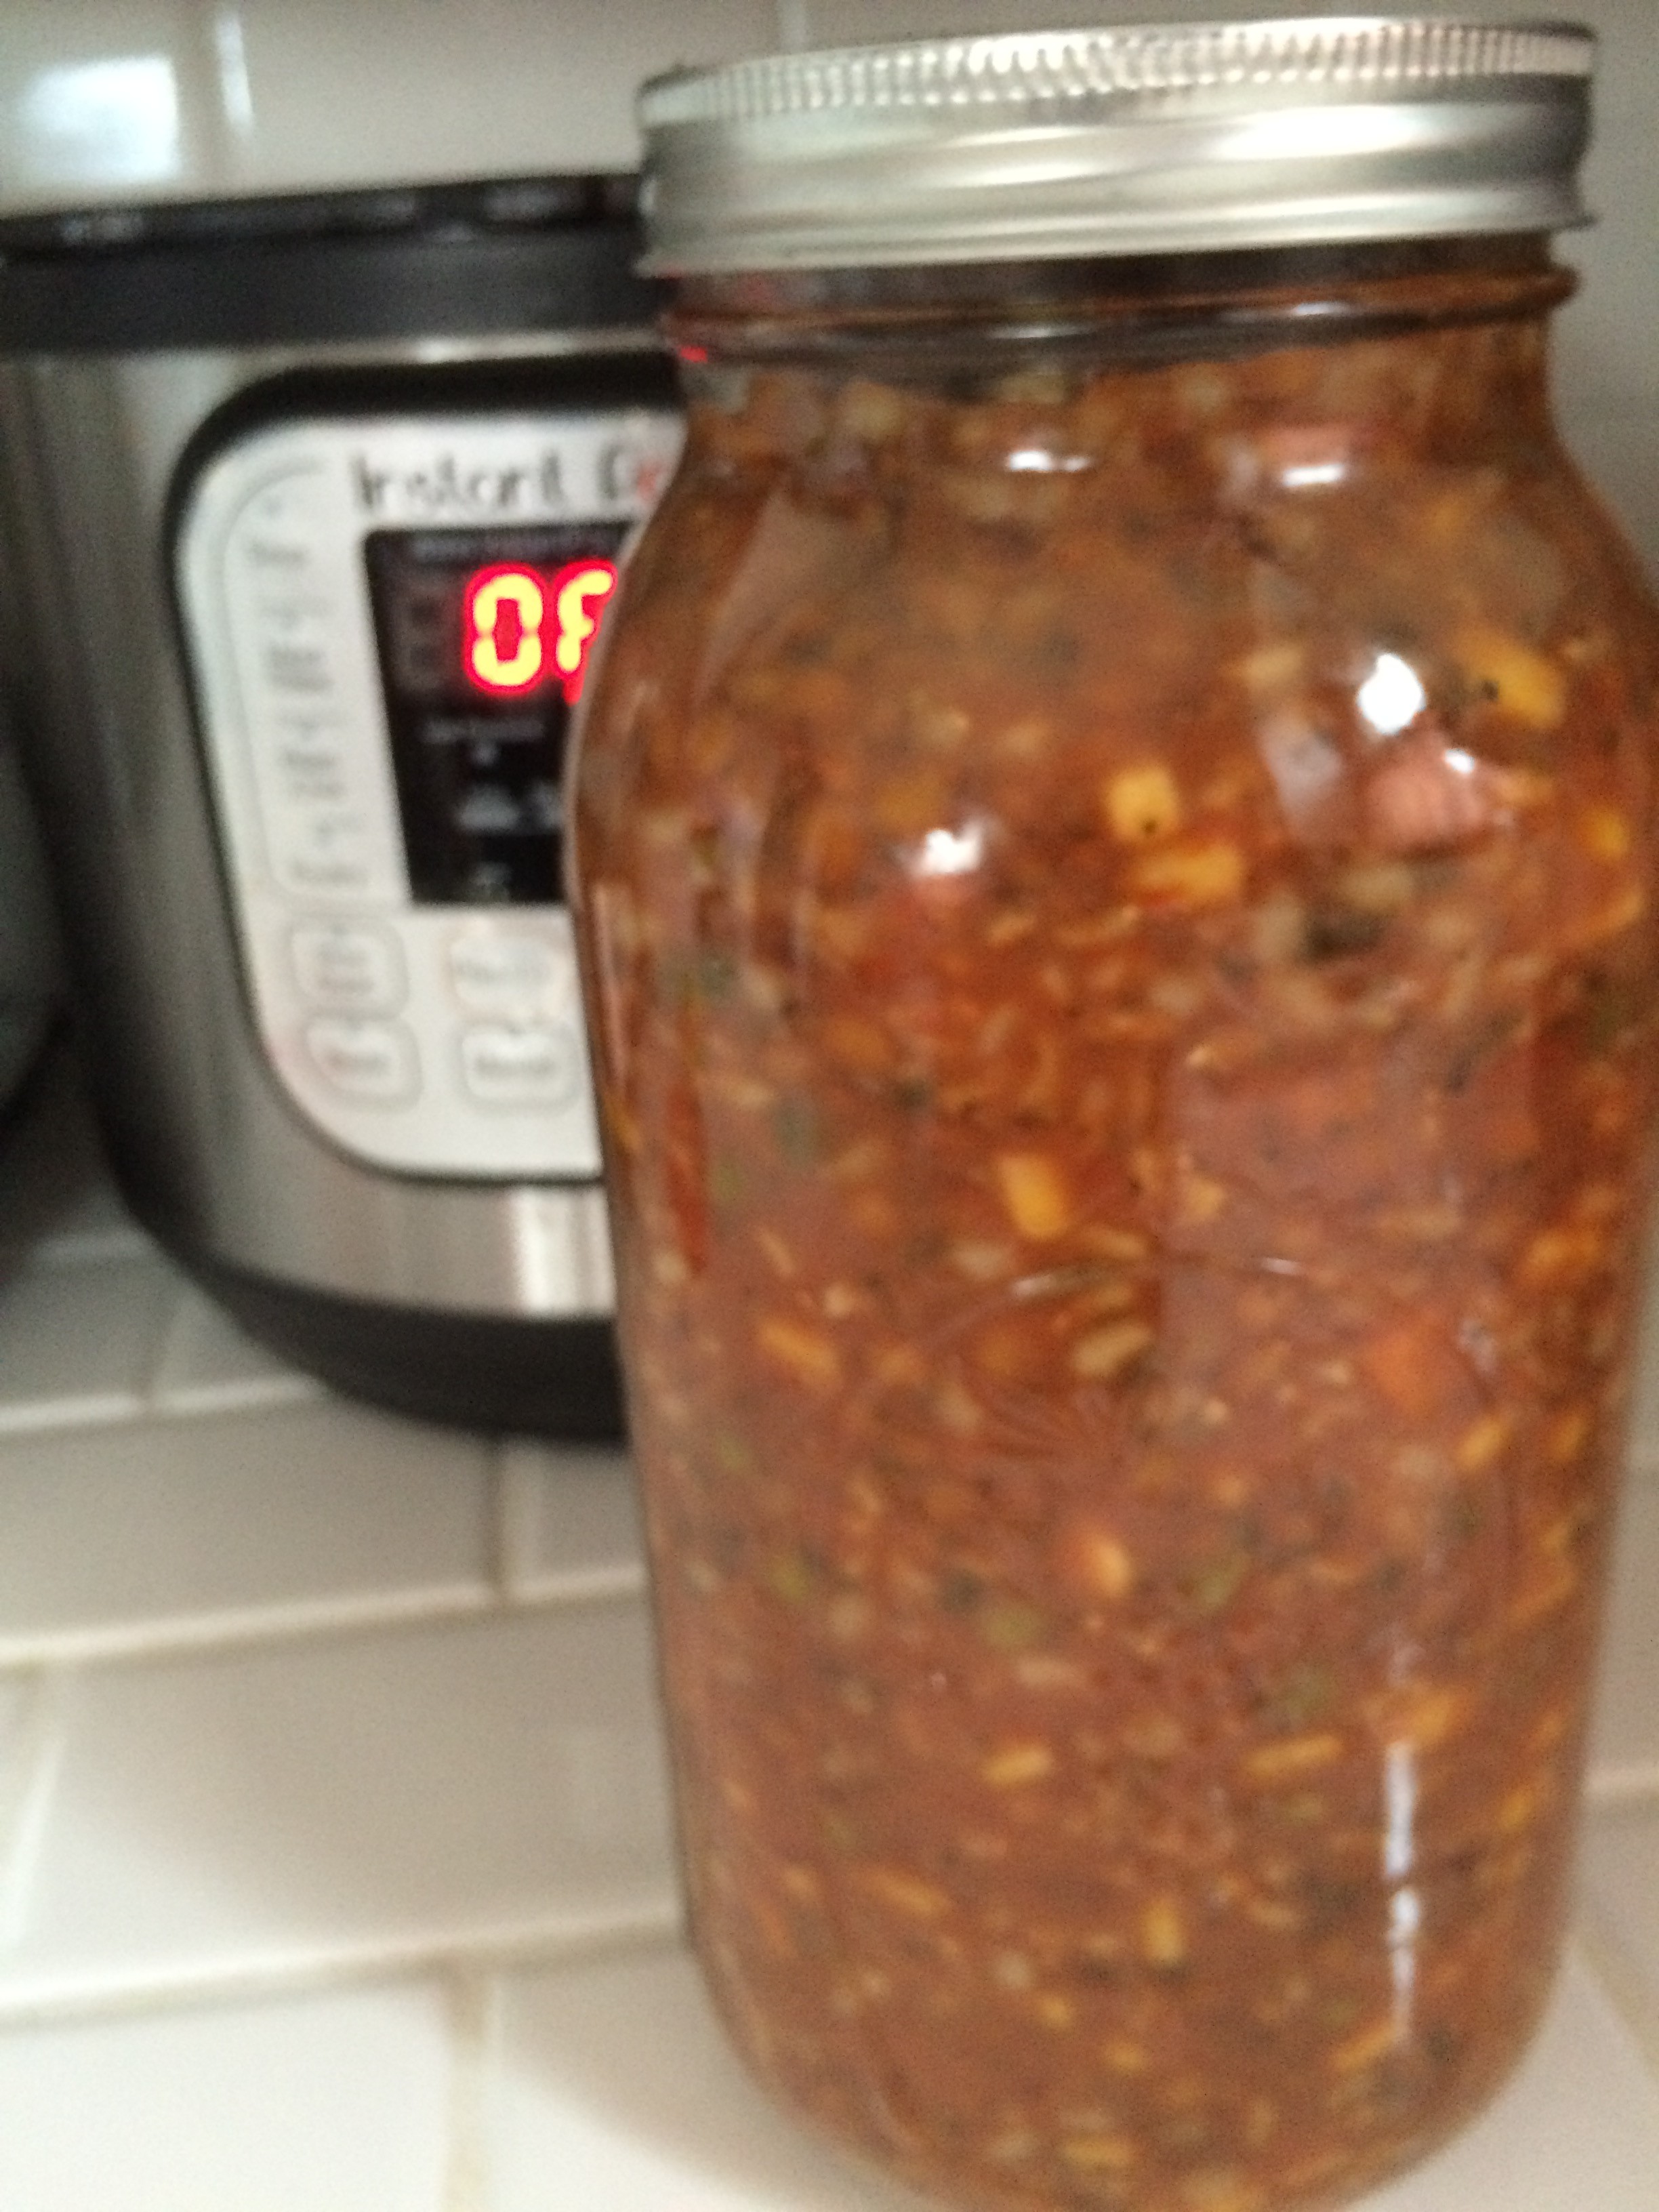
So I grabbed lentils. I grabbed dehydrated seasonings.  And started throwing them together. I decided I wanted to create a recipe that would be a convenience mix, that could be made up ahead, just needing a few liquids added when it’s time to cook. A go-to in times like this. I saved my chop chop time for the raw veggies I wanted to serve with these Sloppy Joes, and did that while the joe mix was cooking.

Sloppy Joes

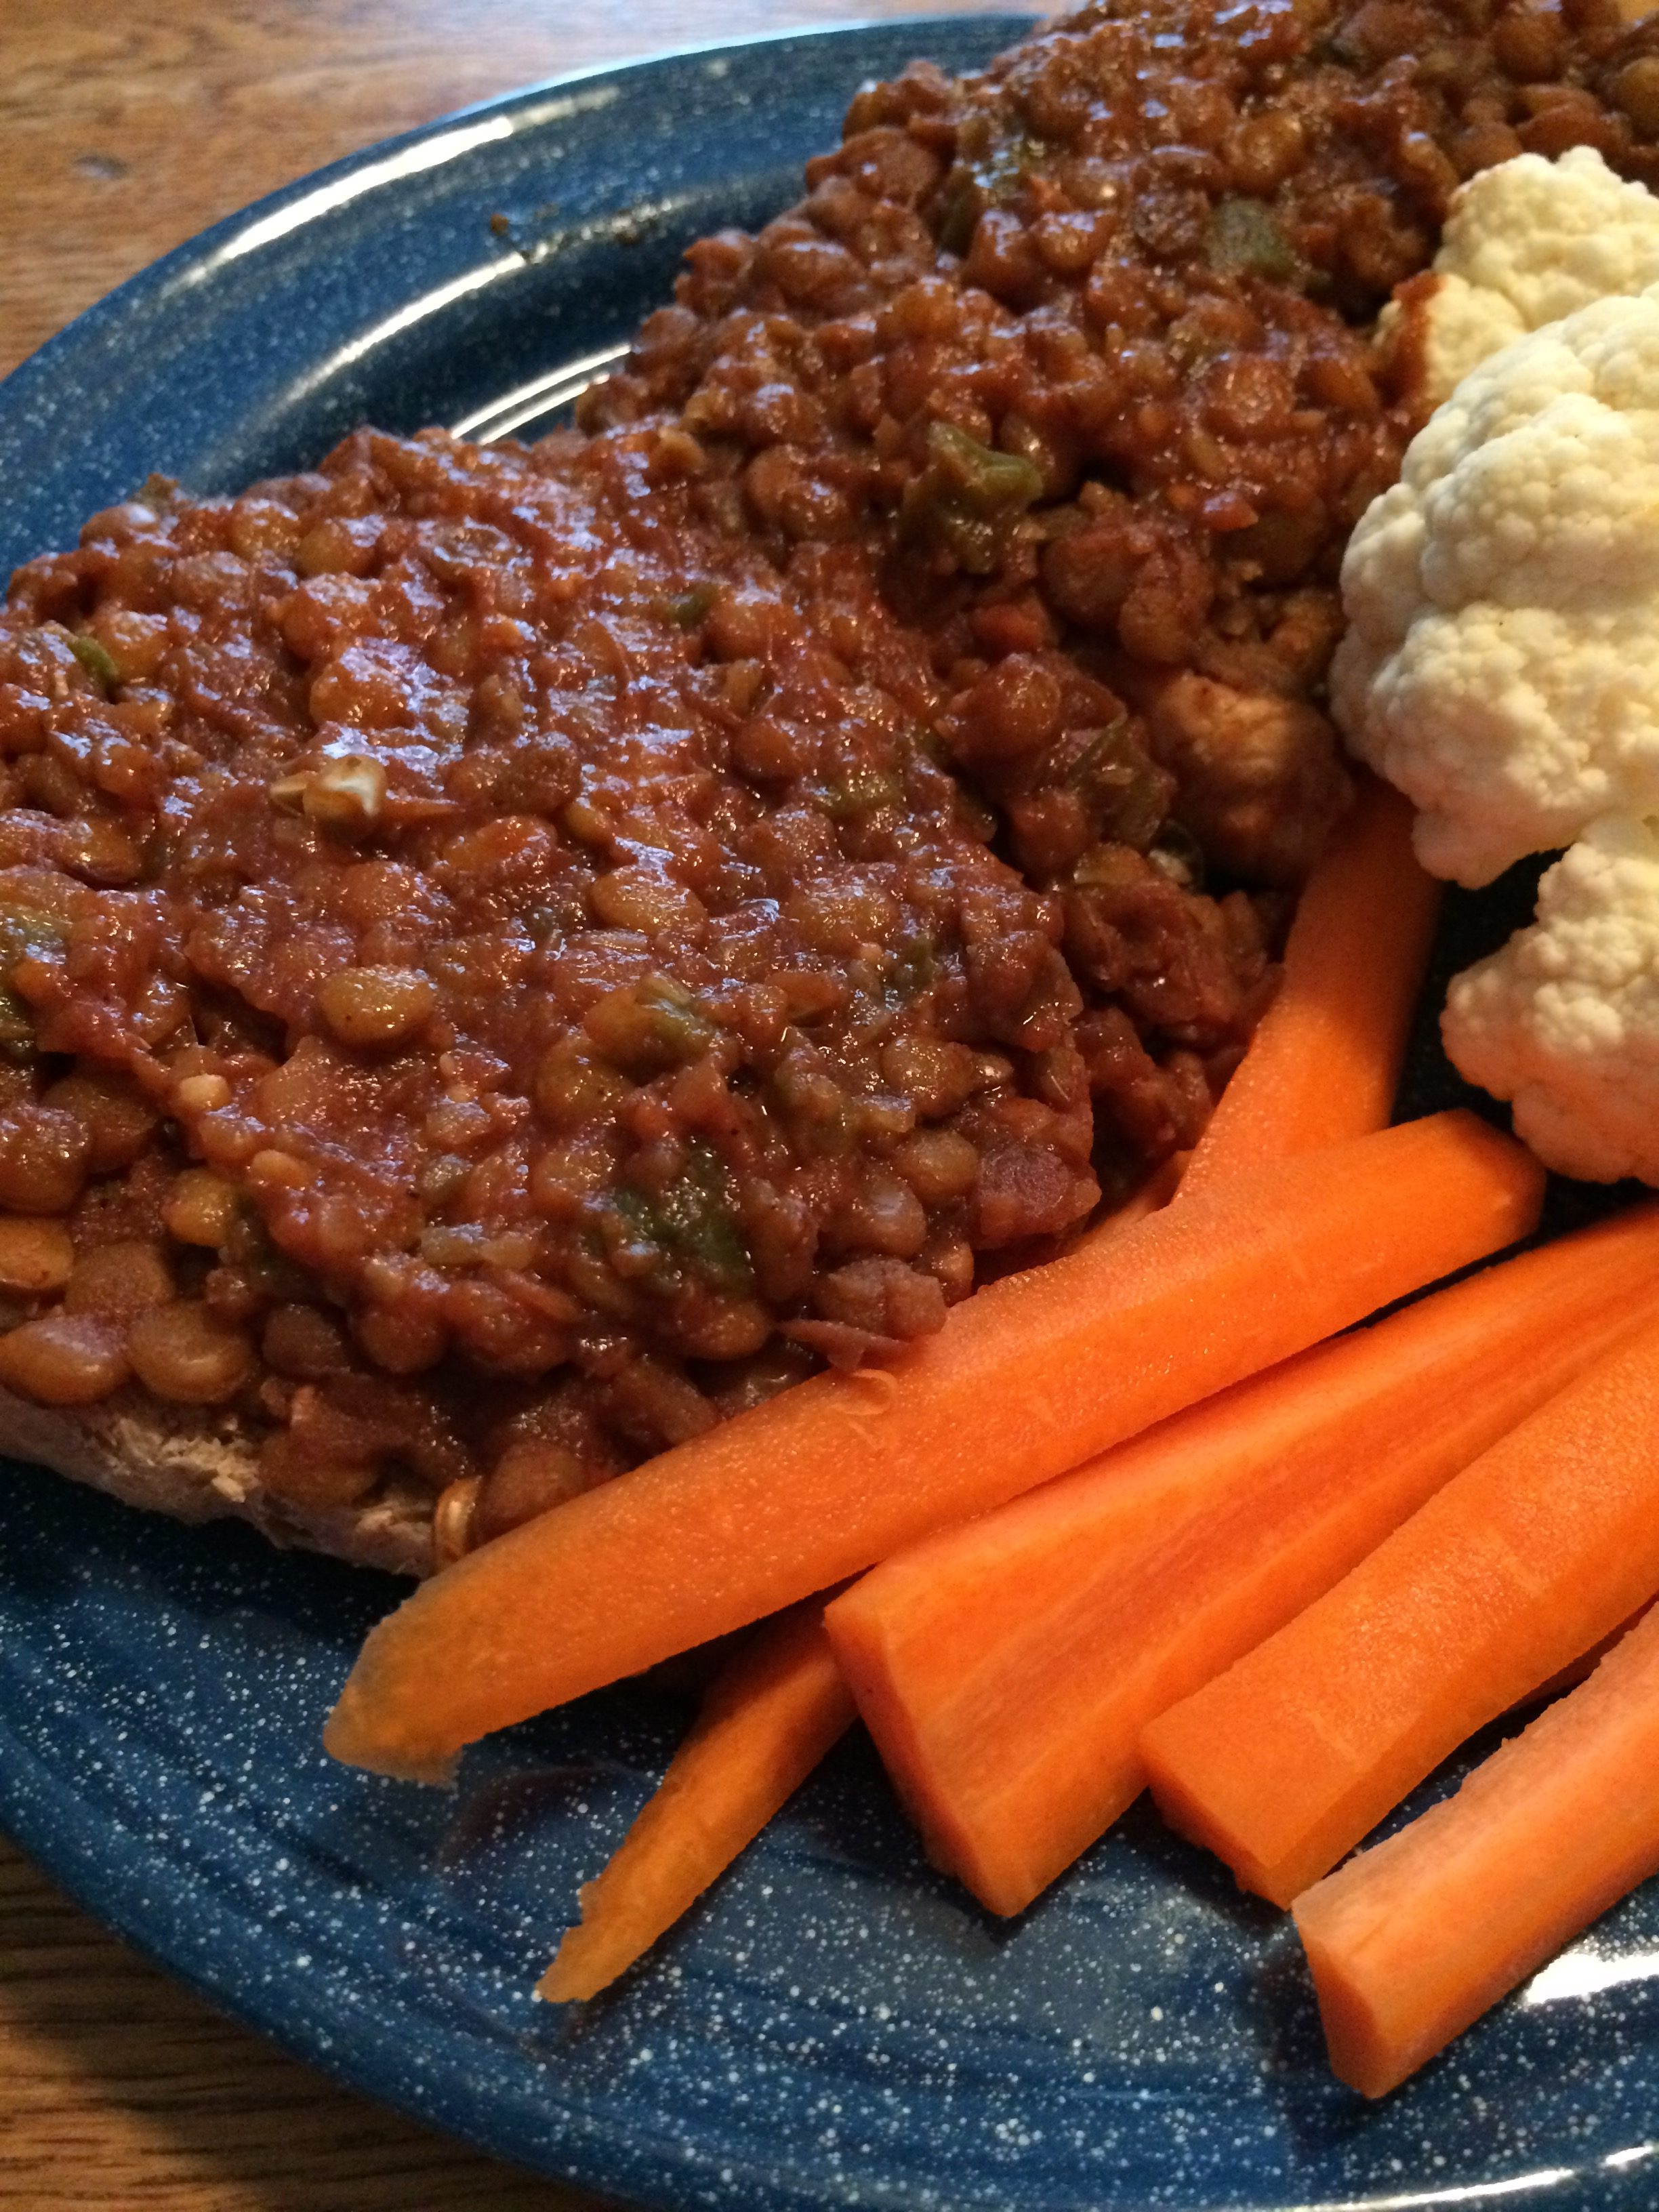
Yes, I eat mine open faced.

Lentil Sloppy Joes


  • 1.5 cups lentils
  • 1/4 cup dried minced onion
  • 2 Tbl. dried green pepper
  • 1 tsp. dried minced garlic
  • 1 tsp./cube veggie boullion/ no salt veggie seasoning
  • 1.5 tsp. chili powder
  • 1 tsp cumin
  • 1/4 tsp smoked paprika
  • 1 Tbl. balsamic vinegar
  • 1 tsp. unsulphured molasses
  • 1 pt. tomato sauce
  • 3 cups purified water
    (all ingredients organic whenever possible)

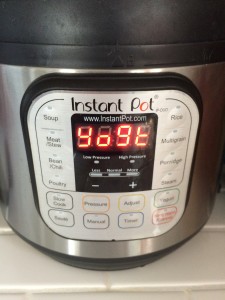
Cook at high pressure for 20-22 minutes in the Instant Pot.

Update: Last night was really an Whoops! that led to the Whoops here. What I crossed out above did work for us–twice. But I know better. Putting tomato products in with uncooked beans makes them take longer to cook. It will probably work better to cook the above without the tomato sauce.  It should only take about 8-10 minutes at pressure,  if you let the pressure release naturally (at least for 10 minutes). (For my lentils to get to the consistency we like, and doing quick release to save time, lentils take 11-13 minutes.)  Then add the tomato sauce in after the lentils are cooked. You may need to hit Saute to reduce it down at that point. I will re-make and update better directions here again. Sorry! The above (with the cross out) does work and taste delicious though. Just doesn’t cook the lentils as quick as it should.

Serve on sprouted/ whole grain buns, with plenty of raw veggies on the side.

Enjoy!


[subscribe2]

Time Sensitive Alert: Instant Pot Deal

InstantPot Lux50If you’ve been considering the Instant Pot (electric pressure cooker,) and I believe you should be considering one, one of them is the Deal of the Day at Amazon today for the next 14 hours.

This model wouldn’t be my normal recommendation, because it is is 5 qt instead of 6 qt and the 6 in 1 model, rather than 7 in 1. The 7 in 1, has a low warm setting for yogurt making, that can also be used to raise bread.

But at this price savings you may want to consider this 5 qt Instant Pot LUX50, while it is on this sale, even if it may be your “starter” Instant Pot, or if you all ready have one, as your secondary pot, for making side dishes.


[subscribe2]

Food Happens

Food happens with you start throwing things together. Good food.

Put my blueberries in before cooking my steel cut oats in my Instant Pot, because they were frozen. Had some homemade coconut yogurt I wanted to eat up. Have been experimenting with date paste as sweetener in more recipes, so had a bit of that left to use. And, as always, a sprinkle of a Tbl. of ground Flax Seed always boosts the goodness.

Result? FANTASTIC tasting Breakfast!

Blueberry SC Oats


What did you fuel your day with today?


[subscribe2]


Stir-fried Veggies & Brown Rice

My Instant Pot likes to play leading role in the kitchen these days. Last night it had to play second fiddle to the wok. Stir-fried Veggies & Brown Rice. ‪#‎simplywhole‬ ‪#‎freelyeat‬ ‪#‎instantpot‬

stir fried veggiesbrown rice ipot


Brown Rice instructions here.

Stir-fried Veggies:

  • Cut up lots of veggies (for long veggies, on the diagonal)–Carrots, Celery, Broccoli, Cauliflower, Onions, Garlic, Mushrooms, …
  • Stir-fry them

We like to add a sauce of:

What was in your Instant Pot last night?


[subscribe2]

Brown Rice {Instant Pot Recipe}

Rice is a staple food for many cultures, including mine personally when it is whole grain. I eat brown rice for breakfast, lunch and supper–and sometimes for a snack. Although short grain is better for “sticky” rice, in desserts and sweet dishes, and long grain better for fluffy, non-sticky dishes, and basmati and others can be more flavorful, much of the time I just use plain ol’ organic long grain brown rice, because that’s what I use the most of, so that’s what I buy in bulk, 25# bags. 

Instant-Pot-1-300x300Making rice on the stove was never my thing. I purchased rice streamers and cookers early on. My Instant Pot has simplified perfect rice even further–by cutting the time down.

Like most things around here, I keep it pretty simple, just cooking it plain, so leftovers can be used in a variety of ways. If I make unflavored, plain rice for supper, to serve super flavorful Savory Mushroom Gravy over, like I did last night, I can eat the leftover rice as a sweet breakfast, with fresh organic strawberries and coconut milk poured over it, like I did this morning. 

I make flavored rice, and use it in casserole type recipes too, but for today, we’re focusing on the basics. Make up a large pot of plain brown rice in the Instant Pot, and use throughout the week, for breakfast, lunch, supper, or snacks. I’ll share the Savory Mushroom Gravy recipe next time I make it–if I remember to take a picture (which I didn’t last night, and it’s all gone.) This morning, the little bit of leftover rice, got coconut milk and strawberries added. So here it is.


To make brown rice in the Instant Pot, use 1.25 cups purified water for each cup of organic brown rice. Just measure rice into pot and add water and close the lid. Cook on high pressure for 21-22 minutes. Quick release, and fluff with a fork right away, then let it sit on keep warm until ready to serve. 

To reheat, put 1/2 cup water in Instant Pot, put the trivet in and set a an oven safe bowl of leftover rice on the trivet. (I use Pyrex or stainless steel bowls.) Put the Instant Pot lid on and Steam (high pressure) for 5 minutes, then quick release. This is the time usually needed for my glass bowls straight from the fridge. In stainless steel, for small amounts, or not so cold, it might not take 5 minutes to heat through.

Enjoy the Whole Grain Goodness!
How do you like to eat rice?

Savory Mushroom Gravy {Recipe}

Savory Mushroom Gravy has become a family fave (except for 1 son who hates mushrooms). We love it over rice or potatoes. Although I don’t make the gravy in the Instant Pot, I do make its underpinnings there. This no-fat gravy is rich, hearty and flavorful. (You meat eaters will never miss the beef.)

Savory Mushroom Gravy

Savory Mushroom Gravy

Dry or water Saute:

  • 1 onion, chopped
  • 3 cloves garlic, minced

Add:

  • 3 cups veggie stock/broth (or water with 2 veggie bouillon cubes, stir to dissolve and disperse).

Add:

  • 3/4-1# mushrooms, chopped (crimini)
  • 2 Tbl. Bragg’s Liquid Aminos
  • black pepper

Simmer until mushrooms start to soften.

Mix (I shake in a small mason jar):

  • 6 Tbl. fresh ground whole wheat flour
  • 1 cup water

Whisk in. Simmer till thickened.

Serve over Brown Rice or baked or mashed Potatoes.

I cook both Brown Rice and Potatoes in my Instant Pot. The Brown Rice link will take to instructions.

red potatoes brocolli iPot

For Potatoes:

  • approx. 3# medium red potatoes

Place 1 cup water in Instant Pot pan. Place potatoes on trivet set in pan. Put lid on. Seal. Hit Manual and 10 minutes. Quick Release is fine, or let it sit on Keep Warm until you’re ready to serve dinner.

To add the frozen Broccoli, I stopped the Instant Pot with 2 minutes left. Added the frozen Broccoli in a stainless steel pot that fits. Restart Instant Pot for 2 minutes. Quick Release. (If using fresh broccoli, you may need 0 minutes.)

Add a fresh greens and veggies salad and enjoy this hearty, potatoes and gravy dinner. Try it and let me know what you think.


[subscribe2]


Lisa’s Easy Veggie & Lentil Stew {Instant Pot Recipe}

Quick and easy, delicious and filling, and Good for You-Naturally!™ Those are the criteria I am looking for in developing most of my recipes (and looking for in others’ that I try). In other words, Freedom & Simplicity™ that’s Good for You-Naturally!™ This one fits the ticket!

It’s a recipe that had become buried in the box. We used to really enjoy it but somehow it hadn’t been made recently, and certainly not since I’d got my Instant Pot. It was time for it to come back to life. Especially now when I needed something quick and easy (time was short), something warm and hearty (spring blizzards are no fun), and as always, something both very yummy and health promoting.

Veggie & Lentil Stew

Here’s my recipe as I developed it years ago. Below that is my adaptations yesterday, when we were in a hurry. We all dove in and I didn’t think to take a pic until I was jarring up the leftovers. Yes, it makes a pot full! Fantastic lunch for today.

Lisa’s Veggie & Lentil Stew
(all ingredients are organic here, get as many as you can that way)

  • 12 c. purified water (approx.)
  • 1 c. brown rice
  • 1.5 cups lentils (dried)
  • 1/4 tsp. dried minced garlic (approx.)
  • 2 tsp. dried basil
  • 3 bay leaves (optional)
  • 1-2 tsp. dried parsley
  • 1 chopped onion (or 3-4 Tbl. dried minced)
  • 4 stalks celery, chopped (or a handful dried)
  • 2 carrots, sliced
  • 1-2 cups corn
  • 1-2 cups peas
  • 2 cups green beans
  • 2 cups tomato sauce (or whatever they’ve shrunk that can down to now)
  • 1 qt. crushed tomatoes (or whatever they’ve shrunk that can down to now)
  • nice squirt of Bragg’s liquid aminos

Add it all to the pot and simmer until done.

How it came together yesterday:

Was out of bay leaves, so they truly are optional. Used dried onion and celery. Had a big bag of frozen mixed vegetables on hand–carrots, corn, peas, green beans. Well how perfect is that?! I used 4 cups of the mix, and added an extra cup of frozen corn. I threw everything into my Instant Pot (6 qt.), filling with water to about the 4 L line. I have no clue how much water that was. I hit the buttons for high pressure and 22 minutes (the time needed for brown rice, the longest cooking ingredient) and left for Good Friday church service. We got home to stew done and on Keep Warm. (i.e. Natural Pressure Release–it was full enough it probably would have splattered if I tried to Quick Release.) The water was all absorbed, so I added more. Served it with fresh veggie sticks, and whole grain oatmeal muffins.

Mm-mm Good for You-Naturally!™ Mushrooms would have been a fantastic add-in (that I will add to the recipe card), but didn’t think of at the time (and not sure I had any on hand.)

Let me know if you make this recipe and how you like it!

[subscribe2]

Steel Cut Oats {Instant Pot Recipe}

One of my favorite breakfasts is Steel Cut Oats. Years ago I didn’t think I liked them. I’d grown up on rolled oats and eaten those my entire life.

But when I tried Steel Cut in more recent years, I found I loved them! The texture of the Steel Cut is different. Chewier. For those that think you hate oatmeal because it is mushy, give Steel Cut Oats a try!

Now, I love them even more because I make them in my Instant Pot, and can just dump in the oats and water, set it and forget it. No watching a clock. No watching–or scorching–a pan. I can go off and do whatever I want, not worrying about when I get back to them. My Instant Pot will hold them on keep warm until I get there.

steel cut oats

Super simple “recipe”

  • I put in a 4 cup Pyrex bowl on a trivet in my Instant Pot, with 1 cup water (in the liner pan) below.
  • Cook at Manual, 10 minutes. You can Quick Release.
  • Serve with berries, homemade Almond Milk, and if desired cinnamon and and a hint of maple syrup.


Do you make Steel Cut Oats? Do you have an Instant Pot? Did you try this recipe? Comment below!

Affiliate links included in my posts. Purchasing through these links helps support this website, for you to receive the info on this site for free.

[subscribe2]

Raw Coconut Milk Yogurt

If you’ve been a reader of my ‘from me’ blog long-term, you know I have several yogurt making posts there. I’ve also written a Beginner’s Handbook for Yogurt Making. But it’s time to experiment again.

Dairy-free yogurts tend to not set up as well without additives. I don’t really like my yogurt texture to be jello-like. Homemade soy milk yogurt does better and we’ve liked it. I prefer a raw yogurt if possible though. So I began looking again for options.

A “raw milk” I’ve made in the last few years that wasn’t on my radar back when I made my original yogurt posts and book is Coconut Milk. Now, I’ve never bought coconut milk; I don’t like the list of ingredients in it, same with other commercially made “not milks”. But I have made fresh Coconut Milk. Raw Almond Milk, our usual, is made quickly and easily at home, and we love it. But it doesn’t make a great yogurt on its own. A couple ideas got my brain re-thinking on successfully making not milk yogurts, and it’s time to experiment with the first.

Coconut Yogurt 1

I love young Thai coconuts. (Find them locally at a Asian grocer, Whole Foods, HyVee, or order through Azure Standard–all much cheaper than this link.) My favorite thing to do with them is to make fresh Coconut Water Kefir. (I’ll add an updated post on this blog and link it here.) Yummy, probiotic drink, great for the gut. I put it in smoothies a lot, and you can make fizzy fruit “pop” with it.  We also love to just drink the raw coconut water fresh. The younger boys love to drink straight from the coconut itself. Sometimes (not often) make fresh coconut milk.

Generally, I use the meat in green smoothies or recipes. But the daily (or every other) making of coconut kefir water goes through more water than we use of the meat. That, having extra in the freezer, can be great for the occasional recipe that calls for larger amounts of coconut meat. But … What else could I do, on a more regular basis?

What is needed for yogurt, especially thicker yogurt? I knew the natural sweetness and fat content in the coconut would both be helpful. The key would be to make my own coconut milk so I could control the consistency of the yogurt, since I knew it wasn’t going to get much thicker than when I put it in.

Coconut Yogurt 2

3 young coconuts provided 2 cups of coconut meat for me to experiment with, and way more coconut water than I knew I’d use in the yogurt. (Of course, the rest is for Coconut Water Kefir.) I decided to add a bit of my homemade Vanilla. And used probiotic capsules for my culture; as they were all I had on hand at 11 at night.

Coconut Yogurt 5

 I culture yogurt in many ways. My dehydrator is my favorite because it’s the easiest and it’s always on my counter and usually running. But, since I started using an Instant Pot, and it has a Yogurt feature and I hadn’t tried it yet, I decided to go that way this time.

Coconut Yogurt 3

Here’s how I did it–and my notes.

  • 2 cups young coconut meat
  • 1/2-1 cup fresh coconut water
  • 1/2 Tbl. homemade vanilla extract
  • 2 PB8 probiotic capsules — opened and only the powder inside used, not the capsule itself
  • Blend all together till creamy. Start with the smaller amount of coconut water, add as needed until desired consistency. (May take more than 1 cup.) I added the PB after the rest was creamy and just pulsed it in.
  • Pour into serving size jars or these (that have lids) and culture at approx. 105° for 8-10 hours. Do not fill jars completely full, as it will expand as it cultures.
  • Cap and refrigerate.

Coconut Yogurt 7

Notes:

  • My coconut meat was pretty firm in 2 of my coconuts and very soft (and scant) in 1. I used 3/4 cup coconut water and will use more next time. (I was a bit afraid of getting it too runny.)
  • I’m not real happy with the other ingredients in the PB8, and will look for a better option before I do this again. But don’t know if there is a better or not.
  • As noted, the yogurt does expand and get a bit bubbly. (You know the culture is working and creating goodies for your gut.)

Coconut Yogurt 6

  • To culture in the Instant Pot, you really do just set your jars in and hit the Yogurt button, and put the lid on. I did put my jars on a trivet, just in case the bottom of the pan may get a bit too warm. It doesn’t matter if you use the pressure lid, or a glass lid. It doesn’t matter if the vent is open or closed. You don’t have to put water in the bottom. The yogurt function will not get to the high temp to create pressure.
  • You can culture yogurt anywhere that you can maintain a steady temp of approx. 105° for the tire needed to culture. Under 95° and the cultures won’t grow to create yogurt. Over 115° and the cultures will be killed, and not make yogurt. If where you are culturing your yogurt doesn’t have a thermostat, be sure to get a thermometer (that measures the right range–a yogurt or aquarium thermometer) to monitor the temp.

Here are some other ways you can culture yogurt:

  • On a folded towel on top of a heating pad turned onto low and covered with another towel. Or in a covered box on top of the heating pad.
  • In a box (or styrofoam cooler) with a small light bulb in it.
  • In a gas oven with a pilot light (turned off).
  • In a ceramic crock, wrapped in a blanket or placed in an insulated cooler.
  • In a water bath in an electric skillet on low. If you do this be sure to test it out with a thermometer in a jar of water (instead of yogurt) to make sure it holds the correct temperature over that length of time. It used to be recommended to use a slow cooker/crock pot on low. I have not found newer crock pots to hold the proper temp. Perhaps getting it to the right temp, turn off crock pot and wrap in a blanket to hold temp.
  • A yogurt maker. 🙂


Do you make non-dairy yogurt? What method do you use? Comment below!


[subscribe2]

Lisa’s Black Bean Burgers

Can you believe it? One of the things I’ve never made from scratch is Veggie Burgers. Long, long ago we used to buy a box of dry mix that we added water to. We lost that source, and for a while bought frozen patties, but I wasn’t completely happy with those ingredients, so we didn’t have them often.

Now that I have my Instant Pot and can go from dry beans to ready to use in less than an hour, I decided to give it a try. I researched several recipes, then forged out on my own. What do I like? What has been in restaurant burgers that I’ve liked? What sounds good? Here’s what I came up with last night. They were delicious. But the variety is endless.


Lisa’s Good for You-Naturally! Black Bean Burgers

Ingredients:

  • 2 cups cooked Black Beans (1 cup Black Beans, 2 1/2+ cups water, Instant Pot high pressure 15-30 minutes. Natural Release.)
  • 2 Tbl. Ground Flax Seed mixed with 3 Tbl. water
  • 1/4 Red Pepper
  • 1/4 medium Onion (I used Red)
  • 1-2 cloves Garlic
  • 1 cup Rolled Oats
  • 1/4+ tsp. Cumin
  • 1/4 tsp. Black Pepper (ground)
  • 1/2 tsp. Real Salt (opt.)
  • 1 Tbl. Bragg’s Liquid Aminos
  • 1/4+ cup bean water
  • 1/2 cup Baby Bella Mushrooms
  • 1/2 cup Corn kernels (fresh or frozen)

Directions:

  • Cook Beans.
  • Grind Flax Seeds and soak in water.
  • Process Peppers, Onions, and Garlic until as fine as you’d like. Add Spices, Aminos, Oats and 1 cup of drained Beans (reserve liquid) and process again, pulsing to mix spices in thoroughly, but not turn oats into flour. Add water and Flax, beginning with 1/4 cup water (that’s all I needed) and pulse slightly to mix.
  • Add remaining Beans, Mushrooms, and Corn. Pulse just to mix in (not break down much.)
  • Form into patties onto parchment paper. (I just use a 1/4 cup measuring cup or scoop, and flatten the tops a bit.)
  • Bake at 350° or Grill (I put into freezer for a few minutes to firm up a bit before grilling.) approx. 15 minutes. Flip half way through.


  • Makes approx. 10 burgers. Can be frozen with parchment paper between.
  • I served with Avocado Slices
  • Use Organic ingredients and purified water
  • You don’t have to use a Food Processor. You can just chop the veggies, and moosh all together with your hands (or mash the beans a bit and stir with a spoon.)

Unbaked/ungrilled patties. I will update with cooked picture when I make again. Sorry. Forgot.

8411_1012738348800553_5070700641611734267_n

Enjoy! And let me know how you liked them!

[subscribe2]