Red Felt Circles or Pretty Pink Flowers {Tutorial}

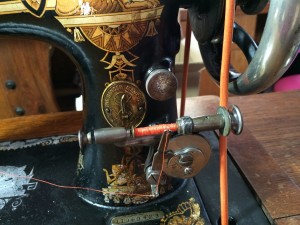
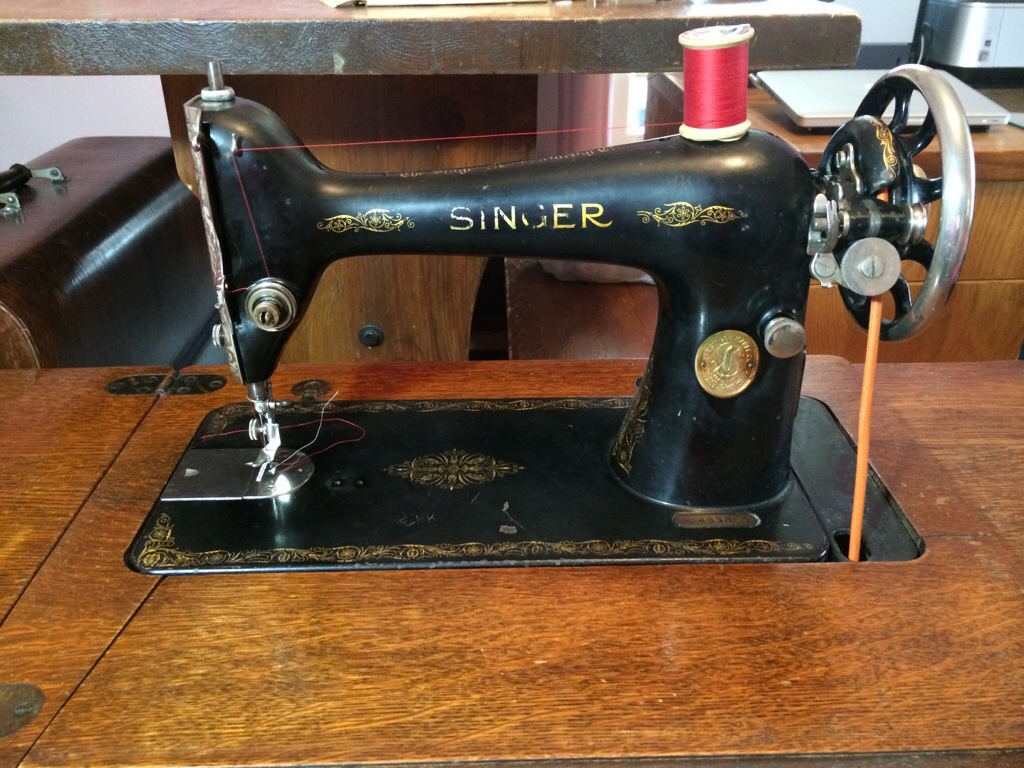
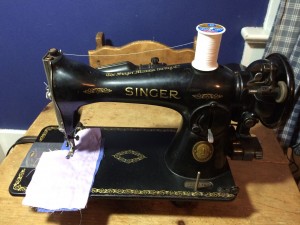
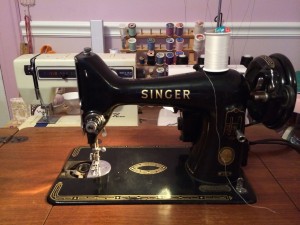
You know those little round circles of red felt on a sewing machine spool pin? Did you ever wonder what they are there for? Mine disappeared long ago, and I never worried about replacing them. Most machines I’ve ever seen or used didn’t have them, so I figured it wasn’t a big deal. I wasn’t too long ago that I found out they are to protect the paint under your spool of thread, as that spool constantly spins there. Ok, I knew it before, but I didn’t think it really mattered until I got old machines.

Now if you have a new plastic machine, your machine may not have them or need them. If you have a “modern” metal machine with the spool pin on the back, you may not care. But if you have an old metal machine with the spool pin on the top, you may decide it is worth protecting that paint. You don’t want to wear down that 75-100 year old paint any further. But perhaps you don’t really want an ugly red felt circle there either.

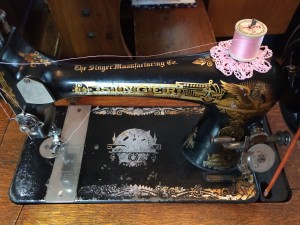
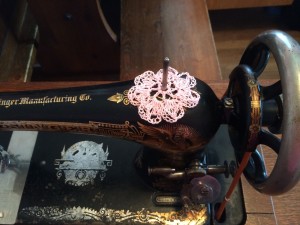
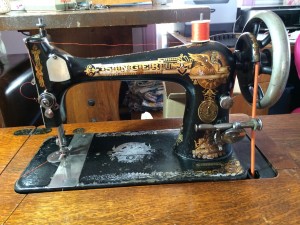
I prefer a pretty pink flower. I’d heard about and seen pictures of spool pin doilies. So much prettier than that red circle! So I decided to make some to dress up my old ladies. Even when those ladies themselves have seen better days, like Jocabed, my 122 year old Singer 27, this pretty little doily can dress her up far better than a red felt circle could.

Spool Pin Doily {crochet} ~ from Me & My House

Spool Pin Doily {crochet - tutorial} ~ from Me & My House

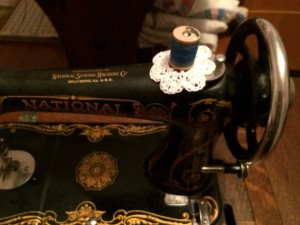
Perhaps you think there should be other flowers in this garden. I didn’t stop at just pretty pink flowers. I decided to make some white ones out of #10 bamboo crochet thread (on Natalie, my 90 year old National 2 Spool).

Spool Pin Doily {crochet - tutorial} ~ from Me & My House

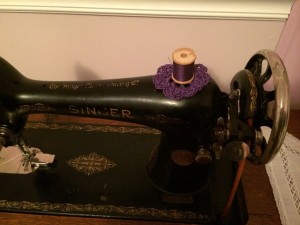
And I tried a purple one out of #3 cotton crochet thread, because that’s the only size they had of purple, (on Ruthie, my 85 year old Singer 66). I wasn’t as thrilled with the #3 thread. Too thick, IMO.

Spool Pin Doily {crochet - tutorial} ~ from Me & My House

If you’d like to make some Spool Pin Doilies for your sewing machine – new or old, you will need #10 crochet thread and a size D crochet hook. You can download my instructions /pattern. FREE to use, just don’t copy, repost, or claim it as yours. Instead share a link to this post (not to the file) so your friends can get their own Free Pattern. Thanks.

Enjoy!

[subscribe2]

SaveSave

Studio Update 3

It’s been over 3 months since I’ve updated on my Studio re-do. Many changes have been made, including complete rearrangement, but I still have a ways to go before it is finished.

My Design Studio ~ from Me & My House

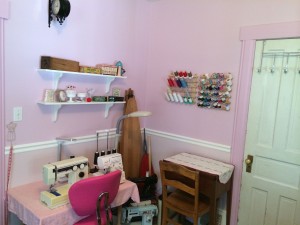
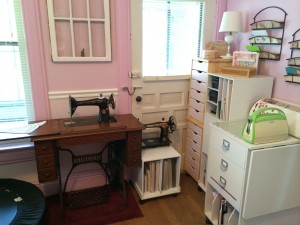
The paper crafting station has moved. This is now my primary sewing corner, well, non-treadle corner anyhow.  My “non-vintage” Riccar sewing machine and new Janome serger are on the sewing table, and 1956 Singer 99K, “Roxie Anne,” in the cabinet. The 2 machines not housed (on the floor) are my 1952 Singer 15-91, “Louise,” and the “Dressmaker” Japanese zigzag c. 1950s. I haven’t used them much yet, (the Dressmaker needs a cord and 15-91 could use a new one.) I’m still debating whether to make a cover for the wooden ironing board and use it, or leave it as is. The sewing box and child’s iron on the shelves are from my childhood. The red child’s ironing board is a recent find, as I don’t have my childhood one anymore.

My Design Studio ~ from Me & My House

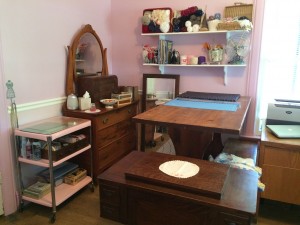
Where my sewing machines were is now my storage and cutting area. I moved the trestle table back up from the family room, and put it back up on risers for a perfect height cutting and pressing table. The dresser holds sewing basics and other supplies in the drawers, a 1922 White Family Rotary sewing machine in the bentwood case, “Betty“, and a drawer that survived a fire, from my dad’s wife’s cabinet that held her 1948 Singer 201-2 “Pamela”. (Buttons are in the cigar boxes.) Yarn, and cutting and ironing tools are housed on the shelves. And yes, the fan works, and is a great addition to the room as the weather warms up. The rolling cart holds all my ribbon, and rulers for cutting. At the end of the cutting table is my National 2 Spool (c. 1925) treadle sewing machine, “Maggie“, after Margaret Thatcher born in 1925. (Article coming soon.) (The mirror is now moved to behind the main door.)

My Design Studio ~ from Me & My House

My papercrafting corner has just moved down the wall to the other side of the door. Ruthie & Jocabed, my 1929 Singer 66 treadle and 1892 Singer 27 (also treadle, but doesn’t have its own cabinet) join the paper crafting storage in this bright corner. A drop down tabletop on the white cabinet, as well as the sewing cabinet top provide work space. My Needak rebounder, for exercise, rounds out this space. (The door to the outside is not used.)

2 things are not shown. My large, 6′ oak desk is in the other corner of the room. You can see a corner of the desk, with a printer and computer, next to the cutting table. Writing, bookkeeping, printing are all done there, so it is a mess. Since it has windows on 2 sides of it, maybe I’ll get a picture of it when I get my curtains made and post another update.

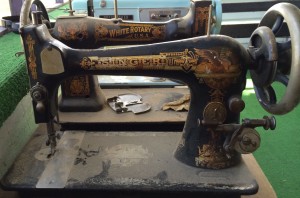
White Family Rotary sewing machines 1916 & 1929 ~ from Me & My House

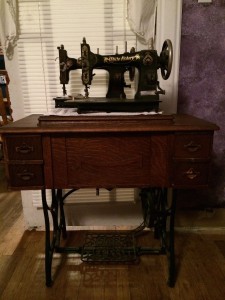
My 1929 White Family Rotary treadle with cabinet (front), “Audrey” after Audrey Hepburn born in 1929, and (locked up and a bit rusty) 1916 White Family Rotary (with no house – back) have been moved to my bedroom, where my Riccar and serger table used to be. I don’t have either of them cleaned and up and running yet. More projects for another day.

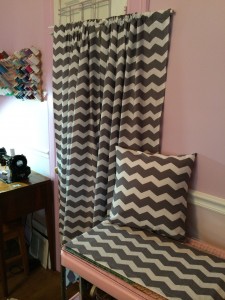
For now, I need to be using these machines and get some sewing and a few other projects done – such as the curtains, crib skirt, and pillow, (for the new grandbabe coming soon,) and the 2 clothes pin bags that I’ve made this week.

Curtains, Pillow & Crib Skirt for K ~ from Me & My House

I am loving my new workspaces. They are so convenient and a delight to work in. I love that all my work can be done in this one room. No more cutting out in one room, sewing in another, crafting somewhere else. My tools are always at hand and ready to use. (Well, all sewing storage doesn’t fit in here, patterns, fabric stash, misc. supplies, etc. but …) I can leave projects out while I work on them. My hope is to finish the curtains and other sewing decor, put up some more shelving and other wall decor, and refinish the doors, in my studio this summer. Then I’ll update again.

[subscribe2]

SaveSave

SaveSave

Jocabed – Singer 27 Sphinx

I’d been looking at Vibrating Shuttle sewing machines. They intrigued me yet kind of scared me off, being different. But I still wanted to see if I could meet the challenge of getting one up and running. I stumbled upon one; she was part of the trio that followed me home. The other machines were: a) going to be a huge or impossible project, b) not really something that is high on my list. But this Singer 27 was something I wanted and worth tackling; though covered with much dirt and dust, she moved freely and wasn’t too badly gunked up inside. The price was right. Even if I couldn’t get her running, I was only out a couple bucks.

Singer 27 before ~ from Me & My House

Jocabed is a Singer model 27-1. She was made in 1892. The Singer model 27 is a vibrating shuttle, meaning instead of having a round bobbin and bobbin case, she has a bullet shaped bobbin case and a long bobbin. Her shuttle swings in an arch from front to back. The 2 sliding plates to the right of the needle indicate the shuttle/ long bobbin. The silver colored “shovel”, at the left of the arm, are also indicative of this model.

Singer 27 Long Bobbin ~ from Me & My House

Winding a long bobbin

Singer 27 Bullet Shuttle ~ from Me & My House

The bullet shuttle with the bobbin inserted, in the shuttle carrier.

Her decals are called the Sphinx pattern, with the Sphinx in the upper corner where her arm and pillar meet. Jocabed’s decals are worn, and in many places “silvered”, meaning the gold color has been eaten away.

Singer 27 Sphinx 1892 ~ from Me & My House

Her tension doesn’t automatically release, like later machines do. You must press and hold the tab under the tension screw to release it. She required taking the tension completely apart. This was a first for me, so was done with fear and trembling for getting it back together correctly. But I did it.

She came unhoused (just the head, no case or cabinet.) She is shown here in my 66 treadle cabinet, which I used to test her out. It wasn’t a good fit, so I need to find another option. But we all got to sew on her a bit, including 4 of the grands that I taught to treadle on her.

I named her Jocabed after Moses’ mother, an Israelite in slavery in Egypt.

[subscribe2]

SaveSave

It’s Raining It’s Pouring

I’ve been Sew Blessed, as I noted a couple weeks ago. And the blessings being rained down turned to an outpouring. I’ve been abundantly blessed again. As with many blessings (such as children) this one came requiring much work.

I noticed the overhead doors open at the shop of an antique guy I know, so I ventured in. He always has a lot of pretty furniture I admire. I asked about sewing. He showed me a couple of cabinets, with no machines. Then said he had 3 heads I could have for $10 total.

20140517-115437.jpg

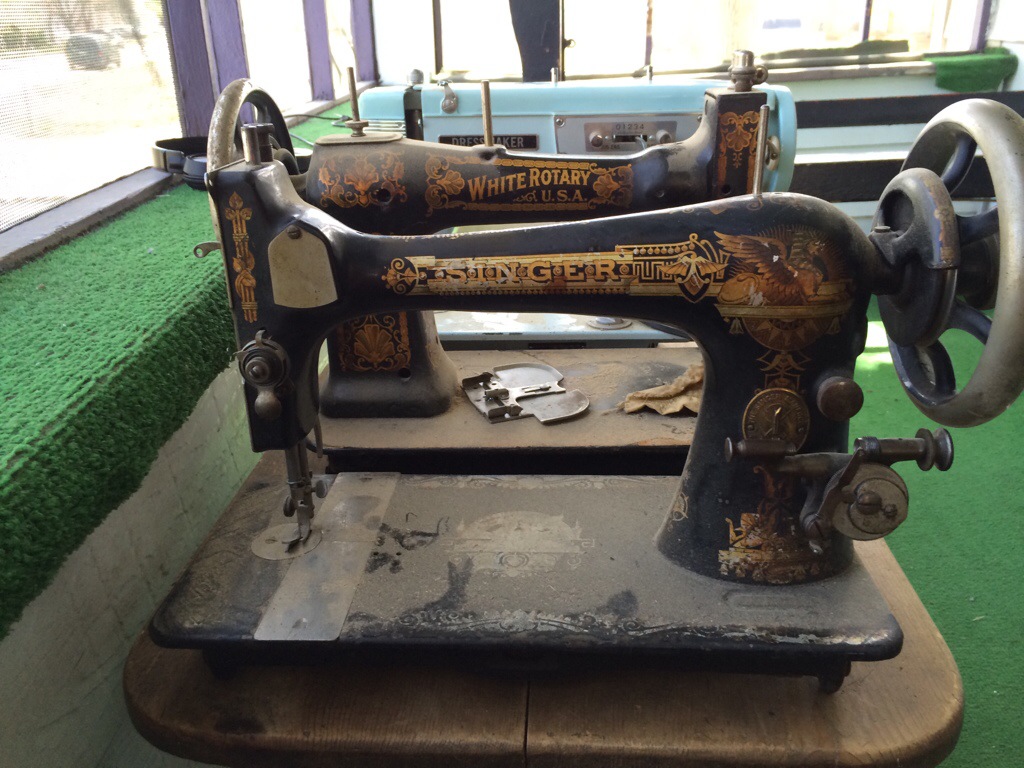
Under all the layers of dirt and dust I recognized a Singer 27 with Sphinx decals. The 27 is a shuttle bobbin type machine, different than any I have. She takes a long bobbin in a bullet shuttle, which is a type I’ve been hoping to get someday, and actually had already inquired on one elsewhere. Regardless of the dirt, and the fact that much of her decals were silvered, the wheel and needle moved and the shuttle and bobbin–and even both slide plates–were there. I also knew she would fit in the treadle cabinet I have. So with a good cleaning, she alone was worth more than the $10 to me.

Machine #2 was in far worse shape. Frozen solid. Nothing would move and quite a bit of rust. But she’s the same model as another gift from a great-grandma, a White Family Rotary. I figured even if I just take her apart and learn more about her, or even use her as a donor machine, (bobbin case and throat plate there if nothing else,) she was worth the rescue.

Machine #3 was far newer than the others, a light blue early zig-zag “Dressmaker” from post-war Japan. She turned, but had no foot pedal. Again, I figured if nothing else, a machine I could autopsy.

So home I came with 3 machines from 1 stop, and only $9 lighter (the amount of cash I had on hand.)

The 27 cleaned up fine and is sewing well. I’ll post about her later.

SaveSave

Well-loved Ruthie

20140429-141926.jpg Meet Ruthie. She’s an 85 year old shirt-tail relative, who joined my family a couple weeks ago. She’s my dad’s wife’s daughter’s husband’s grandmother’s. She shows her age in more than just her style, but also in her wear–which also shows she was well loved and used. She needed a little help in a few areas, but still gets along pretty good for an old gal.

20140429-142010.jpg

Ruthie needed a good bath–a thorough, long scrub. She will never look like a spring chick, but not bad for an old gal. Her wear tells her life’s story, which continues as, after her scrubbing, oiling, and a new belt, tire, bobbin and needle, she is back to faithfully doing what she has always done. (I still have a stripped screw to try to replace and work to do on her cabinet.)

20140429-142110.jpg

Ruthie, originally owned by Ruth Weiden, is a 1929 Singer 66 treadle with Filagree decals, in a Model 4, 7 drawer treadle cabinet. I’m happy to welcome her into my family. Thank you David and Nancy for allowing Ruthie to move in with me. She’s the first treadle to make it into my home. I wasn’t sure where she’d go, but when she was brought in, she was put at the end of my cutting table. She fits, so I think she’ll stay there. Maybe. (I still have another treadle to bring home in a couple weeks.)

20140429-142026.jpg

I’m not the only one who enjoys her soothing rhythm. My 2 youngest boys have taken a delight in treadling away with her.

20140429-142129.jpg

20140429-142140.jpg

You know, I’ve told you before, how doing something creative is relaxing and brain building. Well, you can increase those benefits by treadling. The rhythm of treadling is truly soothing, and it is said that people can treadle longer and with more enjoyment for longer time periods than when using an electric sewing machine. As an added bonus, treadling is good exercise. Need to get those added steps in for the day? Treadle them away.

Have you ever used a treadle sewing machine?

SaveSave

Sew Blessed

I love sewing. I love antiques. Add the 2 together and you have a love for antique/vintage sewing machines. I particularly love the beautiful black, curvy ones, that classic shape of the early 1900’s Singers with black “japanned” paint jobs. Owning an old black treadle machine has always been a dream of mine, particularly a “red head” (red decals). Last year that dream began to take shape–in several steps.

In a spare bedroom at my dad’s sits a treadle. Last year I told him, if it hadn’t already been promised to someone else, I’d like to have it some day–and I’d like to come look at it. When we opened it, we were surprised to find not a treadle machine, not even one that had been converted from a treadle. From my research, I found it to be a 1948 Singer 201-2, a machine that I’d love to (and will) own, even if not a treadle. I’ve already named her Pamela, after my sister who died as a baby in 1948, and since she is coming from my dad.

1948 Singer 201-2 in Treadle Cabinet ~ from Me & My House

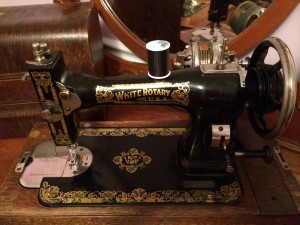
When I told an older lady how excited I was about that, she asked if I’d like to have her grandmother’s machine. Would I?!!! I’d seen it’s bentwood case in a spare bedroom at her house. It was time to find out just what was inside. A 1922 White Family Rotary that had originally been a treadle, but great grandma had put a swing-away motor on it and put it into the bentwood case, making a–very heavy–portable. I had to name her Betty! since she is a White and was “born” in 1922.

1922 White Family Rotary ~ from Me & My House

2 very old machines. Both close to treadles–but not. But cherished for what they are, not what they aren’t.

Since I now had a sewing room that was not also someone else’s bedroom or the schoolroom or playroom, or a hole in the wall in the attic, I started looking more actively for the treadle machine. By now, having studied enough about old sewing machines that I could identify many, Singers at least, I had a growing appreciation for old machines other than treadles. Although I’d looked at many–many times–nothing was ever quite what I was looking for, nor at a price I was willing or able to pay at the time. That treadle, that just surely called my name, never appeared.

Then, God…

decided to pour out an abundance on me–all within about 48 hours.

Last week, I found a machine on Craig’s List, about 100 miles away. It wasn’t a treadle, not even in any type of cabinet or case, but it was only $15 and they said it worked. It was also the only other model Singer made with the same motor as the one on dad’s machine–that didn’t work.  I figured if the motor worked, even if I didn’t like the machine, or it didn’t run, I wasn’t out anything. They were right. She worked beautifully. Just needed a bit of cleaning–and probably some sort of case would be nice. I was now the owner of a 1952 Singer 15-91. I named her Louise, after my sister’s middle name, who was born in 1951 (close enough,) and passed in 1965.

1952 Singer 15-91 ~ from Me & My House

The next day, I ran into a friend. She had noticed my old sewing machine posts, and told me she had one in her garage if I wanted to come look. If I wanted it, we could set up a trade (for essential oils). She didn’t know if it was treadle or not. It was buried in their garage. No treadle. But a cute little 1956 99K in a cabinet. I decided to take it, clean her up and see what she’d do. I had to name her Roxie Anne. 🙂 She came from a Roxanne, Anne is the 5th top name in the 1950’s, in Scotland where this machine was made, and my middle name.

1956 Singer 99K ~ from Me & My House

Not 24 hours later. I received a phone call from my dad’s wife’s daughter. She’d been talking to my dad and he told her about my machines. She has her husband’s grandmother’s machine. She doesn’t sew or have room for it, and no daughters or daughter-in-laws to pass it on to. She’d love to give it to me. It’s a…

1929 Singer 66 TREADLE! Never been converted to electric. Works. And… I just “happen” to be going that way–in less than a week.

Picture to come soon! 🙂

Do you have an old sewing machine? Is there one you want?

SaveSave

SaveSave

What Goes Around Comes Around {How-to}

Years ago I crocheted many baskets, rugs, and other accessories from fabric strips. The rotary cutter, mat and acrylic rulers made it sew easy to create yarn from fabric. That trend ended and I haven’t cut fabric yarn since.
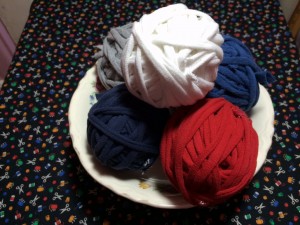
T-shirt Yarn How-to ~ from Me & My HouseBut it’s back! especially in the form of the new trendy T-shirt yarn. Same idea. New twist. With a stretchier yarn. And an even newer tool that can help (even though I don’t have one yet.)

T-shirts. They seem to multiply in the drawers. Our children (hopefully not we) outgrow them. The images start to fade or flake off. They stretch out into weird shapes. So what to do with them? You hate to throw them away, unless they have holes or huge stains.

You could throw them in the rag bag. But there are some better uses. We’ll look at one today, since we’ve kind of been on the yarn theme, and some others at another time.

Just like I strip cut those woven cottons, years ago, we can strip cut these cotton jerseys today, and not even have to buy new fabric yardage to do it.

Here’s how:

1. Line up the bottom of the hem and cut the hem off.
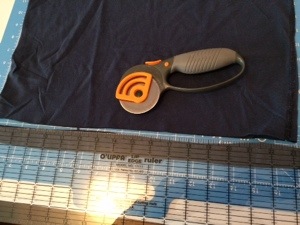
T-shirt Yarn How-to (1) ~ from Me & My House

Tip: T-shirts without side seams are best, but ones with side seams work too.

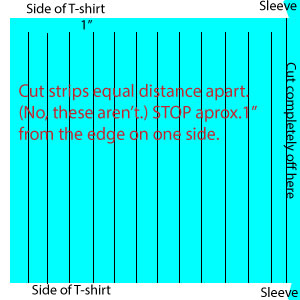
2. Cut evenly spaced strips (1/2″ – 2″ wide, but 1.5-2″ better for braiding than knit or crochet) across the width of the T-shirt. BUT! stop the cuts 1″ from the side furthest from you. IOW, do NOT cut clear across the T-shirt to produce individual rings of fabric.
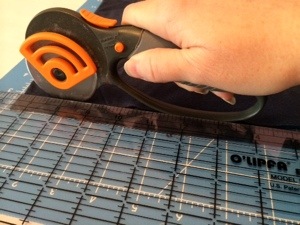
T-shirt Yarn How-to (2) ~ from Me & My House

I’ve cut at 1″ and 3/4″. I measured the “Fettucini” jersey knit “yarn” by Lion that I purchased, and it is 3/4″. I think that is a good size. 1/2″ will give you even thinner yarn, and more yards of yarn per T-shirt.
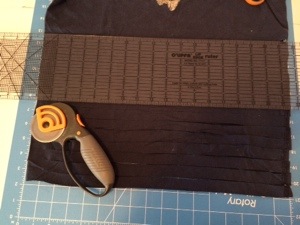
T-shirt Yarn How-to (3) ~ from Me & My House

Realize, the size of the T-shirt will determine the yardage you get from it. Using small children’s T-shirts will require quite a few to get enough yardage to make something. So if you don’t have a lot of T-shirts the same color, you will get a scrappy striped effect. From a men’s small T-shirt, I get about 25 yards of 1″ wide, and 36 yards of 3/4″ wide strips.
shape cut plus
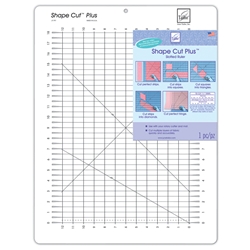
Oh, I about forgot to tell you about a great tool that can help make this go really fast and give great results. (Perhaps I about forgot because I don’t have one yet.) The Shape Cut Plus is a slotted rotary cutting guide with slits every 1/2″ to guide your rotary cutter. Make your strips 1/2″ wide or in any multiple of 1/2″ that you desire. If you plan on cutting a LOT of T-shirts into yarn, or if you do strip piece quilting, you’ll find this ruler (and others in this line) invaluable. The Quarter Cut Slotted Ruler will cut at 1/4″ increments, but is smaller, for a smaller area.


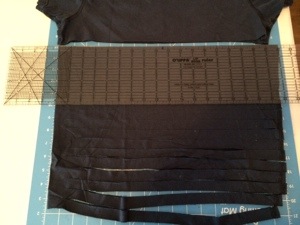
3. When you get about to the arm pit or where an image begins, cut your strip clear through to the end, cutting the top part of the T-shirt apart from your connected strips. The ink from the images will not create a good yarn. Don’t include them. This also goes for if their is any small logo at the bottom or such, cut it off before beginning your strips. And one more note, same goes for if there is a tag in the side seam. Cut it completely off, or you’ll have a hard lump there.
T-shirt Yarn How-to (4) ~ from Me & My House

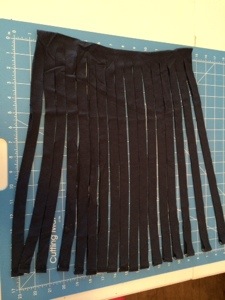
4. Now you have several fringe-y looking strips all connected on one side.
T-shirt Yarn How-to (5) ~ from Me & My House

My poor illustration that may be clearer than the pics.
tshirt-yarn-1

The magic happens with our next cuts to make one continuous long strip of yarn. Lay your cut piece out so you can see the whole part that is hooked together, (turn so side seams are in middle, not at top and bottom.) Begin at the left edge (where the hem was) and cut (beginning even with where the lower cuts start,) at a diagonal to the first cut where the upper cuts end.
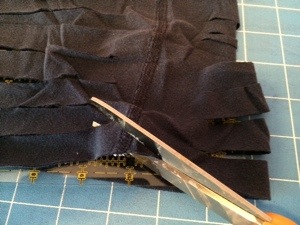
T-shirt Yarn How-to (6) ~ from Me & My House

Then diagonally lower cut #1 to upper cut #2, lower cut #2 to upper cut #3, and so on.
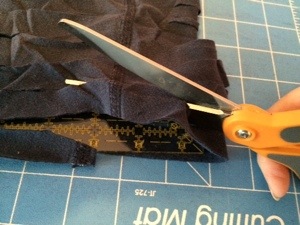
T-shirt Yarn How-to (7) ~ from Me & My House

When you reach the last bottom cut, you will cut diagonally off the edge, and you will have 1 long continuous strip. (I also cut the seams off the ends, if the t-shirt has side seams like this one does.)
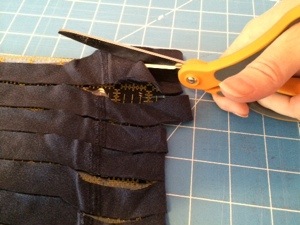
T-shirt Yarn How-to (8) ~ from Me & My HouseMy poor illustration that may be clearer than the pics. The shirt is turned here so the side seam (where connected), is in the middle, not along the top.
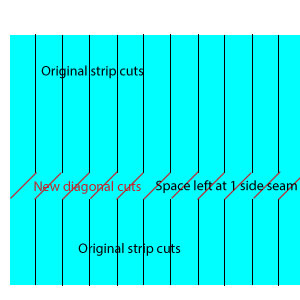
tshirt-yarn-2

5. Stretch out your yarn, really stretch it out. The edges will curl. I grab from side seam to side seam and pull, just like taffy. Then move on to the next side seam, stretch, across the whole length of the yarn.
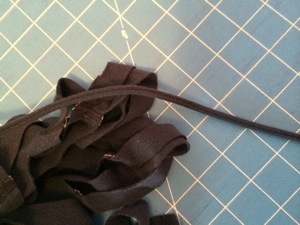
T-shirt Yarn How-to (9) ~ from Me & My HouseT-shirt Yarn How-to (10) ~ from Me & My House

6. Then wind yarn into a ball. Start by wrapping around a couple fingers. Wind.
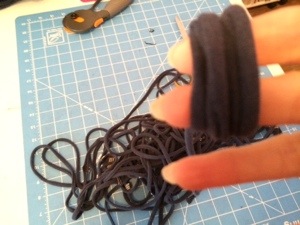
T-shirt Yarn How-to (11) ~ from Me & My House

And wind.

T-shirt Yarn How-to (12) ~ from Me & My House

And wind.

T-shirt Yarn How-to (13) ~ from Me & My House

And wind. Now you have a ball of yarn to crochet or knit into all kinds of useful things.
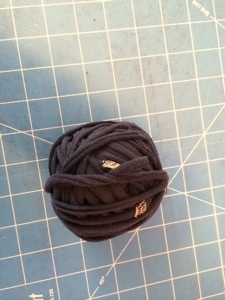
T-shirt Yarn How-to (14) ~ from Me & My House

A scarf (or the beginnings of one pictured here.) Crocheted with a size 50 crochet hook! (6 stitches per row. First row single crochet, rest double crochet.)
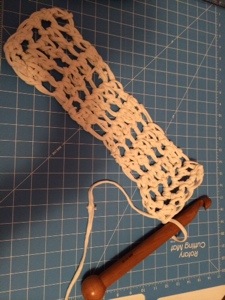
T-shirt Yarn How-to (15) ~ from Me & My House

A trivet for a hot pan, or a mug rug, or the beginnings of a floor rug. (Chain 5, slip stitch into ring, ch 3 dc 9 (making 10 stitches), join, ch 3 dc in same stitch and 2 dc in each stitch around (making 20 stitches), join, ch 3, *2 dc in next, dc in next* around, 2 dc in last. Finish off or continue for larger circle.)
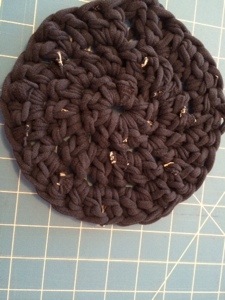
T-shirt Yarn How-to (16) ~ from Me & My House

Or dish rags.

Or a purse or tote bag.

Or ….

Don’t throw the tops and sleeves of your shirts away yet. I’ll be back with more tips for repurposing those into useful things too.

Do you make T-shirt yarn? What have you knit or crocheted with it?

Created to Create

Created to Create ~ from Me & My House“In the beginning God created…” And “God made man (male and female) in His own image.” We were created to create!

Are you sometimes stressed? All mamas are, in fact everyone is, at times. Did you know creativity reduces stress? We tend to think that when we’re stressed we should just veg out (or resort to “retail therapy”). Neither are good solutions, and neither really reduces stress. In God’s design, stress is reduced through being creative, not through consuming without productivity.

Many times in our stress though, we think we don’t have time to be creative. We think of creativity as something that drains our time and energy, when in reality it does the opposite. It uses time productively and calms us, without tiring us. I know the times that I’ve quit creative endeavors for a season, usually because I thought I didn’t have enough time for such, I’ve only become more stressed, and gained no more time. I didn’t get any more other things done.

Granted, there is a balance. We can’t just stop doing necessities in our home making and other responsibilities to be free spirited in our creative areas of desires-at-the-moment. But, we can add creativity into just about everything we do. We can make even most mundane chores more fun, with a little creativity. Even if its just a creative way of getting it done more efficiently, so we have more time for our more fun creative projects (where the results will last a little longer than a clean toilet).

What type of creativity de-stresses you will be different for each person. There are creative activities that can add more stress–for us. They aren’t our “outlet”. If you’ve never really released your creativity, it may take some time to find what your creative outlet is (outlets are.) But you can have fun experimenting. Try various things until you find which ones are relaxing (calming/de-stressing) to you. Some people develop one creative passion, and it becomes a lifelong focus. Others prefer a variety of creative activities. At various times, various creative activities may be the one for that moment.

I believe the various home arts can be great creative outlets for many of us. They are much more than a hobby (which could be more consumptive than productive.) They are a way to bless our families, and beautify our homes–while enjoying what we do. We can also use that creative productivity to make gifts to bless others. There is so much variety in the home arts, we don’t have to look elsewhere for our expression, there is probably a place in what is considered “home arts” that fits us.

Women in days of old needed to be fairly proficient in all of the home arts–well many, at least. Today, women have much more “freedom” to not be creative. We can pay someone else (more likely, some company) to do it all for us. Yet, there remains a more true freedom in not only knowing how to do for ourselves, but also in actually doing it. And, we receive that added benefit of stress reduction. We are blessed to be able to pick and choose which home arts we will work at.  If we want, we can be a Jill-of-all-trades, like our foremothers were, doing a bit of this and a bit of that. But we don’t have to do a certain amount of “this”, to ensure our families will be clothed (or whatever). We are free-er to focus on the areas we prefer. We may thrive in the fabric arts but only dabble in the paper arts. We may decorate but not produce yarn work. We may love to make creative food arts but not do much needle work. The form of the home art is not as important as the creative aspect and just doing it–using your mind and your hands to express the creativity God has placed in your heart.

One last point, for those who feel they are not creative. Like many things in life, you use it or you lose it. Just start somewhere. Start small. Try different things. You will benefit as you learn many different things on your way to finding the ones that fit you. Some may not be a good fit now, but will be in the future. The more you exercise your creativity, the more creative you will become. As you are just beginning, it may seem like you are wasting time and not really accomplishing much–that’s OK!! You are expressing creativity! But, as you practice/play, you will soon find your stress level decreasing and your creativity level–and productivity–increasing. And yourself, your home, your family will be blessed with the results, and you will have gifts for others, and perhaps things to sell to others. Such a win-win-win situation!

Why don’t you give it a try? Instead of spending your time  just browsing Pinterest for cool projects you’ll never actually make (creativity consumption), why don’t you find just one thing (to start) that you’d really like to try, and actually get started on it (creative production)? Looking for inspiration is good (and there is much of it to be found on Pinterest,) but finding a project and getting started doing it is better.

What are your creative outlets in the home arts? What do you enjoy doing creatively to bless yourself, your home, family, and friends? Join us on Pinterest, on our Created to Create board for Home Arts we’re actually creating.

SaveSave

Yarn, Round 2

When mama starts making things it doesn’t take long till she starts hearing, “Make me one too?” It doesn’t matter what you are making, whatever it is that you make, your lovies will want you to make them one.

While I was completing the scarves in the last post, and another as a gift, the requests came in. “Is that for me? Will you make me a pink one?” “I need a warm, winter scarf.” And that led to 4 requests.

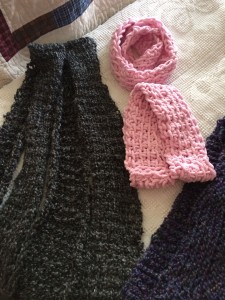
Kid’s scarves. Little yarn. Quick and easy. I can do that. But of course, I needed a different design. The arm knit produced too large of loops for small children, and wasn’t exactly a manly look. I decided on Tunisian stitch for all of them.

Tunisian Crochet Scarves ~ from Me & My House

A few months ago, a fellow yarny asked if I did Tunisian crochet, and told me I’d probably like it since it is a knit look with crochet speed. I finally decided to take a look at it. Oh! it’s just the same thing as what we used to call the afghan stitch.  Yes, I’ve done that. And yes, that’d be great for 4 quick children’s scarves. (So glad I didn’t have to learn something new to do these.) (Youtube how to videos for Tunisian foundation row and Afghan/simple stitch.)

The pink girls’ scarves are Infinity (circular) scarves in Bernat Baby Blanket, a soft minky-like yarn. The grey, boys’ scarves are done in Lion’s Homespun (Edwardian). To the right, the purple scarf, is my “practice” run in Lion’s Homespun (Barrington). Although you usually use a Afghan Crochet Hook for Tunisian crochet, since I wanted a larger stitch, I used a straight Q Crochet Hook (that I use for crocheting fabric rugs, baskets, and such.) Since I was only doing a few stitches wide, I figured the short length would be OK, and it was. (You can always wrap a rubber band around the end to keep your stitches from coming off, if you have that trouble.) The girls’ scarves are 4 and 6 stitches wide and the smaller one a little over 2.5 feet, and the larger close to 4′. The boys’ scarves are 6 and 8 stitches wide. To do it again, I’d go 8 and 10, as the Homespun yarn really curls up. The smaller boys’ is 4+’ long and the larger 5+’.

Happy. Happy. Mama gets to create. Children love what they get.

Do you do Tunisian crochet? What do you like to make with it?

What do your children/grandchildren ask you to make them?


[subscribe2]

A Yarn About Yarn

Whoever got the idea that being a homemaker is boring must not have been one or around one. We have one of the most diverse jobs in the world. It is anything but boring. Always new situations, new problems to solve, new joys to celebrate, and new projects to work on. Whatever that may be.

That said, I interrupt my posts on quilts to interject some yarn work–fancy yarn, at that.

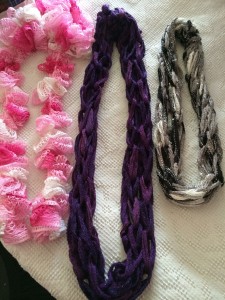
sashayscarves

After successfully tackling a scarf for a Christmas present, a couple weeks ago I wanted to figure out what to do with some specialty yarns I have. I bought them because they were so pretty, but I didn’t have a clue what I’d do with them. I decided they’ve been sitting in my stash too long and it was time to figure that out. In trying to decide what they’d be good for, I decided to learn a new technique. Arm knitting. {Link to a youtube video that is pretty close to how I do the actual arm knitting. My scarves are my own pattern.}

Now, I’ve done plenty of knitting before, but it’s not one of my most used skills. I usually prefer to crochet, because I can complete projects quicker with it. But I have to admit, I’d never used my arms as knitting needles before. I was game to try when I saw you could complete a scarf in a half an hour. (Quick, cute, useful projects are usually good motivation for me.)

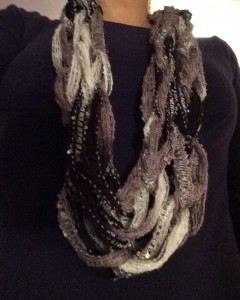
Panda Arm Knit Infinity Scarf ~ from Me & My House

20 yards Sashay Sequins. Knit 6 chains wide, approx. 45″ long. Leave an arm span+ length for binding off, and connecting the ends for Infinity style.

I also don’t wear a lot of scarves, mainly because many of them are too bulky for me. I feel buried in them. But we all know the solution to not finding styles you like is to create your own. Necessity is the mother of invention, they say.

So I set out to solve all these problems. And I’m quite pleased with the results.

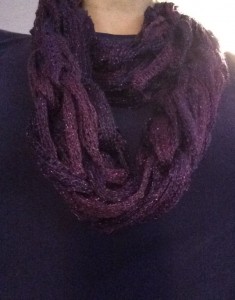
Amethyst Arm Knit Infinity Scarf ~ from Me & My House

30 yards Sashay Metallic. Knit 6 chains wide, approx. 5′ long. Leave an arm span+ length for binding off and connecting ends to make Infinity style scarf.

The yarns I started with were Sashay (Tutu – Pink), Sashay Sequins (Panda- Black & Grey) and Sashay Metallic (Amethyst). I saw that yes, arm knitting is pretty much like regular knitting, only using your arms as knitting needles. And yes, you really could complete a scarf in 1/2 hour. And yes, I could modify them to suit my style and I’d actually wear them. Talk about win-win-win!

After doing a couple arm knit infinity scarves–a longer one that would double loop, and a shorter one that will just single, I decided I wanted to do something different with a third Sashay (the “plain” one) I had on hand. I wanted for more of its own design to show through, so decided to crochet it into a ruffle scarf. I love the way it turned out too. {A youtube video on how to crochet Sashay yarn. I didn’t lock the chains or use near as many loops as she did.}

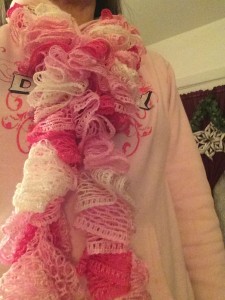
Chrocheted Ruffle Scarf ~ from Me & My House

30 yards “Tutu”, I *think* I did every other hole, and 5 links per single crochet. (10 made it way too full and short.)

All this playing with yarn even motivated me to organize all my yarn and gather all my needles/hooks and patterns back together into one place. Which led to a couple little girls asking when I was going to make scarves for them, pink ones. And a couple boys saying they could really use scarves for the cold weather. So stay tuned for part 2 of this “yarn”.

Have you ever arm knit? If so, what did you make?