Revisiting Not Milk

It’s been several years since I posted our experiments in making milk substitutes. We have been dairy-free for close to 20 years. Over those years we have tried soy milks, rice milks, raw goat’s milk and many others. For the last at least couple of years we have landed at homemade Almond Milk, (with raw goat’s milk being my 2nd choice.) So it’s time to do an update on making Not Milk, in this case, the easiest and highly healthful Almond Milk.

  • 1 cup Raw (organic) Almonds
  • 6 cups Purified Water

Soak Almonds in 2 cups Water several hours (overnight).

Drain and rinse well.

Put soaked Almonds and 4 cups water in high performance blender, and blend 45-60 seconds.

Pour through a Nut Milk Bag (or Unbleached Cheesecloth) into large bowl (I use an 8 cup Pyrex / Anchor Hocking measuring pitcher). Squeeze all the Milk out and pour into a 1 qt. covered pitcher or jar and Refrigerate.

Almond Pulp (remaining in bag/cloth) can be sealed in a container and refrigerated or frozen to be used in desserts, or dehydrated and ground into Almond Meal/Flour.

Options:

Tip! If you desire a “whiter” milk you can peel the almonds after draining and rinsing. Rub each almond between your fingers to remove the peel.

Tip! You can flavor the milk with Real Vanilla (bean, extract, flavor) if you desire.

You can also sweeten it with Raw Honey, Real Maple Syrup, or Dates. Just stir in the Honey or Maple Syrup after blending – about 2 tsp. – 2 Tbl. depending on how sweet you want it. Some also like to add just a dash of unrefined salt.

To sweeten with Dates, add 3-4 pitted dates, cut up, to the blender and blend with the almonds. If adding the dates, you will get more of a cream color, even if you peel the Almonds.

[subscribe2]

Valentine’s Super Shake

I interrupt all these fun paper arts ideas with an easy, awesomely yummy, super good for you recipe in honor of Valentine’s day. I made this wonderful Valentines Shake for breakfast (after my Barley Max – so I did get my greens, even though I didn’t put them in this, this time.)

Valentine's Shake (Strawberry Cacao) ~ from Me & My House (recipe at link)

  •  1 cup raw milk (homemade Almond milk or if you use, raw Goat’s Milk)
  • heaping Tbl. Hemp Seed
  •  big handful frozen Strawberries (organic)
  • frozen Banana (mine was huge, so actually about 2/3 banana)
  • a tidge of raw Cacao Powder (overfull tsp.)
  • homemade Vanilla (about a tsp.)

Mmmmmmm good.

Make and enjoy!

See my Valentine’s post on my B4God.org site.

Food Friday: Coco Balls

These are one of my good-goodies, meaning they taste great and are a great treat, but are also Good for You-Naturally!™ These are a great holiday treat, taken from Good for You-Naturally!™ Weekly Menu & Recipes ~ Level 1 – with over 60 recipes and complete menu for transitioning to whole foods that are Good for You-Naturally!™ – and Holiday Delights.

Coco Balls

Yield: about 20 1″ balls

  • 1 cup Raw Almonds
  • 1 cups Dates
  • Purified Water, to cover Dates
  • 2 Tbl. Raw Carob Powder (or Raw Cacao Powder)
  • 1 teaspoon Real Vanilla
  • ¾ cup dried Coconut +
  • ¼ cup dried Coconut
  • Optional: 2 Tbl. Raw Honey
  • Optional: 1/2 tsp. ground Cinnamon

1. Soak pitted Dates in Water to cover for 1-2 hours.

2.Remove Dates from Water. (You can save the water and use it in a Smoothie or other sweet recipe.

3.Grind Almonds to a coarse powder in food processor or blender. (Processor recommended if you have it.)

4.Blend in Carob Powder, and Cinnamon, if using.

5.Add Vanilla, Honey, and Dates,. Process till smooth. In the Food Processor, this will form into a ball after adding Dates

6.Add 3/4 cup Coconut. Stir (squish) or process in.

7.Roll into approx. 1” or so balls.

8.Roll balls in remaining Coconut.

9.Refrigerate or eat.

Tip! If you prefer a non-Coconut version, leave it and the honey out. Make a very simple version with just Almonds, Carob Powder and Dates.

Tip! This can be done in the blender, but I’d recommend doing your Almonds first. Removing them from blender. Then blending your Dates, Honey, and Vanilla (along with any of the soak water needed to make a paste.) Then mixing Almonds and Dates together by hand (truly by hand, kneading together.)


Food Friday: Cream of Broccoli Soup

Creamy soup for cold nights. A family fave with whole wheat bread straight from the oven, and a veggie tray. As always, a quick and easy, family friendly recipe that is Good for You-Naturally!™

Cream of Broccoli Soup

Serves approx. 3 (we triple this for our family of 8)

  • 3 cups veggie (or chicken) broth
  • 1 head broccoli, diced
  • 1 small onion, diced
  • 3 Tbl. real organic butter
  • 3 cups milk, homemade almond or raw goat
  • ⅓ cup whole wheat flour, fresh ground

1.Prepare veggies.

2.Cook broccoli in broth.

3.Saute onion in butter.

4.Blend above with 1 cup cold milk, till smooth.

5.Add to one more cup of milk and heat until bubbly.

6.Shake flour with last cup of milk.

7.Whisk flour and milk into soup. Cook until thickened.

If you like the cheese thing, grate a little on top of each bowl after dishing up.


Food Friday: Apple Crisp

It’s getting cold and that means some mornings we want more than just our fresh juice or green smoothies. We want warm belly. One of our favorites is Apple Crisp. I say this recipe makes 4-6 servings; we double it for our family of 7-8. But that’s for eating it by itself for breakfast, not as a dessert after supper, which you also could do. Recipe from Good for You-Naturally!™ Weekly Menu & Recipes ~ Level 1 – over 60 recipes and complete menu for transitioning to whole foods that are Good for You-Naturally!™

Apple Crisp

  • ⅓ cup Raw Coconut Oil or Organic Butter
  • ¼ cup Raw Honey
  • ⅓ cup fresh-ground Whole Wheat Flour OR **fresh ground Oat Flour
  • 1 cup rolled Oats
  • ½ teaspoon ground Cinnamon
  • 2 – 2 1/2 cups Apples, cored and sliced (about 1/4” thick) (or other fruit)

Cream Coconut Oil and Honey Lightly cut in Flour, Oats and Cinnamon (with fork – or mix with hands) Spread Apples evenly over bottom of 2 qt. rectangle baking pan (about 7×11) or square cake pan Crumble Topping over Apples Bake at 350° for 25-35 min. until Apples are tender.


Tip! Oat Flour is simple to make with Rolled Oats. Just toss Oats into the blender and blend until flour.

Tip! Double or Triple this recipe will fit in a 9X13 pan.

Tip! Make very cute individual servings, by dividing ingredients out into 1/2 pint, wide mouth canning jars to bake and serve.

Bon Appétit!


Decadent 3 Layer “Raw” Brownies

I just made the yummiest “death by chocolate” type, 3 Layer brownies. The base layer is brownie. The middle layer is a cream (almost mousse like) with peppermint. The top is ganache.  I adapted a recipe I found online. Oh, and it’s a “raw food” recipe – no baking – and Good for You-Naturally!™

It’s close enough to Friday to make this a Friday Food post, especially since so many have asked for the recipe. So here goes….

Decadent 3 Layer “Raw” Brownies

Brownie Layer

  • 3/4+ cup raw almond flour* (see below)
  • 1/2 cup raw cacao powder
  • pinch nutmeg
  • very small pinch unrefined salt

Mix together. Add:

  • 1/4 pure maple syrup
  • 1/4 tsp. pure vanilla extract (mine’s homemade)
  • approx. 2 Tbl. pure water

In food processor, add maple syrup and extract to dry ingredients, process. Gradually add water to get just wet enough to be all mixed and hold together – brownie consistency. Press into small pyrex rectangle pan.

(This is a bit different than my regular bRAWnie recipe, which would also work as a base – but the maple syrup in these is yum.)

Cream Layer

(This makes twice as much as needed for this small pan. But my food processor wouldn’t do the half-size recipe. I left half of this cashew cream without the cacao in it for another use.)

  • 1/4 cup fresh coconut milk (blend coconut meat with coconut water)
  • 2 Tbl coconut butter (Artisana brand is what I have)
  • 1 cup raw cashews, soaked
  • approx. 20-25 drops Sweet Leaf stevia drops (plain or peppermint) and
  • 4-6 drops doTerra Peppermint Essential Oil  (whatever to get the right sweetness and as pepperminty as you like – since this was my first time making this, I used a combination of these trying to get just the right mix. Next time I’ll get more precise.)
  • 2 Tbl. raw cacao powder

Process until smooth and creamy. Spread about 1/2 on top of brownies and refrigerate to set.

Ganache Topping

    • 1/2 cup pure maple syrup
    • 1/2 cup + 1-2 Tbl. raw cacao powder (told you this was death by chocolate!) 🙂
    • 2-3 Tbl. raw extra virgin coconut oil
    • 1/2 tsp pure vanilla extract
    • 1 Tbl  coconut butter

(Again I had to do a bit of adjusting, by adding a bit more cacao and the coconut butter to get a thicker consistency. You want a soft creamy spreadable texture. Not as stiff as frosting, but not runny.)

Process till soft and creamy. Spread on top and return to refrigerator.

(This Ganache would make a scrumptious fudge topping for ice cream, or frosting for cupcakes, or just eat it with a spoon.) 🙂

You could also double the brownie recipe, and omit the cream layer for a plain “frosted” brownie.

Mm-mm good.

* Almond flour – Get 2 for the price of one. I make almond flour from the pulp leftover from making almond milk. (Almond milk instructions in Good for You Naturally!™ Weekly Menu & Recipes – Level 1.) Dehydrate almond pulp till dry, then blend/process into flour.

Friday Food – Coconut Kefir

Do you like a little fizz? Carbonated beverages are so NOT Good for You. But I found a coconut kefir I liked – I splurged on vacation for this Good for You fizzy drink – so I decided I’d give it a shot to make it myself. I can’t afford to buy those things often – and even though the ingredients were “good”, I knew they weren’t all necessary in a homemade version.

The fizz isn’t the main reason for drinking kefir though (and they aren’t as bubbly as soda pop). Kefir is Good for You because it is loaded with probiotics that help build gut health. Many (most) Americans have destroyed, or at least significantly weakened their gut flora by diet and anti-biotics. Eating and drinking fermented foods with Live cultures is a good way to help restore them. This Coconut Kefir is one of the best tasting ways, IMO, (as is raw goat milk yogurt).

I used a kefir starter packet (because that’s what I had access to. I hope to get some kefir grains sometime when I can find them, to give them a try). [Update 2016: I have now been using water kefir grains for a few years. Will post an update on my Good For You-Naturally! blog.] Anyhow, you just add the kefir starter to fresh (or I’ve heard canned works too – but I want fresh) coconut water (from a young Thai coconut, not the old “mature” brown ones). And let it sit. How “Freedom & Simplicity” can you get?!


Good for You-Naturally!™ “Pop”

  • 1 packet kefir starter (a little over 1 Tbl. in my packet)
  • 4 cups fresh coconut water ( to the 1 packet for the brand I used. Check your brand for correct proportions.)
Yes, just 2 ingredients. A couple optionals are below.

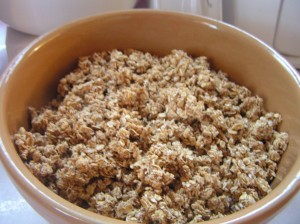
Open Young Thai Coconuts and drain water into glass container. You should get between 1 and 1.5 c. of water per coconut. So you’ll need 3-4 coconuts to get a quart of water. (You may want to empty the coconut water into a larger container and then pour into your Mason jar or whatever you are using to ferment in.) (Find a youtube video to show you how to open it. I cut the husk off the top, then give it a good whack – or a few – with a sharp heavy knife, and pry the top open.) Scoop the Coconut meat out and use in your Green Smoothie, or freeze in an airtight bag to use in a recipe later.

Stir kefir starter into coconut water in a glass jar – with a NON metal spoon. (The experts say to heat to 92° first. Room temp works just fine for me.) [Or just put your grains in. You’ll need 2 Tbl. water kefir grains per 2-4 cups coconut water.] Leave some head room. Cover – but don’t screw a lid on. This gets fizzy/bubbly, and could potentially blow. Let set, on the kitchen counter is fine, for 24-48 hours, until milky/cloudy and bubbly. (The experts say 70°-78°.) (It may take longer. I’ve heard 4-6 days for canned coconut water.) I don’t stop just when I see bubbles starting, but wait until the top is pretty foamy looking. It will get more tangy the longer it ferments.

At this point you can drink it or screw the lid on it and put in fridge or add fruit and ferment it longer. In the refrigerator it should last a few weeks. But I never have it that long.

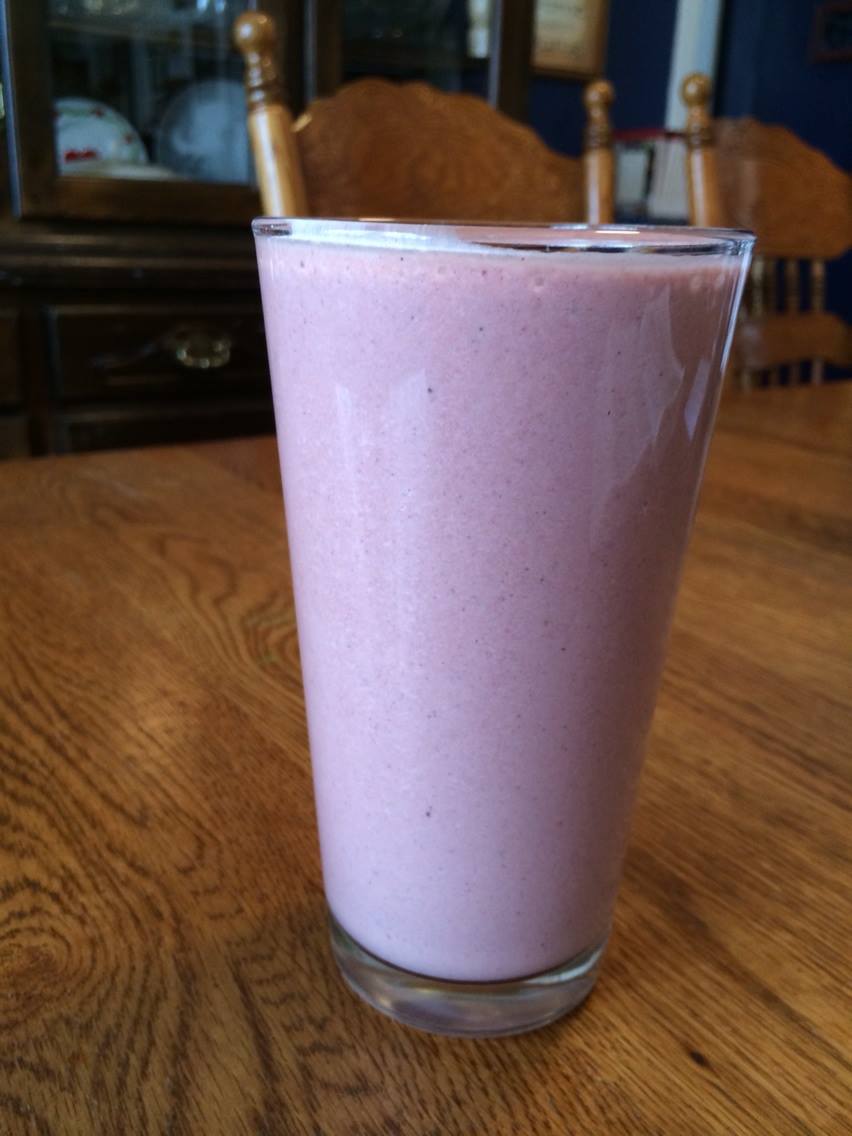
You can drink it straight, or add fresh fruit to it – strawberries (3-4 per serving), or lemon ( a few slices – or juice of,) or whatever fresh or dried fruit you’d like. I like strawberries blended with the coconut kefir in the blender. If you want it sweeter, you can add a truly natural sweetener, like couple drops of SweetLeaf stevia extract (or real, green stevia leaf powder,) in it before drinking.

You can also do a double ferment, by adding about 1/4 c. fruit, and letting it sit on the counter (covered) another day or 2 – even more bubbly. Strain or blend before drinking. When refrigerated, the fizz may be reduced  if left in the fridge very long. But the probiotics are still in there, alive but not as actively growing.

Before adding fruit, refrigerating, or drinking it all! – remove 1/4 cup to start a new batch. [If using grains, you just strain out the grains and add the grains to new coconut water.] Add about 4 c. fresh coconut water to the 1/4 cup “starter” kefir [or grains], stir and follow as before. The packet starters are suppose to give 6-7 or more batches before they fizzle out. I’m going to need more starter (or find grains) AND buy more coconuts real soon. I may have to try to make water kefir in the meantime.

[To keep your grains healthy and growing well, every week or so refresh them by culturing in filtered/spring water with 1/4 cup coconut sap sugar instead of fresh coconut water. I warm the water to dissolve the coconut sugar, then cool before adding the kefir grains.]

Do you make kefir? What about any other fermented/probiotic drinks or foods? Comment below.


Learn to make another Good for You-Naturally!™ cultured/probiotic food in our Freedom & Simplicity™ Guide to Yogurt Making.


Friday Food – Crunchy Granola

fridayfood2.jpgAs per request, here is my favorite granola recipe. Get this and over 60 other Good for You-Naturally!™ family-friendly, easy to make, budget conscious recipes in Good for You-Naturally! Weekly Menu & Recipes – Level 1. See demos of many of these recipes – and TASTE them too, at the Good for You-Naturally!™ Seminar LIVE!


Good for You-Naturally!™ Maple-Almond Granola

  • 1 cup pitted Dates
  • 1/2 cup Purified Water
  • 1/4 cup Real Maple Syrup
  • 1/4 cup Raw Coconut Oil
  • 1 tsp. pure Maple Flavoring (or organic Vanilla)
  • 1 tsp. ground Cinnamon
  • 1 cup Raw Almonds
  • 8 cups Rolled Oats
  • 1/2 cups dried, shredded Coconut

granola• Blend (or process in food processor) Dates, Water, Maple Syrup and Coconut Oil until smooth. (Add a little more water if you need to, to keep it blending. Medjool Dates will blend creamier than drier dates, like Deglet Noors.) Stop and scrape down the sides as needed. (Food Processor actually works better if you have one. But, add the water a little at a time, or it may splash out at the beginning.)

• Chop Almonds. (If you have a food processor, you can add them to your Date mix, after processing it, and process again until nuts are small chunks.)

• Blend or mix in Maple Flavoring/Vanilla and Almonds.

• Stir Oats and Coconut together in a large bowl.

• Mix Date mix into Oats and Coconut, with hands is easiest.

• Crumble onto solid sheets for dehydrator (or cookie sheets if you don’t have a dehydrator).

• Dehydrate at 105-110° overnight (or so, until dry) for raw granola. If you don’t have a dehydrator, dry in oven at lowest temperature, 45 min. to a couple hours, until dry. (This will depend on what your oven’s lowest temp is.) Stirring every 10-15 minutes.

• Cool and break into clumps.

• Store in air tight container.

• Serve with Raw Almond or Goatʼs Milk

 This is just one of the over 60 Recipes in Good for You-Naturally! Weekly Menu & Recipes ~ Level 1, a family-friendly menu plan and recipes to help you gently transition to a lifestyle of eating for your health. It also includes and shopping guide for real foods and so much more!


Friday Food – Maple Oatmeal-Raisin Cookies

These super yummy cookies are considered “raw”. They are dehydrated at low temp, rather than baked, to retain all their nutrition goodness.

If you follow a high raw lifestyle of eating, or if you just want to increase your intake of yummy Good for You-Naturally! foods for better health, give them a try.

Lisa’s (Raw) Maple Oatmeal-Raisin Cookies

2 cups whole oat groats (organic)
3/4 cup pure maple syrup (organic)
2 Tbl. raw EV Coconut Oil (organic) (melted or not)
1 tsp. ground cinnamon
1/4 tsp. ground nutmeg, optional
1/4 tsp. ground allspice, optional
1 cap/tsp. vanilla
1 cup organic raisins
1/2 cup chopped raw walnuts, optional (organic)


  • Soak oat groats in more than double the amount of pure water (4+ cups), overnight.
  • Drain well.
  • Process oat groats and maple syrup in food processor (or Blend in blender) until semi-smooth.
  • Mix in coconut oil, spices, vanilla and raisins (and nuts.)
  • Drop by spoonful on dehydrator solid tray and flatten.
  • Dehydrate overnight at 105°.
  • Turn over onto mesh screen and dry a few more hours until desired chewiness.

These are awesome cookies that taste like “regular” oatmeal raisin cookies (and look like them too, just not “browned”.)

You can use raw honey or pitted soft dates (or raw agave nectar), if you prefer, but the maple syrup gives a GREAT taste to these.

I usually add just cinnamon to my oatmeal cookies, but these other spices added a bit different flavor that is good too.

If you don’t have a dehydrator yet, click here to see what to look for when buying a dehydrator and the ones we recommend.

from my Good for You-Naturally! for Life online course


Tooth Powder Recipe

Are you looking for an alternative to harmful, chemical laden toothpastes? We’ve used several natural toothpastes. But if you’d like something much cheaper that you can make yourself, homemade toothpowder to the rescue. Also, although a “natural” ingredient, glycerin (in many “natural” toothpastes) has been found to not be the best for helping prevent tooth decay.


Whether you’re looking for a healthy alternative, a cheap alternative or just something “on hand” to get you through a pinch, homemade toothpowder is a good choice. Super simple, cheap, convenient, and works great.


Of course, you could just use plain baking soda. That would be great all on its own. But if you want a bit more complex recipe, with a few more benefits, like helping prevent tooth decay, tasting great, and giving you minty fresh breath, read on.


Good for You-Naturally! Tooth Powder

1 Tbl. baking soda

1/4 tsp. unrefined/sun dried sea salt

3-4 drops On Guard Essential Oil

6-8 drops Peppermint Essential Oil  – both from  doTerra

Mix the salt into the soda well. I use a toothpick to stir. Add the oils and mix in well. Store in a small container with an air tight lid, preferably a glass container ( but plastic, like a Tupperware mini midget or a small bottle with a flip top, small hole in lid with an over-cap, also works.)

(If you don’t use doTerra essential oils, be sure the oils you use are safe for ingestion. We choose doTerra for their supberb therapeutic-grade quality and safety. IOW, they work–not just smell good.)