Papercrafting Supplies 101: Tools

I’ve been known to say papercrafting is my type of “art” because all you have to know how to do is cut and paste. That isn’t too far from the truth. So far in this series we’ve looked at paper, the key component in papercrafting, and adhesives, the pasting part. Today we’re going to look at the 3rd part of that equation, the cutting, and a handful of other basic tools for paper crafting.

Cutting is necessary for most paper crafts, and if you’re a lot better than I, perhaps you can do it with just a pair of scissors. But most everyone uses a more accurate and faster tool, a paper trimmer. Quick, straight and accurately measured cut lines from a paper trimmer make paper crafting easy. You’ll still want a good, sharp pair of scissors for more detailed (and more rough) cuts, but for most of your cuts, that are just straight lines, get a paper trimmer.

mspapertrimmer
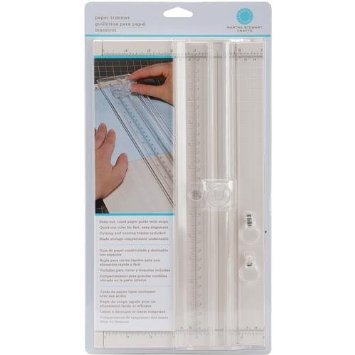
The most common, and usually least expensive, type is the sliding blade trimmer. These trimmers have a small blade that slides up and down in a groove that lays over the paper. It can cut paper and cardstock, but not thicker materials, and usually not more than a couple layers at a time. Many of these trimmers are narrow and have a swing out arm for measuring larger cuts (up to 12×12″ paper). They are light weight and portable, fast and easy to use, and accurate. You can also make partial cuts with them, just part way down the paper, or even only in the middle of the paper, with the measurements down the length. Some of them come with a separate plastic “blade” that can be inserted when you only want to “score” (crease), not cut the paper, (or you can use a bone folder in the groove to make score lines also.) The blades on these trimmers need to be replaced, pretty often if you use them a lot. They will leave a ragged edge when they are getting dull. But blades are inexpensive and easy to replace–just always keep spares on hand. Some feel that the swing out arms don’t give real accurate measurements on larger pieces. (The one pictured, and that I own, has a pull out arm which I think is more accurate.) Most people start with sliding blade trimmer, and usually keep one on hand, even if they add and use the other types.

I own the the Martha Stewart trimmer pictured, and also a Fiskars, perhaps the most well known brand. My Fiskars is older and not as accurate, in my opinion. My Martha Stewart has both cutting and scoring blades, a full length slide out arm, and  a small magnifier on the blade holder that magnifies the measurements down the length of the blade guide. I really like the way it works, but its blade seem to dull faster than any of my other trimmers.

rt200nThe next type of paper trimmer is the Rotary Paper Trimmer
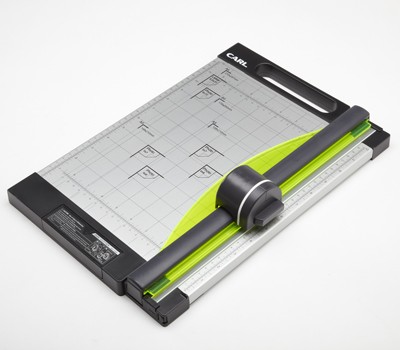
. Many of these look much like the sliding blade trimmers but the blade is round and rolls down your paper along the guide. Rotary trimmers can be found with both the swing out measuring arm like most of the sliding blade trimmers, or full width. These trimmers usually cost a bit more than the sliding blade type, but are available in all price ranges. They are very accurate, cut very clean edges and can make very small cuts. This is what I use when I need to take off “just a sliver”. It somewhat bothers me that the entire bar area isn’t see through, like on the sliding blade trimmers, making it harder to cut narrow papers, in my opinion. Also with the round blade, it is harder to make accurate partial cuts, stopping at the exact spot you’d like. Be sure to get a rotary trimmer with plenty of measurement markings down the length by the blade (mine, not pictured, doesn’t). Rotary blades last longer than sliding blades, but cost a bit more to replace. Rotary trimmers also have a narrow cutting mat under the blade that has to be replaced occasionally, when it’s cut up. A bad cutting mat results in inaccurate cuts. Some of the rotary trimmers have optional blades that make various decorative cuts.

My rotary trimmer is a Carl brand (same brand as pictured). I love it’s accuracy and ability to make clean sliver cuts. I love that I can cut (at least) medium weight chipboard with it.
purplecowcombotrimmer
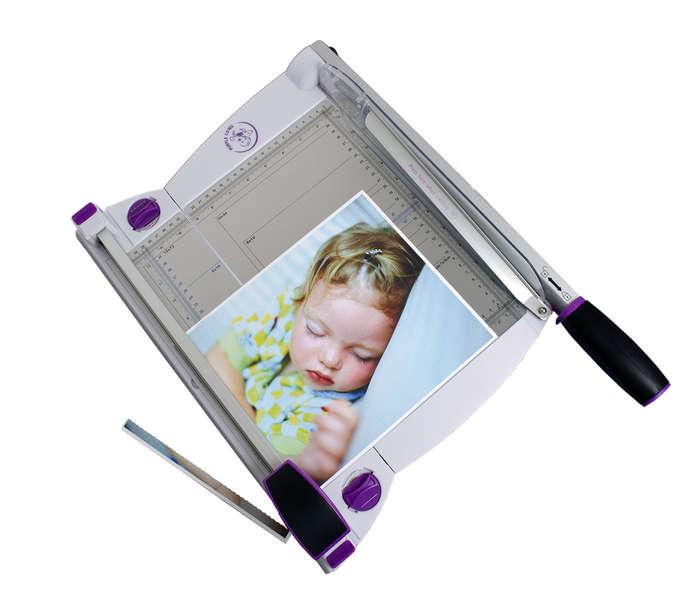
The least common paper trimmer is a guillotine type. This is the type of paper cutter used in offices and schools. It can cut through layers of paper and thicker cardboard and such, and you never have to change the blade. But some find it not as accurate for small, short cuts, or feel it takes up too much room, is too heavy to be a portable take-along, and potentially too dangerous. Others love it as their primary trimmer. It is limited to only making full cuts, from one end of the paper to the other. The one pictured is a combo trimmer that has a rotary trimmer on the other side. The 2 sides also can come apart. I don’t have a guillotine cutter.

timholtzscissors

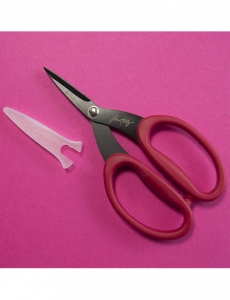
Along with your paper trimmer, you will also want a good, sharp pair of scissors. To get started, a pair of 8″ basic paper/craft scissors will be fine. Later, you may want to add a pair of precision or specialty scissors, such as the Tonic Studios Tim Holtz non-stick short blade scissors, or Cutter Bee precision scissors. Some people also enjoy having various decorative edge scissors.

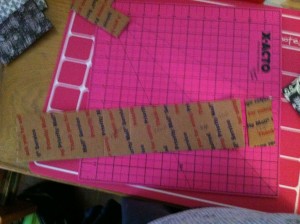
There will no doubt be times you will be glad to have an X-acto knife and mat, for cuts your trimmer can’t do, or do well. I also prefer to use my large rotary cutter (and a mat) for cutting thick materials, like chipboard.

In addition to cutters, you will also need measurers. A regular ruler is a necessity–I like my metal X-acto ruler, and perhaps not a necessity but very handy, a centering ruler. A centering ruler has 0 in the middle and then goes out both ways, and is very handy for lining up all the things you want to center on a page or project.

msscoringboard
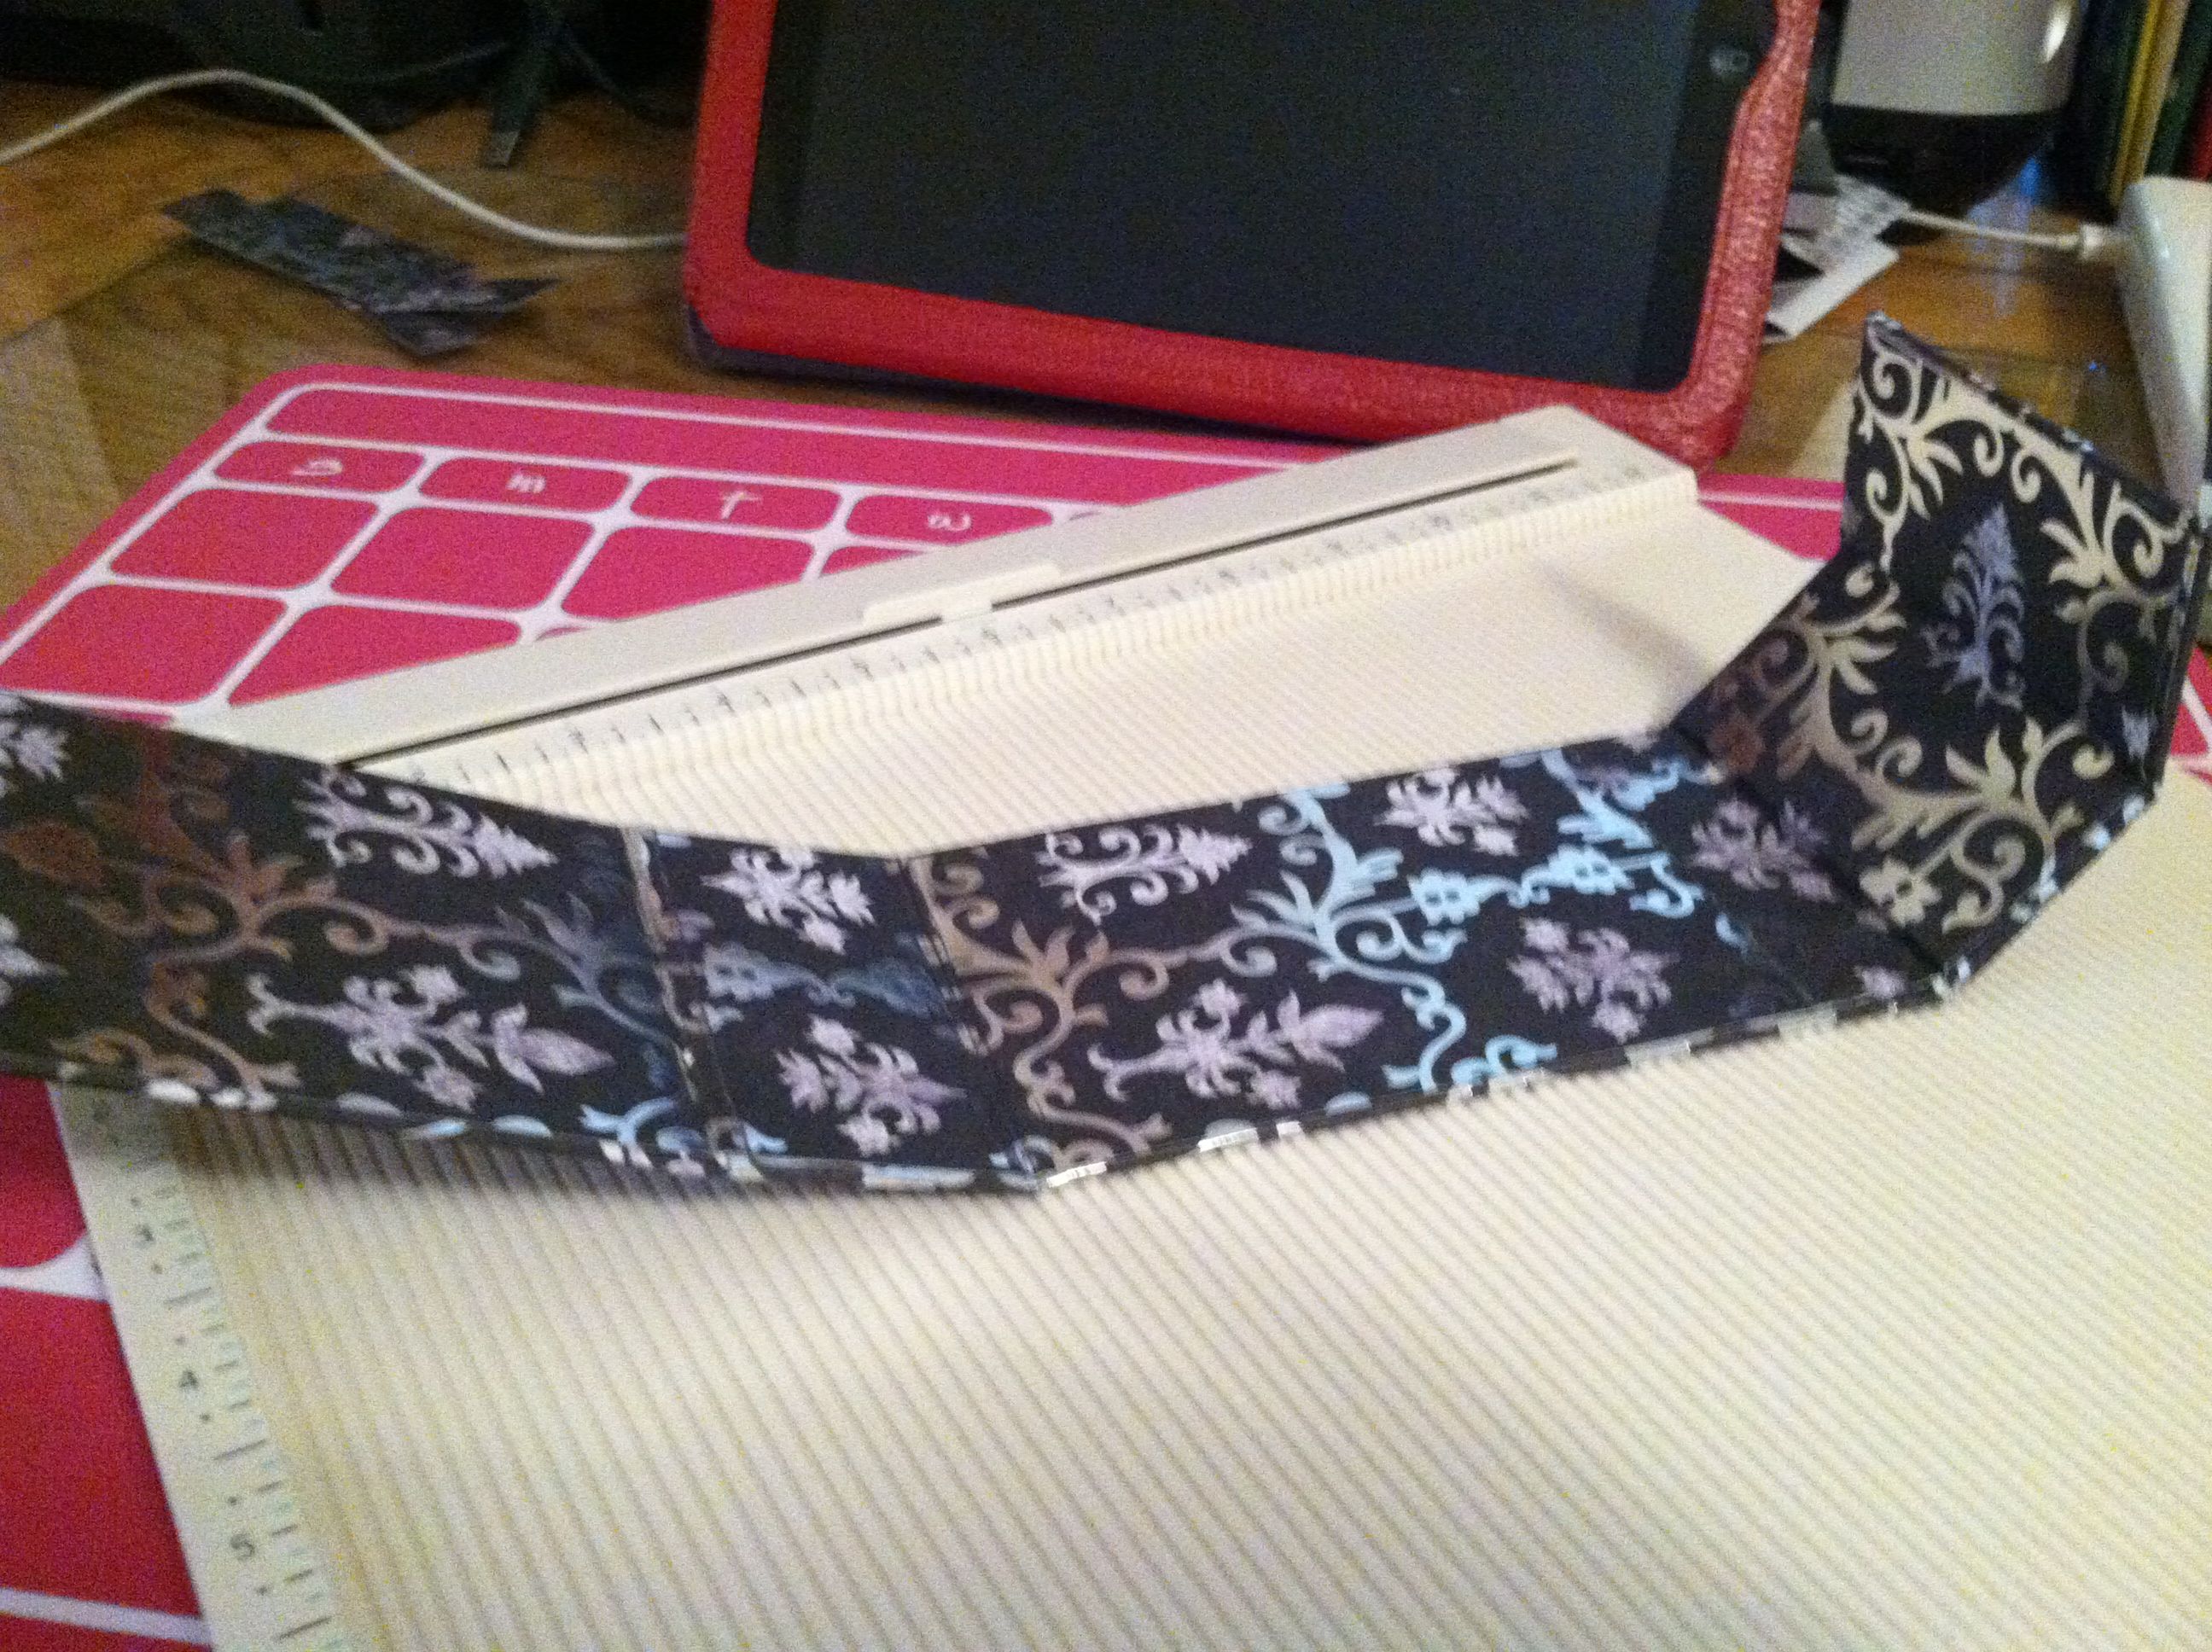
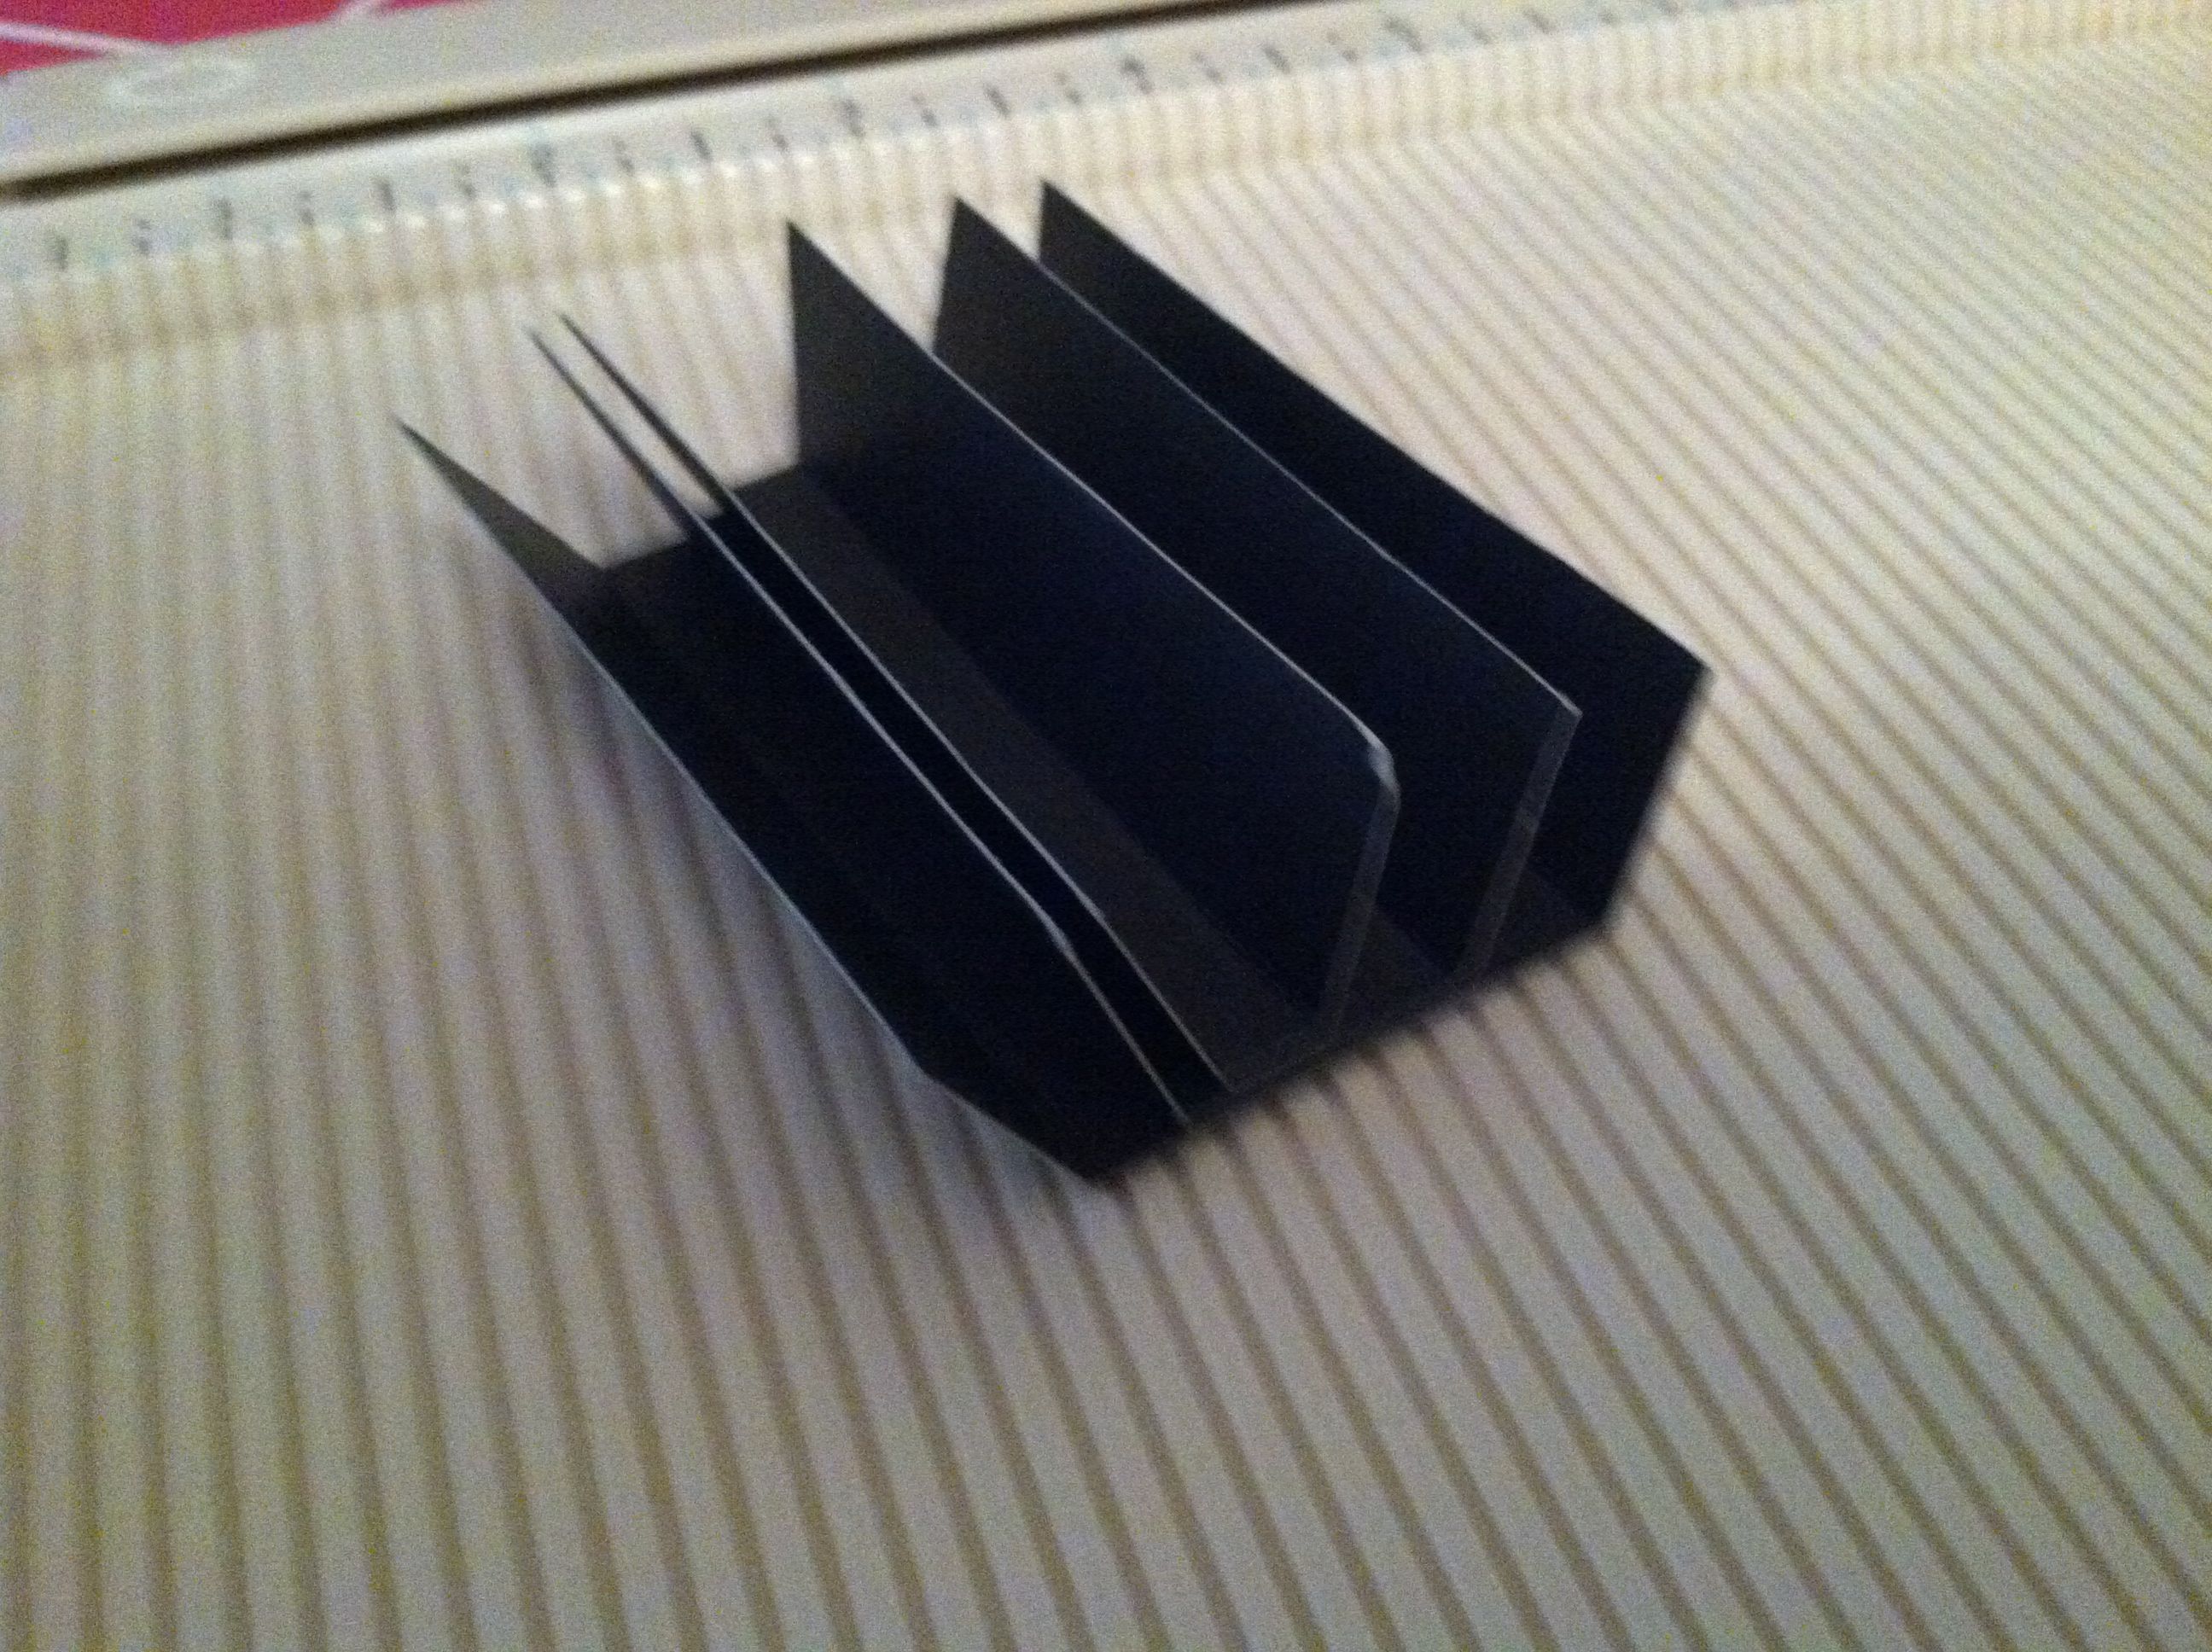
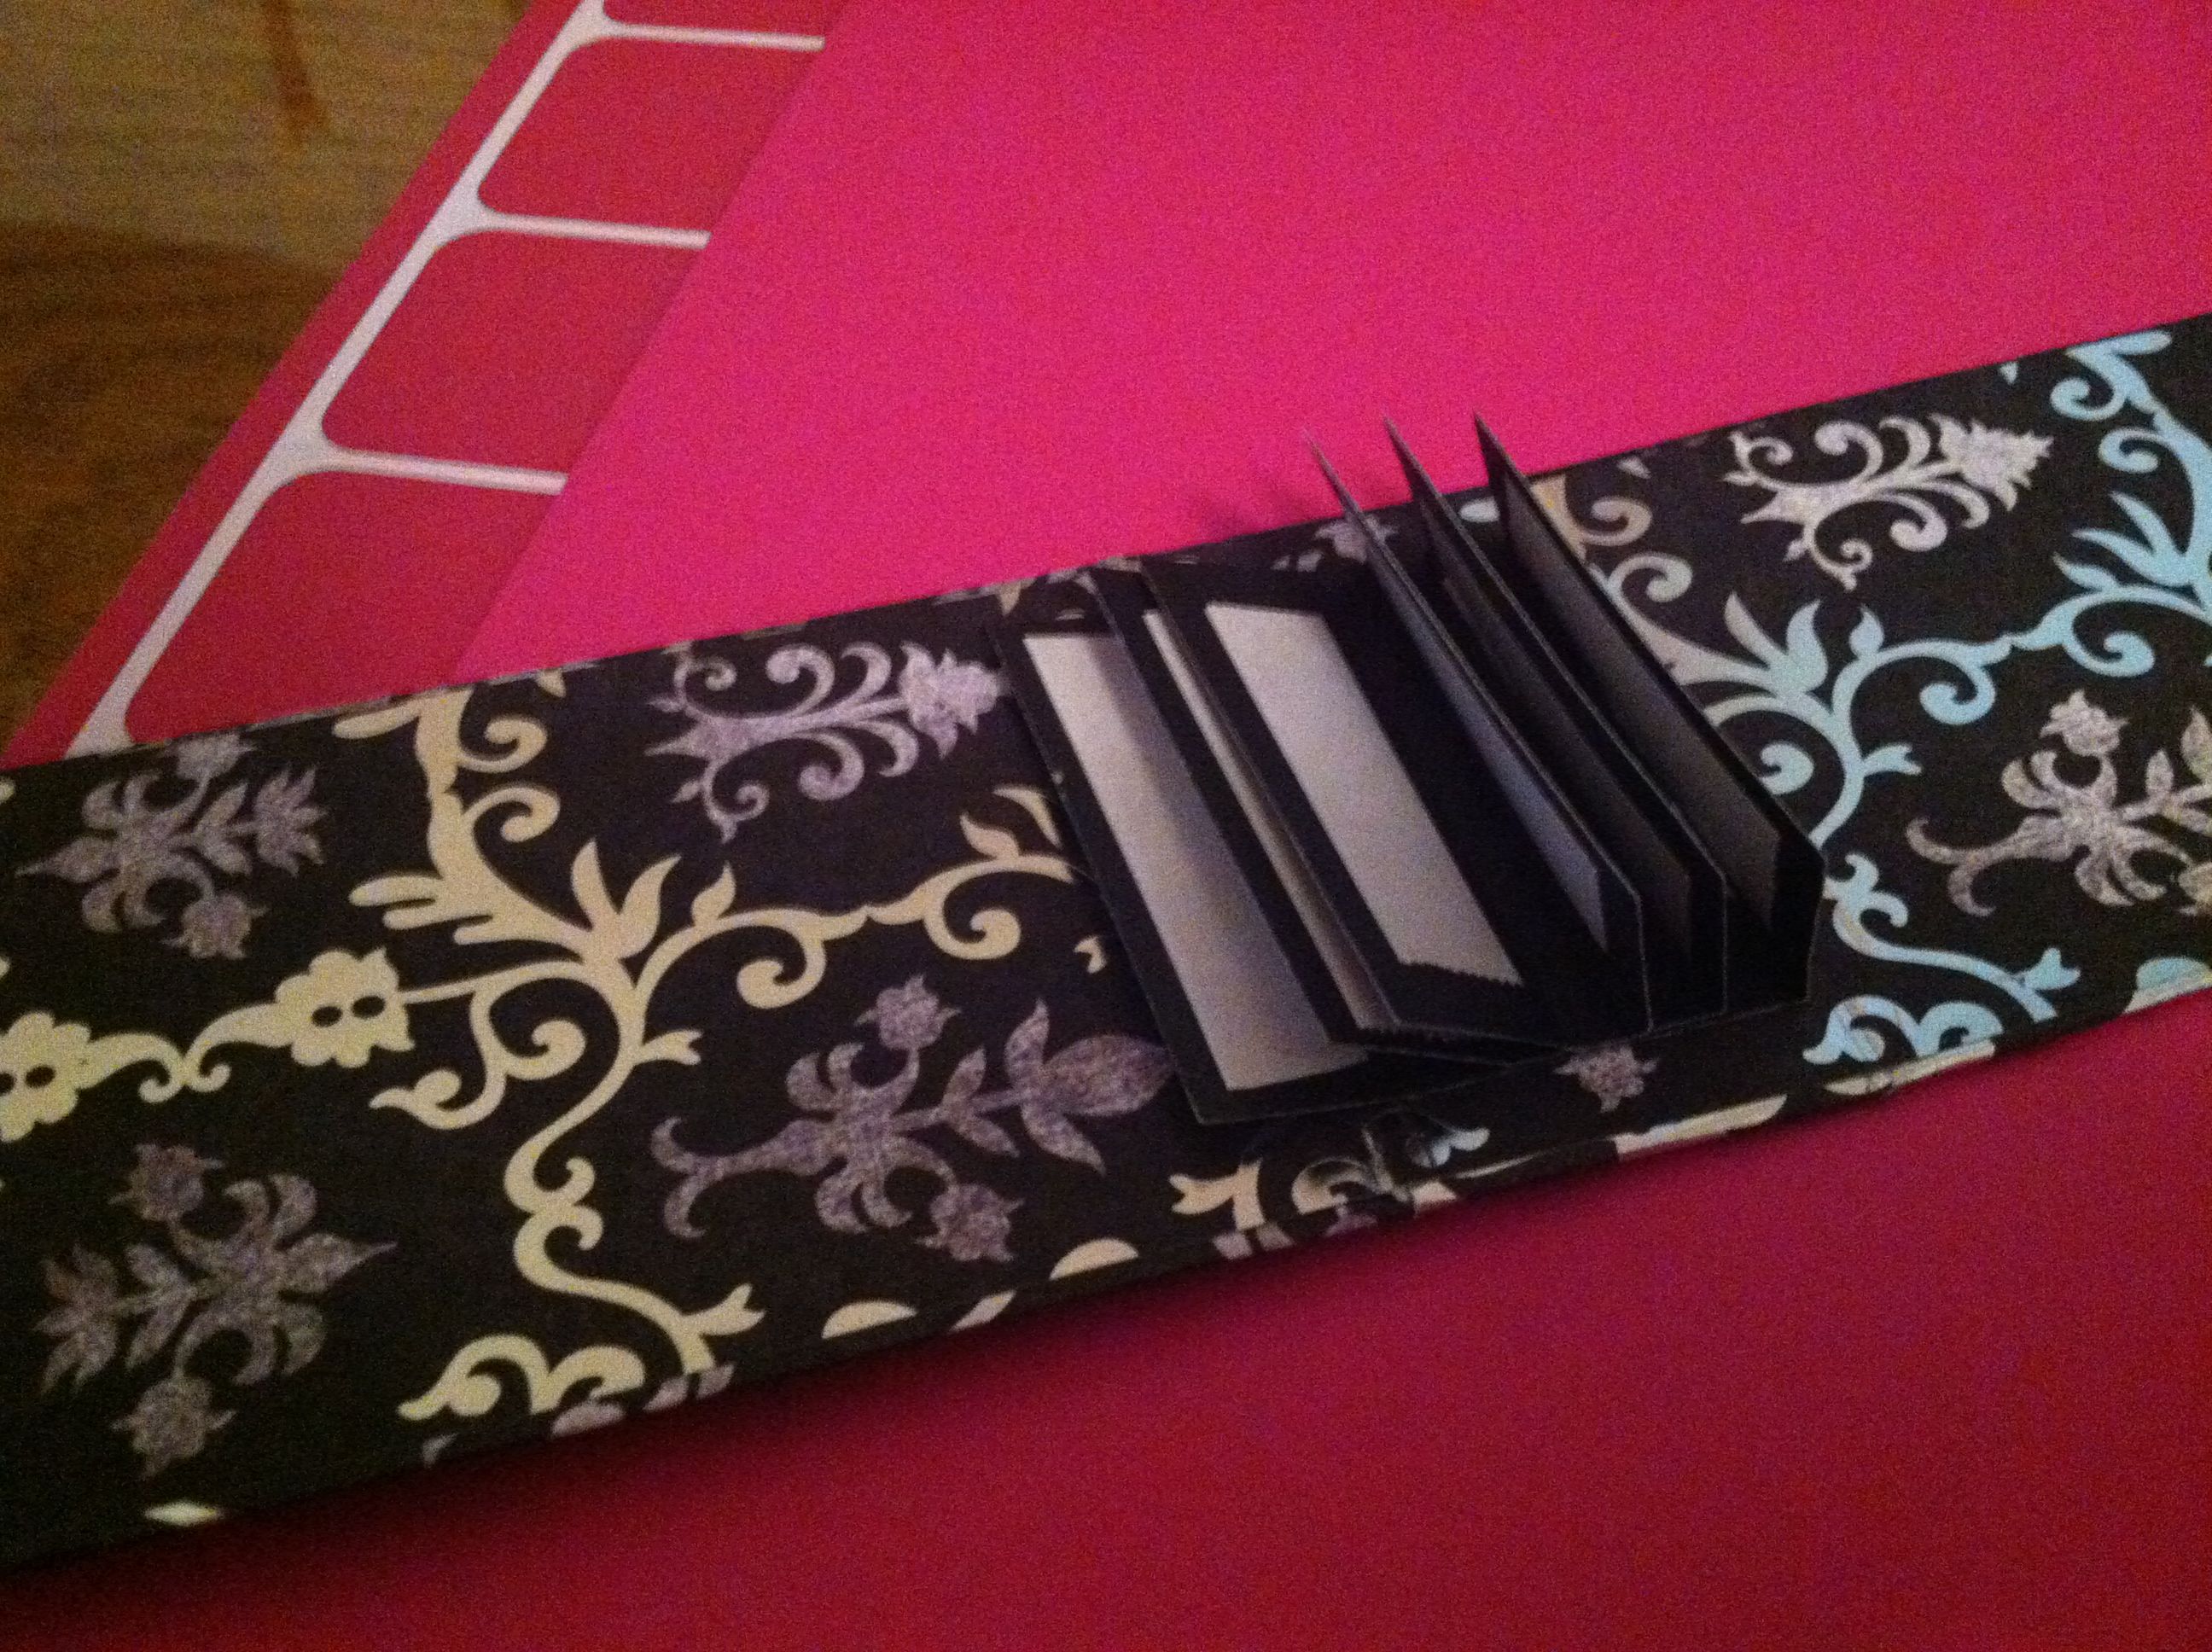
Cutters and rulers are very familiar to you, but above I mentioned 2 things that may be unfamiliar to you, scoring and a bone folder. Scoring prepares paper for creating even and crisp folds, without the paper cracking. Although scoring can be done with some trimmers, or even a ruler and bone folder, most paper crafters use the fast, easy and most accurate way, a scoring board. A scoring board has narrow channels–for making straight crease lines on your paper to fold on, at measured distances for making all your lines quickly and accurately. You make these score lines with a bone folder, a tool with a blunt pointed end for scoring and smooth edges for making your folds crisp and sharp after you fold your scored lines, without marring your paper. The score boards I’ve seen all come with a bone folder. You can also buy bone folders separately, if you prefer a different style. Some people also use a stylus for creating their score lines on a scoring board.

I own the Martha Stewart Scoring Board pictured. I like that it has scoring channels every 1/8″, and the envelope tool for lining up your paper to make diagonal scores. It also has a compartment for storing your bone folder. Tip! I ran colored permanent markers down various channels at the measurements I use most often, to give me quick to find visual guides.

Our last tool today is a non-stick, heat resistant craft mat. It will protect your work surface from adhesives, heat and ink. These are different than cutting mats, and are usually made of silicone or teflon material. They work great for protecting your desk from the heat of glue guns or embossing heat guns, and wipe up clean from gluing/taping/mod podging and stamping/inking. I prefer silicone as it’s non-toxic.

These are the basic tools you’ll need for paper crafting. Other tools are specific to specific types of work you do in paper crafting. I will cover those as I cover their area of technique. So to get started, 5 basic tools are needed. You may even already have 2 or 3 of them. You’ll need a paper trimmer and scissors, a ruler, a scoring board and a craft mat, add that to you basic supplies of paper and adhesives and you’re ready to get paper crafting.

Now that we have the basics covered, I’ll be back with add-ons, for other techniques and embellishments you may want use, in the Papercrafting Supplies 201 series.


http://teachinggoodthings.com/blog

Check out more DIY projects on Kathy’s blog at Teaching Good Things.

[subscribe2]

Papercrafting Supplies 101: Adhesives

Papercrafting Supplies 101: AdhesivesAdhesives are something I learned a lot about early on in album making. I had been fine with my basics for cardmaking and other paper projects I’d been doing over the years, but once I started making albums I learned that you really need to use good, scrapbooking-specific adhesives if you want these things to stay together through much handling.

Like papers, you use different types for different things, but three basics will see you through most needs. Also like paper, you want photo safe, acid free products. Adhesives made especially for scrapbooking/paper crafting are best.

1) Double-sided Tape Runner. For just adhering layers–paper to paper or paper to cardstock– that will not be getting much wear/any movement, a tape runner works fine. I have used various brands of the small “snail” type runners and they are ok for light duty (especially in card making and such) but for those that plan to do much paper crafting, I highly recommend a Scotch ATG (Advanced Tape Glider). Those little snail-type runners go through tape really fast, and the ATG is much more economical. The quarter inch size (pictured below) is what you will use most (maybe only. It’s all I have.) ATG tape also works (holds better) than most small snail-type runners I’ve used, but those can be used in a pinch.

2) Strong Double-sided Tape. For adhering pieces that are going to get movement/wear, you want something stronger than a tape runner. You need something that is really going to hold for hinges and binding, chipboard, box making, and such. You don’t want your albums or boxes falling apart. My favorite super-sticking double-sided tape is Scor-Tape, because it can be torn rather than cut, making it fast and easy to use–and economical too.  But I also use Terrifically Tacky (a red line type) because I got a SUPER deal on it in various sizes. Wonder Tape from Ranger would be the same red line type, but I’ve never used that brand. Like ATG, the size you will use most is probably the 1/4″, but I like having the 1/2″ and 1/8″ on hand because I use them sometimes too. I also have 1 1/16″ of Terrifically Tacky that I use sometimes, and will probably get 1″ Scor-Tape when I run out of that. Scor-Tape is much cheaper to use than the red line tapes (unless you get a buy 1 get 4 free deal like I did.)

Papercrafting Supplies 101: Adhesives3) Wet glue. There are some times when you just need a glue adhesive. Tapes are great for most things, but for adhering the insides of pockets (you don’t want your tags and such to stick in the pocket) and when it’s hard to get a precision alignment (tape is stuck for good once it’s stuck,) a quick drying wet glue comes in really handy. Scotch Quick Dry Adhesive is my fave. It is a strong permanent glue that dries quickly, but gives you enough time to reposition if necessary. It is photo safe, acid free, and a little goes a long way. And it doesn’t leave wrinkly papers like most wet glues–perhaps largely because you need so little. Tombo Mono Multi Liquid Glue is also a popular one with scrapbookers, but I’ve not tried it.

Like the papers, these 3 basics will take you far. They may be all you need–or you may want or need other special adhesives at times. Again, I’ll mention one more that you will probably want to have, but isn’t absolutely necessary at the beginning. There’s a good chance you may already have it.

A Glue Gun. There are times, especially when adding embellishments, that a glue gun is the best tool for the job. I prefer a high and low temp one–the low being great especially for laces, ribbons, and such. This is a tool you’ll use for much more than just papercrafting. I’ve used Stanley and other brands before, but am currently using a 40 watt dual temp Surebonder (below).

Other specialty adhesives that you may want for embellishments and dimensional  layering are foam adhesive dots/squares and glue dots. Magnetic discs (by Basic Grey) also stick things together in papercrafting, usually as a closure for an album itself, or interactive parts inside an album.  Duck Tape is another specialty adhesive, used sometimes as a spine for albums.


[subscribe2]

Papercrafting Supplies 101: Papers

I am far from a Papercrafting “expert” but, as perhaps someone a little further on the journey than you, I thought I’d share some of the Basics needed to get started, for the complete newbies. This will be a series of posts, each focusing on one type of supply.

The obvious first is Paper. Generally there are 3 basic types you’ll need. Quality (and thickness) varies from brand to brand. There are also other variations and specialty papers that you may want to use, but certainly don’t need to get started. The one thing you do want to look for in all your paper crafting papers is “Acid & Lignin Free”.

Paper Crafting Supplies: Paper - from Me & My House1) Patterned paper. This is your pretty paper used for decorating your paper projects (cards, albums, tags, altered items, etc.) You can buy individual sheets, but much more popular and economical is to buy “stacks”, pads of various coordinating papers. Usually the thickness is about the same as copy paper, but sometimes almost like a card stock. Most patterned paper is only printed on one side, but double sided is also available (mainly from the big names). Double sided is more expensive, but very helpful perhaps even necessary, for some projects. Usually you want standard 12″ x 12″ (again the most economical). Other sizes are available, 6×6″, 8×8″, and others, more rarely. Occasionally you may want these for the smaller designs on them and/or already precut to the size you want or less waste.

  • Beginners: Start with a stack of 12×12″ patterned paper in a design you love.
  • Tip!: You can get larger stacks of more varied paper very economically – especially because many of the big name craft stores carry their own lines and put them on sale at 50% off regularly. 180 sheets for $9.99 is common.
  • Tip!: Save your scraps. Most, even small ones, can be used in other projects.

Paper Crafting Supplies: Card Stock - from Me & My House2) Card stock. This is what backs your pretty patterned paper to give it more sturdiness. You’ll use it for your card bases, your album pages, tags, etc. There are different weights, you’ll usually want something fairly sturdy, 65# or more. Card stock comes in both 12×12″ and 8.5×11″. Generally the 8.5×11″ is fine (and cheaper) for card making and mini albums. The 12×12″ can be useful for some things, and necessary for others (like creating full size album pages.) The 12×12″ comes in more colors, various textures, and sometimes prints. Basic black, white, and “kraft” tan or brown are good for many things, but you’ll want more variety eventually, if not right away.

  • Beginners: Start with a pack of varied basic/neutral colors card stock. 8.5×11″ is fine.
  • Tip!: Greeting cards are generally made from a half sheet of 8.5×11″ card stock. Which way you cut it in half determines which side your fold will be on.
  • Tip!: Save your scrap strips. Most of them will be big enough for hinges in albums.
  • Tip!: Manilla card stock is perfect for making your own tags (much cheaper). File folders work great for this.

Paper Crafting Supplies: Chipboard - from Me & My House3) Chipboard. Though not really “paper”, chipboard is the type of very dense (not squishy) cardboard you use in paper crafts for album covers and other things that you need to be very sturdy. Medium weight chipboard will be appropriate for most of your uses. It doesn’t come in the variety of colors as card stock, usually just black, white, and kraft (tan). But that isn’t a problem, because usually you will be covering it with patterned paper, card stock, or paint/ink. Because the edges show on many/some of the projects you do, you may want to eventually get all 3 colors, but many people just use kraft. (I tend to use black and white more.) Like card stock, chipboard also comes in both 12×12″ and 8.5×11″. (The grey paper to the left is Grungeboard, see below.)

  • Beginners: Start with a pack of medium weight chipboard, which ever color you prefer. I recommend the 12×12″ as being a bit more versatile with less waste. But depending on what specifically you are making, that may not be true for you.
  • Tip!: Sometimes there is a price difference for the various colors. Unless you particularly want a specific color, get whichever is cheapest, though black may show through light colored papers. Grafix is a well known brand.
  • Tip!: If you get packages by priority mail, you can save the boxes and use them in place of chipboard for most small albums that have completely covered covers.

That’s it! Just 3 types of paper stock will get you started in making beautiful albums, cards, tags and other paper crafts.

Tyvek: I want to mention one more type of paper though, because I find it very helpful for keeping my albums secure. Tyvek is a plastic-y paper that large envelopes, like priority mail envelopes, are made of. It is great for reenforcing spines and hinges of albums. You need just a small strip for each. You can buy Tyvek envelopes or recyle ones you get mail in. I highly recommend it for album making, but you don’t have to have it.

Some other specialty papers you may want down the road are:

  • Grunge paper and grunge board–“Grungepaper:  a compressed, flexible, thinner sheet of dingy material that can be punched, painted, inked, sanded, die-cut, or grunged.” It is very strong, so great for spines and such. It’s other properties make it great for dimensional die cuts and more. Grunge board, as expected, is thicker than grunge paper. (See in the Chip board pic above.)
  • Vellum–True vellum is a parchment made from calf skin. Vellum paper you find in the stores mimics this, in a smooth translucent paper that is inexpensive.
  • Acetate–a thin, clear plastic (like transparencies are made of.) Used in papercrafting for making clear pockets or covering other designs with a protective, but see through cover.
  • Foil, Watercolor paper, and other specialty papers may also be used for certain projects. But loke the other specialty papers in this category are not necessary for getting started, unless you are wanting to do a specific project that calls for them.
  • Mini albums are also sometimes made with envelopes (of various sizes), notecards, and paper bags–and even empty toilet paper rolls.

I tend to buy whatever I find on sale at a great price that I like. But do you (that already are paper crafting) have a favorite company? If so, what is it and why do you like it best?

[subscribe2]


TP Mini Revisited {Tutorial}

TP Mini Engagement Album - from Me & My HouseWhat could be easier (or weirder) than saving empty toilet paper rolls to put your pictures in? But it works! Here’s how.

Supplies:

  • Empty TP (cardboard) rolls (6) – for pocket pages
  • Chipboard (or recycled priority mailing box) – for cover
  • Patterned Paper – to cover
  • Cardstock – for hinges and tags
  • Closure (recommend Basic Grey small magnetic disks, but I used Velcro, as that’s what I had)
  • Embellishments – to decorate with (whatever you like)

Tools:

  • Ruler, Scissors. Exacto knife and mat – or Rotary cutter and mat especially helpful for cutting chipboard/cardboard.
  • Adhesive – I recommend ATG gun (tape dispenser), ScorTape, and 3M Quick Dry Adhesive (glue). (But I used cheaper, more readily available adhesives – that aren’t quite as good.)
  • Iron, spray bottle of water – optional, but helpful
  • Paper trimmer, score board and bone folder – very helpful, but possible to do without

Step #1Flatten tp rolls. Tip! After flattening by hand, spritz folded edges with water and press with a hot iron. This gets them much flatter.

TP Mini Album Tutorial - from Me & My HouseStep #2Cover tp rolls. Cut patterned paper 1/2″ wider than the dimensions around the roll and 1″ or more taller. (My tp rolls were 2 5/8″ x 4″, yours may be different.) If your pattern paper has a direction, (specific top and bottom,) make sure you cut it correctly for that.

Use ATG (or other adhesive) to attach paper to roll, overlapping the edge in the back, and pushing the ends in. Tip! I scored (creased, to help the paper lay flatter on the rolls,) at 2 5/8″ and 5 3/8″ and folded the excess on the side over first, then wrapped, so it ends along the edge, rather than a seam down the front or back. (I cut my paper at 5.75″ x 4.75″. As you can tell, I should have cut taller, to fold more inside.)


Tip! As you tape any pieces, “burnish” (rub over it with your bone folder – or even ruler or finger, or fingernail or such,) to get a good contact/seal.

Tip! You can also cover them with solid colored cardstock, and just cut smaller patterned papers to mat the front and back (about 1/4″ smaller width and height than the tp rolls). This way is great for using up smaller scraps of patterned paper.

TP Mini Album Tutorial - from Me & My House

Step #3 – Cut your cover base boards. Cut chipboard (or recycled mailing box) to make front, bottom, back, top and flap. It should be taller and a bit wider than your tp pages. Mine was 3″ wide and 14″ for front, bottom, back, and top, 3 x 1.75″ for flap. I was able to just fold at my score lines, but if you don’t have a long piece like that, you can use separate pieces covered together. That would be 3×5″ each for front and back, and 3×2″ each for top and bottom (for my size tp rolls,) and flap can be any length you want.

Tip! If using magnetic disks for your closure, attach now to your front and flap. Center each and place the same distance from the top on each piece.

TP Mini Tutorial - from Me & My HouseStep #4Cover your cover base boards. Cut patterned paper to cover your cover base PLUS 3/4″ around each edge. (1.5″ total) Tip! Since your paper is most likely not 17+” long, you will need to piece it. I like my piecing to be at the back of the bottom. (You may not care.) Also if your paper has a direction you will need to take that into consideration as you piece it, so it isn’t upside down on the back and flap. (Mine would be 4.5″ x 17.75″) (In picture is my Score Board.)

  1. Join paper with Scor-Tape (or other double sided strong tape,) to get it long enough.
  2. Put ATG (or Scor-Tape or other double sided tape) around edges of each piece of your cover base, and several strips  in the middle (on 1 side).
  3. Lay you cover base pieces onto your paper, leaving 1/8″ space (about 2 chipboard widths) between each piece and the 3/4″ paper around the edge. Tip! I begin with the back piece on the joining edge, then work out with my other pieces.
  4. After attaching cover base to cover paper, score or turn the card on its edge, to fold the paper smoothly over the edges. Put Scor-Tape along edges of cover base boards and along outer edge of paper, all the way around. Miter corners of cover paper, leaving 1/8″ paper at each corner.
  5. Remove Scor-Tape backing and wrap paper edges around cover boards, smoothing and pushing in corners of paper to cover corners well.
  6. Cut inner cover lining from patterned paper 1/4″ smaller than length and 1/4″ smaller than width, again piecing at the bottom side. (Mine= 2.75 x 17.5″) Attach with ATG or Scor-Tape (or other double sided tape).
  7. Gentle fold cover on the folds (between each piece/side).

TP Mini Album Tutorial - from Me & My HouseStep 5 – Make your hinge. I used Laura Denison’s Stack the Deck Hinge.

  1. Cut 3 pieces card stock: 2.5  x 1.75″, 2.5 x 2.25″, 2.5 x 2.75″ Score and crease at .75″ from both ends of each piece on their NOT 2.5 side. (These 2.5″ wide fit well for the 2 5/8″ wide tp rolls.)
  2. Cover the bottom of each piece in-between center of score lines with Scor-Tape. Do not get tape on the score lines. (If using other double sided tape, you may need to cut the width of the tape down.)
  3. Tape each hinge piece down the center of the one next bigger than it. Tape largest one to center of cover bottom. Burnish each taping well.
  4. TP Mini Tutorial - from Me & My HousePut Scor-Tape on each side of the 6 hinges (sticking up after adhering bottom to cover).

TP Mini Tutorial - from Me & My HouseStep #6 – Attach pockets to hinges. One by one remove backing from Scor-Tape and put TP roll over it–encasing the hinge. Tip! Take care to hold the tp roll open as you lower it over the hinge. Once it sticks, it is stuck. You can do one side at a time if that helps. I also like to fold the hinge over a bit, so it isn’t pressed against the bottom of the hinge. It helps the pages turn more smoothly. You can alternatively use Scotch Quick Dry (wet glue) to attach pockets.

TP Mini Engagement Album - from Me & My HouseStep #7 – Add tags and decorate/ embellish pockets and cover. Cut 6 tags from card stock, at approx. 1/8″ smaller than the width of your tp rolls, and the proper height to fit down your pockets (this will vary depending on how you attached your pockets to your hinges, and what kind, if any, tabs your tags have.) Mine were 2.5″ x 4.5″ with a self scalloped tab. You want your tab to stick out of your pocket. Decorate the fronts of your pockets and outside of cover however you desire.


TP Mini Album {Tutorial} - from Me & My HouseI hope this all made sense to you. Someday I may venture into video tutorials–or at least remember to get good pictures of each step that is not readily explanatory in words. But for now, this is what I’m able to do, so I hope you find it helpful. Feel free to ask questions, if there’s something you don’t quite get from my explanations. And a final pic of the inside (before decorating.)

And–Enjoy making a TP Mini Album.


[subscribe2]


Revisiting Dollhouse Carry Along

Today we are revisiting a post from a couple of weeks ago, as a reader has asked for instructions. So here’s the Dollhouse Carry Along Tutorial.

Dollhouse Carry Along from Me & My House

Supplies: 

  • Plastic Canvas – 2 sheets 10.5 x 13.5″
  • Fabric Pieces (4 fat quarters will work, with leftovers. Choose colors for Roof, Outside, Inside, and Garden)
  • Poly Batting – small pieces
  • Small Hair Elastics – 5
  • Buttons – 5
  • Various Fabric Scraps (small pieces, various colors for decor)
  • Rick Rack and/or Trim Scraps (for decor, if desired)
  • Various Small Felt Scraps (small pieces for decor)
  • Glue gun and glue, scissors, sewing machine, thread and needle

Cut –

Plastic Canvas:

  • 3 pieces @ 4 x 6″ for front, back and floor
  • 2 pieces @ 2.75 x 6″ for roof
  • 2 pieces @ 4 x 6.25″ for sides
    • Cut Side pieces Roof angle as follows. Mark the center point on 1 short edge (2″). Beginning at 4″ up the sides (on both sides) measure 2.75″ up and in to that halfway point. It will be not quite up to the full 6.25″. (Hopefully this illustration will help this make sense.)

Dollhouse Carry Along from Me & My House


*Note: I used my rotary cutter and mat to cut the pieces, and cut the plastic along the outside edge of the lines, so no little nobbies were sticking out.

Batting:

  • 2 pieces for each plastic canvas pieces – cut 1/4″ larger –
    (6@ 4.25 x 6.25″, Roof 4@ 3 x 6.25″, Sides 4@ 4.25 x 6.5″)
  • Cut angle for Side roof pieces just outside the plastic piece edges

Fabric:

  • Fabric #1 for Outside of house –
    • 1@ 13.75 x 7.5″ for front, back, and floor
    • 2@ 5.25 x 7.5″ for sides (cut angle as for batting above, PLUS leaving your 1/2″ seam allowance)
  • Fabric #2 for Roof and Handles
    • 2@ 4 x7.5″ for roof
    • 2@ 10.5 x 2.5″ for handles
  • Fabric #3 for Inside of house –
    • 1@ 12.5 x 7.5″ for back roof, back wall and floor
    • 2@ 5.5 x 7.5″ for side walls
  • Fabric #4 for “Garden” flap – 1@ 8.25 x 7.5″
  • These fabric measurements are approximates. You may need to add an extra .25-.5″ depending on how thick your batting is. These measurements will allow you between .25″ and .5″ seams. My batting was not the real thick kind.

dollhousefabric

Step 1

Hot glue batting to both sides of each piece of plastic canvas, centering plastic on batting. Be careful pushing the batting and canvas together, the glue is HOT!

Step 2

Lay Outside Side pieces face up. Lay 1 Inside Side piece on top of each, face down. Stitch each together around sides and roof (leave bottom open.) Turn right side out, push corners out, press. Put batting covered plastic piece in each Side.

dollhousesides

Step 3

With right sides together: Sew Garden piece to one end of Inside piece. Sew Roof pieces to Outside piece, 1 to each end. Sew each handle piece into a tube, and turn right side out. Press each of these pieces/seams.

Step 4

Lay Inside face up. Pin handles (facing in) at each end, approx. 1.5″ in from each side. Pin Side pieces to Inside piece (Inside prints facing), just above the Garden piece, (roof point facing in,) lining up raw edges.  Pin elastics on each side of the Garden piece, at about .75″ and 4″ down the side (near the top of the roof, and just under the roof, of Outside piece – after seam allowances.) Your last elastic goes at the center of the end of the Garden piece (or other end). You should have just enough elastic on the inside of your seam allowance to loop around your button.

Dollhouse Fabric Layout

Step 5

Stitch around all sides, leaving an opening in the center of one short edge large enough to turn right side out. Be careful to not catch the points of your Side roof in your stitching. Turn right side out and press (not over the Side pieces, or the hot glue will melt and get on your fabric).

*Note: I backstitched over the elastics a couple of times, to make sure they were quite secure.

If I were to do it again, I’d leave the opening in the Back instead of front as my picture shows. I’d also probably put the last elastic loop on the Back of the Roof (instead of the Garden end), so the button would be on the front – but that’s purely aesthetic preference.

Step 6

Insert covered plastic pieces in this order, Roof, Wall, Floor, Wall, Roof. Topstitch between each of these pieces. (I did this piece by piece. Put 1 piece in , stitched close to it, added the next, stitched close to it, etc. making sure my stitches lined up with my seams for the roof and garden.)

Dollhouse Carry Along from Me & My HouseStep 7

Handstitch your opening closed, and your Back walls to Side walls, and back Roof to Side roof angles. (I did mine from the inside, then turned it out.) Position your buttons on Sides and Back of roof and stitch them on.

Dollhouse Carry Along from Me & My House

Dollhouse Carry Along from Me & My House

Dollhouse Carry Along from Me & My HouseStep 8

Decorate your house – however you’d like. I used both felt pieces, and fabric pieces that I’d ironed interfacing to. And a permanent marker. I hot glued the pieces on – except the bed is loose. My shapes were just cut freehand – and I am NO artist. (If I’d had more time, I may have used my Cricut.) The bed is made from card stock, as a box form, then covered with fabric. The “pillow” is raised by some batting under it. The mirror is made by heat embossing with silver embossing powder.

Dollhouse Carry Along from Me & My House

Dollhouse Carry Along from Me & My HouseI hope these instructions are clear enough to follow. I didn’t write down what I did as I did it, so I’m trying to remember step-by-step. Thankfully I did take several pictures along the way.

Enjoy!

I’d love to see yours after you make one.

[subscribe2]

Sewing Saturday

Sewing Saturday is a new feature I’m adding to the musings and random ramblings ‘from me’. I’m planning on making it a monthly feature, and will try to get a graphic designed before the next one is posted.

This month I want to share with you one of the easiest sewing projects you can make. It is a good place to start with a young child wanting to learn to sew with the machine.

A baby blanket is a fun project, as it can be used as a gift to bless someone else. Therefore you can make MANY of them, and never be run over by them in your own home. If you have a serger this project is even simpler, but a regular machine is great and easy too.

You will need nice (not too flimsy) 100% cotton flannel fabric. You can make your blanket 30″ sq. (for a newborn) or 36″ sq or 45″ sq. We prefer the little bigger sizes as they make a nice favorite “blankey” that the child can use longer. Since this fabric will shrink, you need to buy more than your final size. I like to get 2 1/4 yd. for a 36″ sq. or 2 3/4 yards for the 45″ if I want the front and back to be the same (1 7/8 yd for 30″).

I really prefer to do coordinating patterns, different design on front and back, but the designs go together. For that, get 1 1/8 yd each of 2 different fabrics for the 36″, or 1 3/8 yd each of 2 different fabrics for the 45″ (1 yd each for 30″).

Pre-shrink (wash and dry) the fabric (and iron if needed.)

Cut 2 squares the size you want your blanket to be. (The finished blanket actually will be a little smaller, if you’re using a regular sewing machine, as I’m not adding seam allowance to these.) Be sure to cut along the grain, you want a perfect 90° corner so your blanket will be truly square and not cockeyed. I like to use a rotary cutter and mat for cutting pieces like this. (Using the full width of the fabric and making your square to match that measurement is the easiest way.)

You can leave your corners square if you like, or you can round them. I prefer rounded, especially with a serger, but with a beginner and regular sewing machine you may just want to leave them square. To round the corners, put the 2 pieces of fabric directly on top of each other, right sides together if stitching by regular sewing machine, wrong sides together if using a serger. Place a plate in the corner with the edge of the plate exactly on the edges of the blanket. With a marking pen draw around the edge of the plate, then cut on your line, to round the corners.

If using a serger, pick a “pretty” thread – I usually like to use a variegated, “wooly” thread in the needles. Just stitch the sides together, sewing right on the edge (not cutting any off,) rounding the corners, and overlapping your stitching a bit when you get clear around. After cutting your threads, pull the ends to tighten and “seal” the stitching. You’re done!

If using a regular machine, use a 1/2″ seam allowance and start stitching slightly past the middle of one of the sides, sew to the corner and turn, (or round each corner if you’ve cut them this way) clear around until you get back to your first side, but NOT all the way around. Leave an opening about 8″ or so. Be sure to back stitch at the beginning and end of your sewing.

Turn blanket right side out and press edges, so the seam is nice and flat, tucking in the seam allowance of the opening. Hand stitch the opening closed. Top stitch, with a pretty coordinating color thread, completely around the blanket, 1/4″ in from the edge. Now You’re Done!

My dd has enjoyed making these as baby gifts for her older sisters’ babies. They are such a nice, soft and pretty and useful gift. You can make matching washies (for bath or wiping bottoms) or hankies (don’t use kleenex on a little nose, these are much softer) or burp clothes (if the mom uses them) out of properly sized pieces of fabric, by either just serging edges, or making a small hem all around. I prefer double sided for all but the hankies. To do this follow the exact same instructions as the blanket, using a glass or smaller round for the corners.

Sew much fun!

For Me and My House ~ At Jesus’ feet,
Lisa @ Me and My House ~ Discipleship for Life!
Order Christian & Home Ed Resources here

Get future posts to this blog by email:

It’s a Quilt! It’s a Pillow! It’s a Quillo!

Greetings from Me and My House,

Today I’m moving on from nutrition teaching to a simple sewing project. Keep up your Good for You-Natural! lifestyle of eating though.

Quillos are a favorite around our home. Each child has their own for wrapping up in to take a chill off or laying around on. They are super for taking on trips. A quillo is a quilt that folds into a pillow, that is simple to make.

Quillo folded into Pillow {sewing instructions} ~ from Me & My House

You will need 4.5 yards total (after preshrinking) cotton print fabric. Homespun plaids work great, as do any type of novelty print, quilting fabrics, or flannels. You can use all one fabric if you want, but I prefer to use differing fabrics for the front and the back. The pillow/pocket can be made with both sides the same as the one of the other fabrics. If you want the two sides to be different, you will need another 1/2 yard fabric. The instructions here are for an adult size, aprox. 45″ (the width of your fabric) by 72″. (A child/smaller size is the width of the fabric by 60″, and a smaller “pillow/pocket” is made. A baby size can also be made – 36″ by 45″.)
This one is child’s size:

Quillo {sewing instructions} ~ from Me & My House

Supplies needed:
So for your adult size quillo, you need:
2 yards preshrunk fabric for the back
2 1/2 yards preshrunk fabric for the front and pillow/pocket
These should be compatible prints – different, but look good together.
2.5 yards batting – any batting that does not have to be quilted at small intervals. I prefer an all cotton or wool batting.

Thread that blends with both your prints.
Scissors/Rotary Cutter & Mat, Pins, Sewing Machine, yardstick, removable fabric marker.

Instructions:
Blanket:

Square up the ends of the fabric and cut (I prefer to use a rotary cutter) the front and back blanket pieces each 72″ long across the width of the fabric. Cut 1 piece of batting the same size.

Layer (by spreading out on a large flat surface) the batting, then one of the fabrics, wrong side down on the batting, then the other fabric right side down (on the right side of the first fabric). Smooth all layers and pin around all edges.

Sew around all 4 edges (I prefer using a walking foot) leaving a 10-12″ opening in the center of one end to turn. Clip corners. Turn right side out and press seams, including pressing the opening seam edges in.

Pillow/Pocket:
Cut 2 18″x18″ squares for the pillow/pocket out of the remaining front fabric (or one square from each fabric, if you are using both). Cut one piece of batting the same size. Layer and sew exactly the same as the blanket part, only about a 6″ opening is needed.

Alternative pillow/pocket:
You may also use an 18″x18″ quilt block as one layer and your front fabric as the other layer. After sewing the edges, turning and pressing, quilt your block before attaching to blanket in next step. When attaching to blanket, be sure to sew with the quilt block side facing the blanket side, otherwise when you fold your quillo into a pillow your quilt block will be inside and unseen.

Quillo folded into Pillow {Click for sewing instructions} ~ from Me & My House

Attach Pillow/Pocket:
Find the center of the open end of both the blanket and the pillow/pocket parts, and match them up. Make sure the center of the other end of the pillow/pocket is lined up with the center of the blanket. Pin the ends of blanket and pillow/pocket together and pin the sides of the pillow/pocket to the blanket. Stitch a narrow seam across the ends of both, attaching the pillow/pocket to the blanket, and closing up the open ends of both.

Lay quillo out flat. Measure in from each side of the blanket onto the pillow/pocket about 1/4″ onto the pillow/pocket. With removable marking (disappearing or wash out marking pen), mark this distance the entire length of the quillo, on both sides of the pillow/pocket. In other words, you are going to sew on the pillow/pocket sides, but you are going to extend these seams the entire length of the quillo. After marking, pin through all layers along each line while quillo is still laying flat. Stitch along both lines.

You’re finished! To fold quillo as a pillow, fold into aprox. thirds along the stitching lines you just made, with the pillow/pocket facing down and your folds on top. Then fold the top down twice to a point just above where the top of the pillow/pocket is, then fold again, over the back of the pillow/pocket. Turn over and reach inside of the pillow/pocket, grab through all layers of both bottom corners and flip the whole thing inside out. Your folded blanket is now inside your pillow/pocket. Smooth and you have a nice pillow.

Simple, but pretty, and certainly practical.

For Me and My House,
At Jesus’ feet,
Lisa

[subscribe2]