Itty-bitty Grows Up

Just a couple pictures today of the fun I’ve been having. {Even I’m not sure if that was a sarcastic statement or not.} 🙂

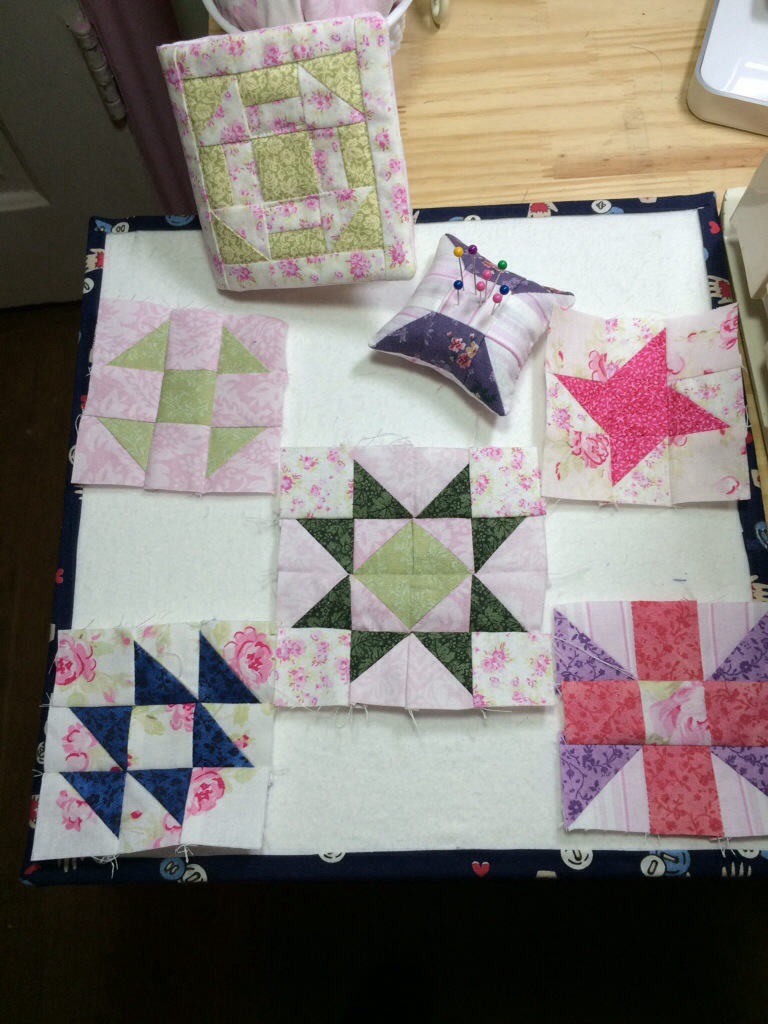
What kind of crazy sews so many itty-bitty half square triangles? It’s bad enough to sew–and press– 1″ squares, but crazy to cut those into half square triangles and rectangles. #whatwasithinking #gladthatsover  In addition to the needle book and pin cushions, I plan to use most of the others in my sewing machine cover/mat. {Instructions for all coming soon.}

20140409-105652.jpg

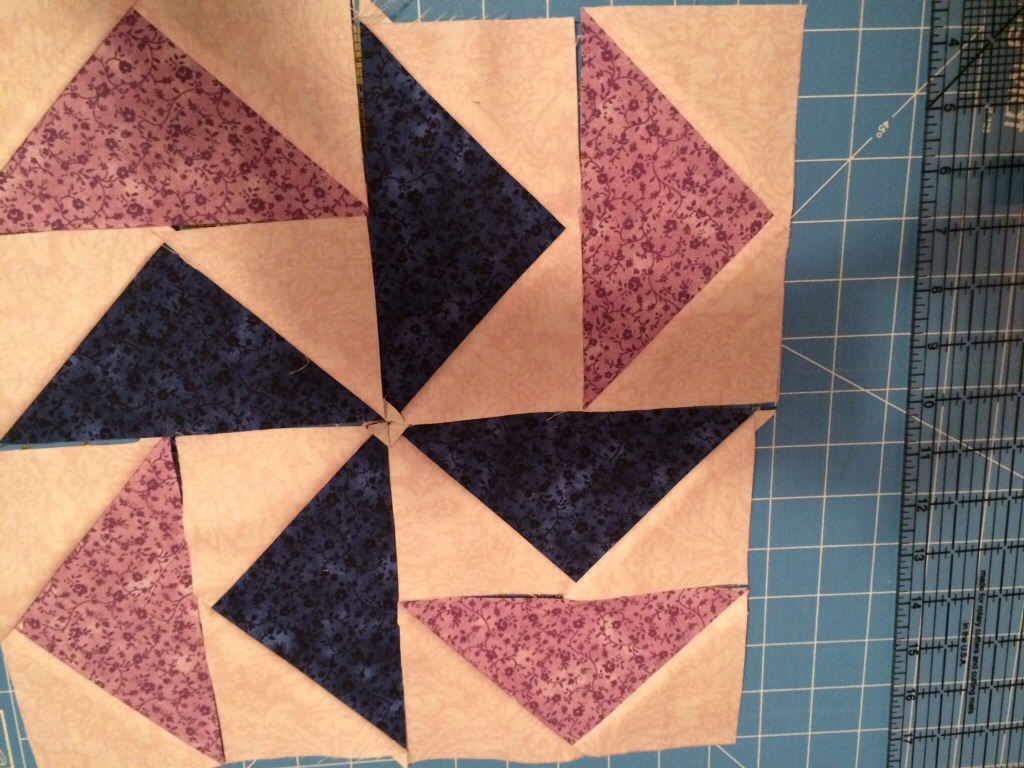
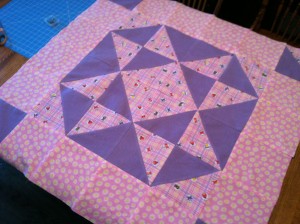
So what do I do? Practice a couple new techniques for Flying Geese– to make a huge, 12″ block, that I don’t have a clue what I’m going do with. They did turn out nice, but I have no plans of making a full size quilt at this time, so… what to do with it?

20140409-105715.jpg

What size quilt blocks do you prefer to make?

So Sew Fun

Our children have been into competition shows for quite some time, cooking competitions (well in addition to the boys’ sports shows). On the rare occasion that I watch TV, watching one of these cooking competitions with them is usually what I do. But I’ve discovered something far more fun than Iron Chef, the Great British Sewing Bee. (Not available on our BBC TV station here, just online.)

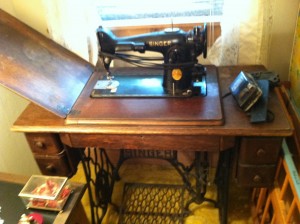
The episode below introduced me to the Bee. It’s the perfect episode for me, probably no other would have intrigued me. In it, the competitors are required to use traditional sewing techniques, and even the greatest sewing machine built (minus all the bells and whistles we have today), the Singer 201, the “Cadillac” of traditional (vintage) machines in their day (just at the turn from treadle to electric, a beauty in her day). Just like one that will someday be mine. (I am so looking forward to getting it running again. It is not a treadle machine, just in a treadle cabinet. Love it.)

Singer 201 in Treadle Table ~ from Me & My House

Here’s the show. Sewists will love watching this. Take a peek, and perhaps be tempted to watch other episodes.

SaveSaveSaveSave

Rag Quilts {How to}

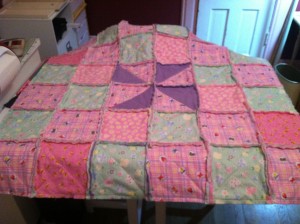
Baby Girl's Rag Quilt ~ from Me & My HouseMy babes aren’t the only ones that can snuggle in a soft and cuddly, homemade with love blanket. Even if you’ve never quilted before, you can make a baby rag quilt, like the ones I pictured in my last post–easily and quickly. No intricate cutting. No tricky piecing. No fancy sewing. Just straight cuts and seams.
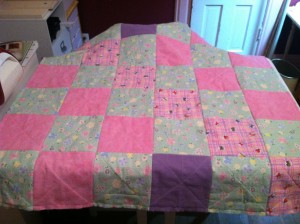
Baby Girl's Rag Quilt {back} ~ from Me & My House

You’ll need:

(See note at end.)

Planning:

For a baby sized quilt either a 6×6 or 7×7 pattern works well. With finished squares of either 6″ (for the 7×7 pattern) or 7″ (for either), your blanket turns out at 42″ or 49″ square. 42″ is a good “normal” size for a baby blanket, and 49″ is a nice large baby blanket. (Smaller blankets can be made, but babe will outgrow them soon. I prefer these larger sizes, to wrap babe in, not just throw over.)

A 7×7 pattern requires 49 front squares, 49 back squares, and 49 “batting” (middle layer) squares. A 6×6 pattern requires 36 for each of the 3 layers. I use flannel for all 3 layers. (For a regular quilt, you could use actual batting for your middle layer.)  The squares are each cut 1″ larger than the finished square size for the front and back, and at the finished size each for the middle layer.

For a 42″ finished 6×6 pattern, you need to cut a total of 36  8″ squares for the front, 36 8″ squares for the back, 36 7″ squares for the middle/ batting layer.

For a 42″ finished 7×7 pattern, you need to cut 49 7″ squares for the front, 49 7″ squares for the back, 49 6″ squares for the middle/ batting layer.

For a 49″ finished 7×7 size, you need to cut a total of 49 8″ squares for the front, 49 8″ squares for the back, 49 7″ squares for the middle/ batting layer.

You could also make a larger 6×6 pattern with 9″ top and bottom squares that finish at 8″, (and 8″ middle layer squares,)  for a 48″ square quilt.

For a smaller, 6×6 36″, cut a total of 36  7″ squares for the front, 36 7″ squares for the back, 36 6″ squares for the middle/ batting layer.
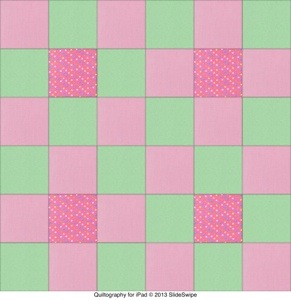
9 Patch Quilt Pattern ~ from Me & My House.jpg

9 Patch

To determine how many squares you’ll need of each for different colors/patterns, you will need to either find a 6×6 or 7×7 pattern, or draw one out. (Some are included here. The patterns of my finished quilts pictured here are not exact, due to the amounts of fabric I had. i.e. the inclusion of the purple squares in the first pic.)

If your fabric is wider than 42″ (not counting selvages, and less than 48″) after pre-shrinking, you will get seven 6″ squares, or six 7″ squares, or five 8″ squares across the width.

Use this to determine how many rows of squares you need to cut from each fabric for your pattern. (Remember you need 1 more whole row, even if you only have one more square than the previous row. So depending on how many colors you are using, it may end up more than the base amount listed.) Then multiply the number of rows needed by the size of your squares to get the length you need. Remember that this amount will be needed after your fabric is pre-shrunk, so add a bit extra. Flannel usually shrinks a few inches.

The back of the quilt can either be all one color/pattern, or varied as my baby girl’s quilt is. If you are using all 1 fabric, you will need about 1 7/8 yards for a 42″ quilt, and 2 1/4 yards for a 49″ quilt. (This is after pre-shrinking, and if the fabric is 43+” wide.)

The middle/batting layer can be any color that doesn’t show through your top or bottom layers. You will need about 1 1/4 yards for a 42″ quilt, and 1 7/8 yards for a 49″ quilt.

Need ideas for layout? You can use a “scrappy” pattern, just randomly placing blocks, usually making sure that none that are the same are touching. Diagonal stripes is an easy one, that can be done with any number of rows – first picture this post. Or a 9 Patch (4 times for a 6×6 – repeat, or vary as above). Or a Trip Around the World pattern (shown in 7×7).

If you know how or learn to make Half Square Triangles, you will be able to do many other designs. (It will take just a bit longer.) I’ll show you how to do that with an easy technique in a future post – and many other designs. You can also take a peek on my Pinterest page. Many of the patterns there are just squares and HSTs.


Cutting:

When cutting from new fabric yardage, these quilts can be cut very quickly with a rotary cutter, ruler and mat. When using leftover/scrap fabric, that is not even strips, it takes a little longer, but the rotary cutter makes it much faster than cutting each square with scissors.

So, lay that fabric out, and start cutting squares. Be sure to cut on the grain of your fabric, and be sure your squares are squared up.

If you’ve not cut with a rotary cutter, mat and ruler before. Lay your fabric, folded in half with selvedges meeting (as it comes off the bolt,) making sure it hangs straight. Fold the fold up toward the selvedge making sure to keep this fold straight – use the lines on your mat. Lay your ruler across, perpendicular to your selvedges, near the end, and cut to line your end up straight. Then move  your ruler over the number of inches required, again lining up at top and bottom for a straight cut. Continue cutting these strips until you have as many as you need. Then take each strip and turn it sideways and cut at the same measurements to get your squares. Keep your cuts on your mat (or you’ll ruin your table) and keep your fingers out of the way.
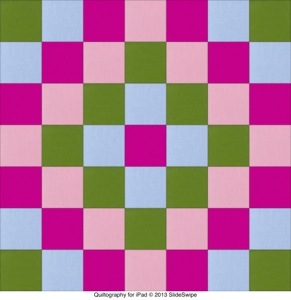
Trip Around the World Quilt Pattern ~ from Me & My House.jpg

Trip Around the World

Stack ’em up:

If your back is all one color, you can just make a big stack of your back squares, and a big stack of your middle/batting squares. Your top squares will need to be stacked in the order they will be on the quilt. I turn each row catty-wompous in the stack, just to help me keep track. If your back will also have a pattern, you will need to lay it out with the fronts, to make sure you get the right ones together. (i.e. Make your 3 layer sandwiches ahead of time, and lay them on top of each other according to order in row.)

Sewing the Squares:

You will begin by sewing the layers of the individual squares together. This forms the “quilting”. You will make a sandwich of 1 back square face down, 1 middle/batting square centered on it, 1 top square face up.  You will stitch each “sandwich” diagonally, from one corner, through the center, to the opposite corner. And then stitch again, with the other 2 corners, forming an X across the square.

Tip: I sew all the squares of a row, in a string, with the first diagonal. Then, I go back and sew the second diagonal, all in a string again. I think this is faster than sewing an X on each square individually. I don’t worry about backstitching since these stitches will be sewn over.

Also, I just eyeball my diagonal seams. If you don’t trust yourself to get accurate diagonals, press the top square of each sandwich along the diagonal, then open back up. This press mark will create a line for you to sew along to get straight seams.


Sewing the Rows:

After sewing X’s through each square sandwich, grab a row of squares and stitch the sides together with 1/2″ seams, with backs facing, according to your pattern. (Since I sew mine in a string, I already have them in the order of the pattern for the row.)

Take the top right square of the pattern, put it face down, (making sure the top is at the top, if it has a pattern). Lay the next square for the top row on top of it, with backs together, lining up edges, (making sure its top is at the top.) Stitch the two squares together on the right edge with a 1/2″ seam.

Open these up and lay face down. Put the next square for the row on top of the previous one (at the right), lining up right edges (and tops and bottoms), stitch with 1/2″ seam. Repeat till you get to the end of the row.
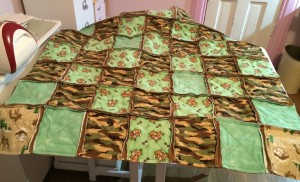
 

Baby Boy's Rag Quilt ~ from Me & My House


Sewing the Columns:

After stitching the squares together for each row, lay out your rows in the proper order for your quilt. Grab the top row and the next row, and put their backs together, lining up long edges. I open the seams between squares, and pin through each intersection of the squares, before sewing, sew my intersections line up nicely. Sew with 1/2″ seams. Add the rest of the rows the same way.

If my seams are off a bit, I line up the center ones, then work my way out with pins, then sew.

After all the rows are sewn together, stitch around all 4 sides of the quilt with 1/2″ seam.

Cutting the Fringe:

Now comes the most time consuming step of the whole thing. Put on some music, an audiobook, or  a movie. 🙂 Snip (with good, sharp, pointed scissors – spring loaded ergonomic ones are best) about every 1/4 – 1/2″ along each and every seam, being careful to not cut through the stitching. (Like you are cutting fringe.) This creates the “ragged” look, after the blanket is washed a couple of times.

In fact, after snipping, run it through the washer and dryer a time or two, by itself, to begin this fraying.

Done!

There you have it. All done. Quick. Easy. Soft. Cuddly.


Note: Links are affiliate links to what I have/like. I’ve found these to be better quality that last, don’t have to be replaced, work well, prevent strain better than other brands I’ve tried.) Use what you have available.


[subscribe2]
Baby Quilts

This mama used to crochet afghans for all the babies, beginning with my first. I loved them having something special, handmade with love, that was soft and cuddly, that they could keep for years to come. I still have my own handmade baby blanket.

Over the years, my styles varied, and I didn’t always have a crochet hook in hand. Some got sewn blankets, some embroidered, some quilts. Lately, since my own baby is no longer a baby and I now have a little more time for other projects (sometimes), I’ve gone back into a quilting phase–quick and easy machine quilting that is, on baby sized blankets only–made of soft flannel.

I love working with patchwork. But I’ve not developed the patience for intricate patterns made of hundreds of small pieces. So large squares with simple patterns, or one pronounced pattern, usually define my designs.

The Ohio Star is one of my favorite quilting patterns, so 2 years ago I designed this “star” girly baby quilt for one of our new grand girls. (I think it is technically a Ribbon Star.) I loved it! And it got me primed for making more baby quilts.

Ohio Star Baby Quilt ~ from Me & My House

This past year I had 2 new babes to sew for, so I decided to do “rag” quilts, with exposed edges between the squares and around the sides. These wash up into such soft cuddly blankets with their frayed edges.

The girl’s rag quilt is a 6×6, like the Star. But the pattern focuses on a smaller center design, a pinwheel, with a more “planned random” pattern around it. (Only 4 half square blocks to work with instead of the 20 on the Ohio Star.)

Baby Girl's Rag Quilt ~ from Me & My House

The back of this one got a fun diagonal stripe pattern. (So that added the challenge to this one.) 🙂

Baby Girl's Rag Quilt {back} ~ from Me & My House

The boy’s rag quilt is a 7×7 varied pattern. Though there is an order to it, there is no pronounced design (and no half square blocks). A fitting pattern to go with the camo, I figured. 🙂 The back of this one is solid brown squares, except the center one, which is the green with the dogs. Just a fun little surprise in the middle.

Baby Boy's Rag Quilt ~ from Me & My House

I’ve really enjoyed working with the rag quilts. They go together pretty quickly, and are more forgiving than most quilts when it comes to lining up all those bazillion (it seems) corners. Not having to bind the edges also saves a lot of time. But also adds much to the cuddliness of these quilts.

In my next post, I’ll give instructions for the rag quilts. Even if you’ve never made a quilt before, these are easy enough for anyone that can sew a straight (or relatively straight) seam. (I told you they’re forgiving.)

Do you make quilts? Do you quilt by hand or machine (or send it out for the quilting)?

[subscribe2]

Carry Along Doll House

I have so many projects to catch up on here, but I’m going to work backwards, from the latest – back, and hopefully some new ones scattered throughout too.

Last month, right after our daughter’s wedding, was our granddaughter’s 5th birthday. My intentions were to make her a set of paper dolls (was thinking probably magnetic) but I didn’t have all the supplies (because – after I ordered the Cricut cartridges – I couldn’t find all the other things I still needed here in town, and didn’t know that in time to order them.) That led me to the night before her party and still not knowing what to do.

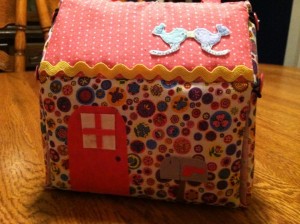
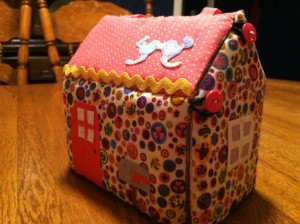
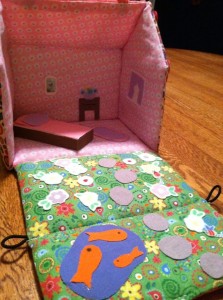
At 10:30 p.m. I went to Walmart for supplies, then came home to start on a fabric doll house with purse-type handles for carrying along. If I’d had more time I had more ideas for decorating, but was happy enough with it to call it good and give it to her. It’s the perfect size for small dolls, like Polly Pocket or such. I think it turned out really cute.

dollhousepurseoutsideThe frame is plastic canvas, covered with batting. The fabric insides and out are sewn together, then the frame inserted. 4 different “fat quarters”, plus scraps for the decorating, are needed.

I love the mail box. My door – was just OK, IMO. The love birds on the roof are fussy cut from a flannel print.

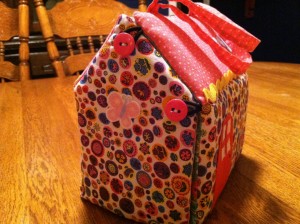
dollpurseout2This side has a window, backed by the same fabric I used for curtains inside. The house is “closed” by 2 buttons on each side and one at the top. The loops are small covered pony tail holders.

dollpurseout3This side only has a butterfly (another flannel cut out), but you can see the handles better.

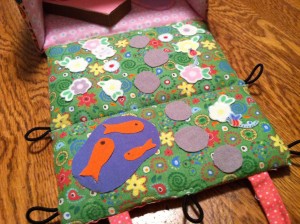
dollpursein2When you open it up, you’re greeted with a lovely garden, with a stepping stone path, flowers (more flannel cutouts) on either side, and a goldfish pond.

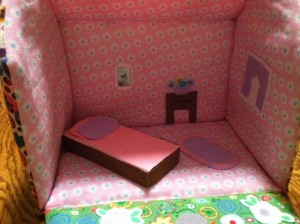
dollpursein3Inside we have the inside of the window with curtains, a rug on the floor, a table with drawer and a bowl of flowers on it, a mirror on the wall, and a bed with pillows. The bed is a box I made from card stock, then covered with fabric. The pillows “puffed” with batting. The mirror was made by using silver heat embossing powder.

dolhousepurseinsideAnd lastly, the whole inside.

What was your last sewing/craft project?

* This post shared on Teach Me Tuesday Homemaking link-up

[subscribe2]

It’s a Quilt! It’s a Pillow! It’s a Quillo!

Greetings from Me and My House,

Today I’m moving on from nutrition teaching to a simple sewing project. Keep up your Good for You-Natural! lifestyle of eating though.

Quillos are a favorite around our home. Each child has their own for wrapping up in to take a chill off or laying around on. They are super for taking on trips. A quillo is a quilt that folds into a pillow, that is simple to make.

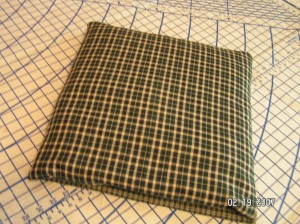
Quillo folded into Pillow {sewing instructions} ~ from Me & My House

You will need 4.5 yards total (after preshrinking) cotton print fabric. Homespun plaids work great, as do any type of novelty print, quilting fabrics, or flannels. You can use all one fabric if you want, but I prefer to use differing fabrics for the front and the back. The pillow/pocket can be made with both sides the same as the one of the other fabrics. If you want the two sides to be different, you will need another 1/2 yard fabric. The instructions here are for an adult size, aprox. 45″ (the width of your fabric) by 72″. (A child/smaller size is the width of the fabric by 60″, and a smaller “pillow/pocket” is made. A baby size can also be made – 36″ by 45″.)
This one is child’s size:

Quillo {sewing instructions} ~ from Me & My House

Supplies needed:
So for your adult size quillo, you need:
2 yards preshrunk fabric for the back
2 1/2 yards preshrunk fabric for the front and pillow/pocket
These should be compatible prints – different, but look good together.
2.5 yards batting – any batting that does not have to be quilted at small intervals. I prefer an all cotton or wool batting.

Thread that blends with both your prints.
Scissors/Rotary Cutter & Mat, Pins, Sewing Machine, yardstick, removable fabric marker.

Instructions:
Blanket:

Square up the ends of the fabric and cut (I prefer to use a rotary cutter) the front and back blanket pieces each 72″ long across the width of the fabric. Cut 1 piece of batting the same size.

Layer (by spreading out on a large flat surface) the batting, then one of the fabrics, wrong side down on the batting, then the other fabric right side down (on the right side of the first fabric). Smooth all layers and pin around all edges.

Sew around all 4 edges (I prefer using a walking foot) leaving a 10-12″ opening in the center of one end to turn. Clip corners. Turn right side out and press seams, including pressing the opening seam edges in.

Pillow/Pocket:
Cut 2 18″x18″ squares for the pillow/pocket out of the remaining front fabric (or one square from each fabric, if you are using both). Cut one piece of batting the same size. Layer and sew exactly the same as the blanket part, only about a 6″ opening is needed.

Alternative pillow/pocket:
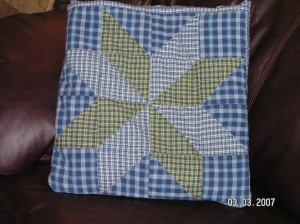
You may also use an 18″x18″ quilt block as one layer and your front fabric as the other layer. After sewing the edges, turning and pressing, quilt your block before attaching to blanket in next step. When attaching to blanket, be sure to sew with the quilt block side facing the blanket side, otherwise when you fold your quillo into a pillow your quilt block will be inside and unseen.

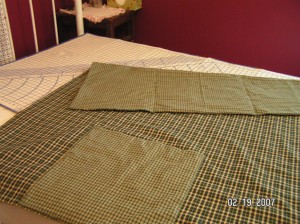
Quillo folded into Pillow {Click for sewing instructions} ~ from Me & My House

Attach Pillow/Pocket:
Find the center of the open end of both the blanket and the pillow/pocket parts, and match them up. Make sure the center of the other end of the pillow/pocket is lined up with the center of the blanket. Pin the ends of blanket and pillow/pocket together and pin the sides of the pillow/pocket to the blanket. Stitch a narrow seam across the ends of both, attaching the pillow/pocket to the blanket, and closing up the open ends of both.

Lay quillo out flat. Measure in from each side of the blanket onto the pillow/pocket about 1/4″ onto the pillow/pocket. With removable marking (disappearing or wash out marking pen), mark this distance the entire length of the quillo, on both sides of the pillow/pocket. In other words, you are going to sew on the pillow/pocket sides, but you are going to extend these seams the entire length of the quillo. After marking, pin through all layers along each line while quillo is still laying flat. Stitch along both lines.

You’re finished! To fold quillo as a pillow, fold into aprox. thirds along the stitching lines you just made, with the pillow/pocket facing down and your folds on top. Then fold the top down twice to a point just above where the top of the pillow/pocket is, then fold again, over the back of the pillow/pocket. Turn over and reach inside of the pillow/pocket, grab through all layers of both bottom corners and flip the whole thing inside out. Your folded blanket is now inside your pillow/pocket. Smooth and you have a nice pillow.

Simple, but pretty, and certainly practical.

For Me and My House,
At Jesus’ feet,
Lisa

[subscribe2]