Before I even start, let me tell you – you don’t have to have a yogurt maker to make yogurt! Yogurt is VERY easy to make. No long list of ingredients or steps to follow. 2-3 ingredients and heat, stir, pour, incubate. That’s it.
I haven’t done it in a while – since we went off “real”/cow’s milk. (I haven’t tried it with the alternative milks yet. Soy milk* is said to work well. Update: I’ve now made raw goat’s milk yogurt. Click for instructions.) I had an individual yogurt maker in the past and for several years used the yogurt making kit that goes with my dehydrator. (It’s time to pull it out and try our own soy yogurt.)
If you don’t have a yogurt maker and want to make yogurt, here are some other sources you can use to hold the right temp. I’ve used them all in the past when I didn’t have a maker.
You need:
Milk (raw, store bought, powdered milk mixed to proper proportions, or soy) about 4 cups (but you can make as much or little as you want.) Heat, in a heavy saucepan over low heat, to a bit under a boil. (Be careful not to scorch it!) Then cool to 115°. My old candy thermometer didn’t go low enough, my new one does. I’ve used a fish aquarium floating thermometer for this and my sourdoughs.
Optional, for “thickening power”. Homemade yogurt is sometimes a little thinner than store bought, more like European yogurt. –
Powdered Milk. You can add extra powdered milk for a firmer yogurt – either regular powdered milk, or soy. I’ve heard that with the “other” starter, linked below, you don’t need to add this. If you do add it, add 1/2 – 1 c. per 1 qt. of milk before heating milk.
Or agar agar powder – dissolve 1 tsp in 1/2 cup water and bring to a boil (watch closely) add to milk.
Live Yogurt Cultures. Stir into the milk AFTER it has cooled to 115° or you’ll kill them! –
From either a Yogurt Starter – I’ve used Yogourmet, I’ve heard of another one that is good for a thicker yogurt. Use the amount listed on the package.
Or from Plain Yogurt with *live, active* cultures. Use 2-4 Tbl. plain yogurt for 1 qt. of milk.
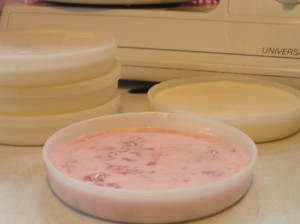
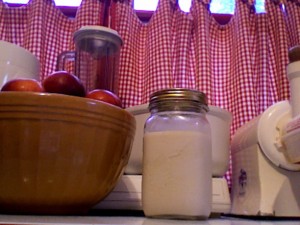
Pour yogurt mixture into perfectly clean containers. (A good way is to pour boiling water into washed and rinsed containers, then empty them.) Small glass jelly jars make a good individual size, or pint or quart jars are fine. My yogurt maker came with small plastic containers with lids.
Incubate – You want a steady temp of 95-115°. Use your thermometer to check that it maintains this temp.
It will take anywhere from 3-9 or so hours for your yogurt to set up. Test it by tilting the jar a bit. Refrigerate as soon as it is set.
Here are some ways you can incubate your yogurt without a yogurt maker:
Pour milk/culture mixture that’s at 115° (or just slightly lower) into an insulated thermos and wrap with a thick towel.
Or place a folded towel on top of a heating pad turned onto low and place yogurt containers on top of it and cover with another towel. Or put containers in a covered box on top of the heating pad.
Or in a box (or styrofoam cooler) with a small light bulb in it. ( I built one of these – cooler with light bulb – for my sourdoughs.)
Or in a gas oven (turned off) with a pilot light.
Or in a ceramic crock, wrapped in a blanket, or placed in an insulated cooler.
Or place containers in a water bath in an electric skillet or slow cooker/crock pot on low. If you do this be sure to test it out with a thermometer in a jar of water (instead of yogurt) to make sure it holds the correct temperature over that length of time. I have not found newer crock pots to hold the proper temp. My newer one, on keep warm setting, still needed the lid off to maintain a temp of 115-120. Also water (of proper temp) needed to be added several times, since it evaporates with the lid off.
Or any other place you can keep a steady proper temp. This is the key thing, find a place that you can test out to make sure it holds the required temp steadily.
My fave place in my dehydrator that has a thermostat control. I can set it at 105-110° and know it is going to stay right there the whole time. But I’ve also had good results with a heating pad on low with a thick (double layer) towel between it and the jars and another towel thrown over it all.
What can you do with your yogurt? (Stir in any additions after the yogurt has incubated.)
You can eat it plain.
You can sweeten or flavor it – with fresh fruit, or fruit only spreads, or honey or agave nectar or vanilla or maple syrup, etc.
You can make awesome smoothies with it and fresh or frozen fruit.
You can make “ice cream” (frozen yogurt) with it.
You can use it in place of buttermilk in recipes. Just stir it to thin it a bit.
You can use it in breads – especially good in sourdough types.
You can use it in place of sour cream or even creme cheese. Put it in cheesecloth and pull up the corners of the cloth and hang over a bowl or the sink to drain/drip overnight. This will make a thicker yogurt, perfect as a substitute for either of these, depending on how thick you get it. Use this on baked potatoes, in dips and dressings, and other recipes.
*Note: Homemade soy milk will need a “sugar” of some type added to it for the culture to feed off of in order to set up. Honey and maple syrup won’t work. (Since I haven’t made this yet, I’m not sure yet what I will use.)
(See update on Making Soy Yogurt)
Want more help for yogurt making? Get our dirt-cheap Freedom & Simplicity™ Guide to Yogurt Making.
For Me and My House ~ At Jesus’ feet,
Lisa @ Me and My House ~ Discipleship for Life!
Order Christian & Home Ed Resources here
Get future posts to this blog by email:


